Installing the Bobbin
19
2
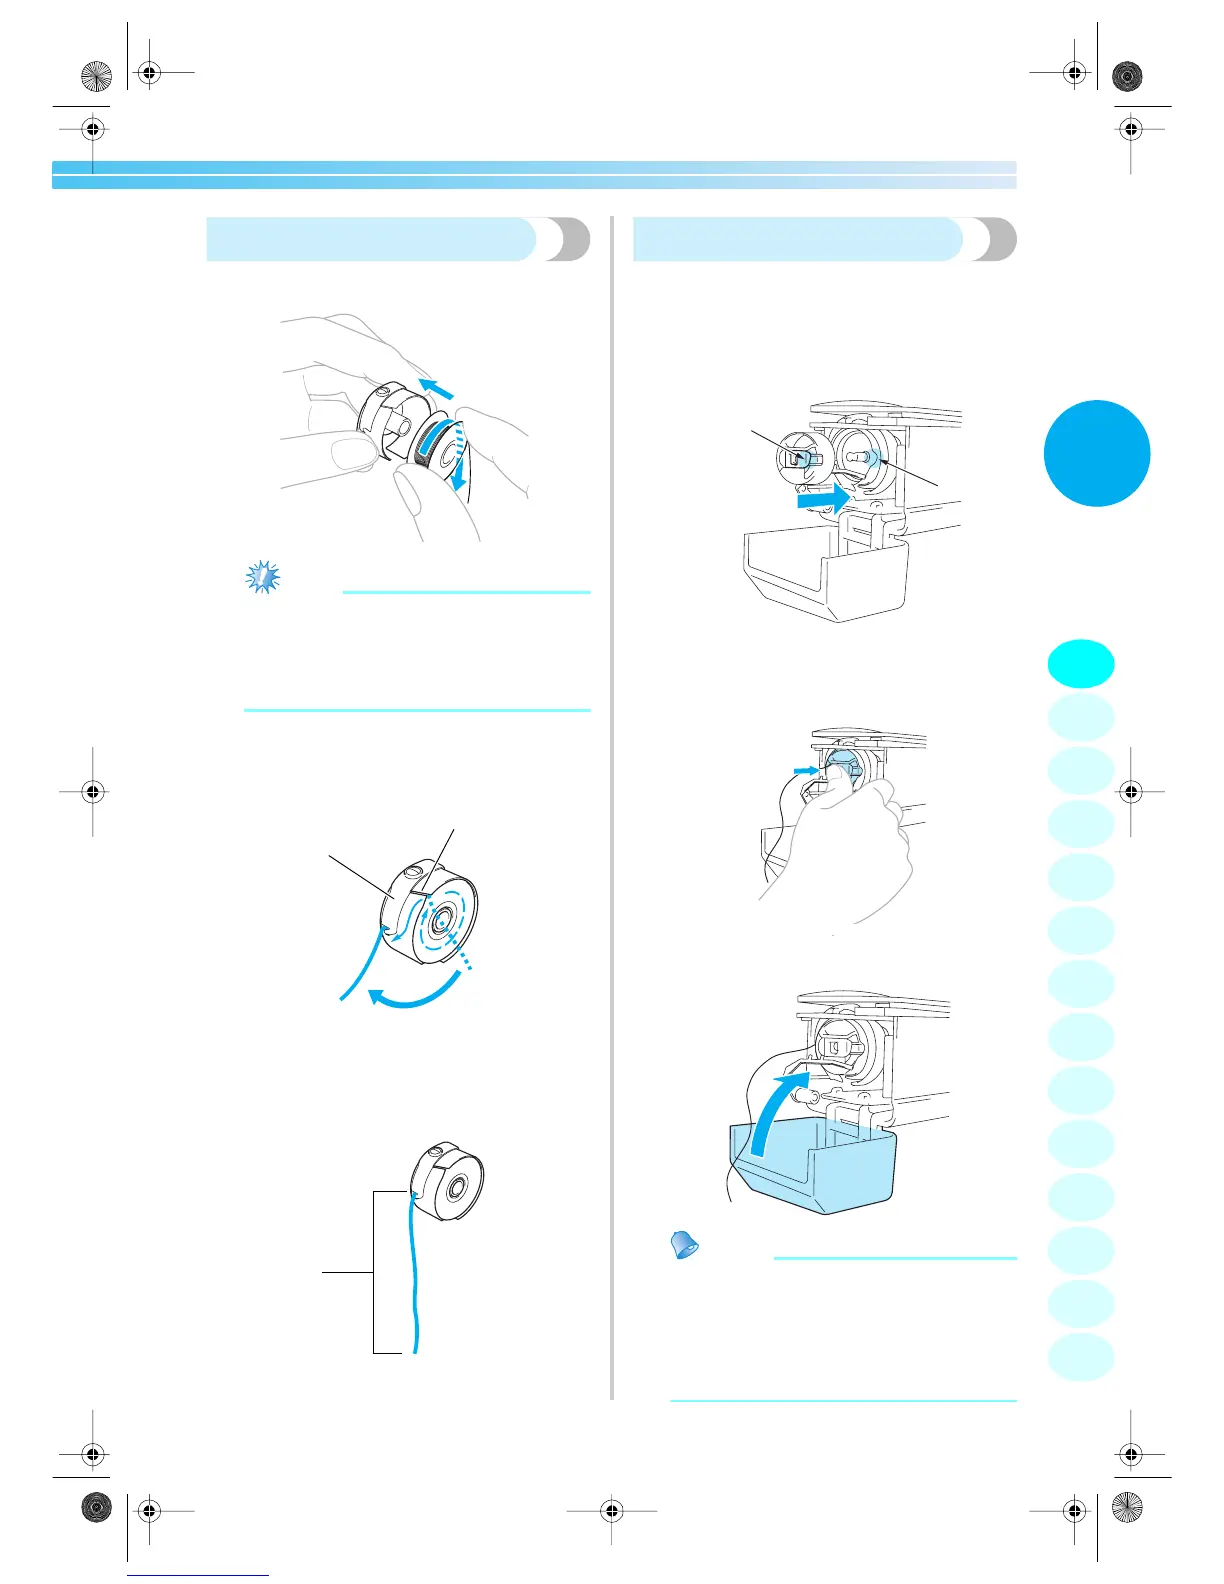
Installing the bobbin
1
Insert the bobbin into the bobbin case.
Note
● Check that the thread winds off the bobbin
clockwise as shown in the illustration. If the
bobbin is installed with the thread winding
off in the opposite direction, the embroidery
will not be sewn correctly.
2
Pass the thread through the thread slit and
under the tension-adjusting spring.
1 Thread slit
2 Tension-adjusting spring
3
Pull the thread through the opening in the
tension-adjusting spring.
1 Pull out about 50 mm (2 inches) of thread.
Installing the bobbin case
1
Insert the bobbin case into the hook.
Insert the bobbin case while aligning the tab
on the bobbin case with the notch in the hook,
as shown in the illustration.
1 Tab
2 Notch
• Fully insert the bobbin case until it snaps
into place.
2
Close the hook cover.
Memo
● This embroidery machine is not equipped
with a bobbin-winder. Use pre-wound (L
type) bobbins.
● The optional bobbin winder (stand-alone
type) and optional metal bobbins can also
be used. (Refer to page 5, 168.)
1
2
3
4
5
6
7
8
9
10
11
12
13
14
2
1
1
1
2
Sapphire.book Page 19 Friday, August 1, 2003 9:12 AM

 Loading...