EasyManua.ls Logo

Brother PR-600 User Manual

Brother PR-600
227 pages
To Next Page IconTo Next Page
To Previous Page IconTo Previous Page
Page #91 background imageLoading...
Page #91 background image
Embroidering a Pattern Containing Seven or More Colors 73
3
Embroidering a Pattern Containing Seven or More Colors
When embroidering a pattern that uses seven or more thread colors, it is necessary to change the thread spools.
When changing the thread spools, instruction to change the thread spools will appear with the machine
automatically stopping.
Assignment of thread colors to needle bars
Thread colors are automatically assigned by the
machine to needle bars 1 to 6, starting with the
thread colors that are sewn first. (However, if a
new pattern has thread colors that are the same as
the previously sewn pattern, the thread colors will
be assigned to the same needle bar as before,
regardless of the sewing order.)
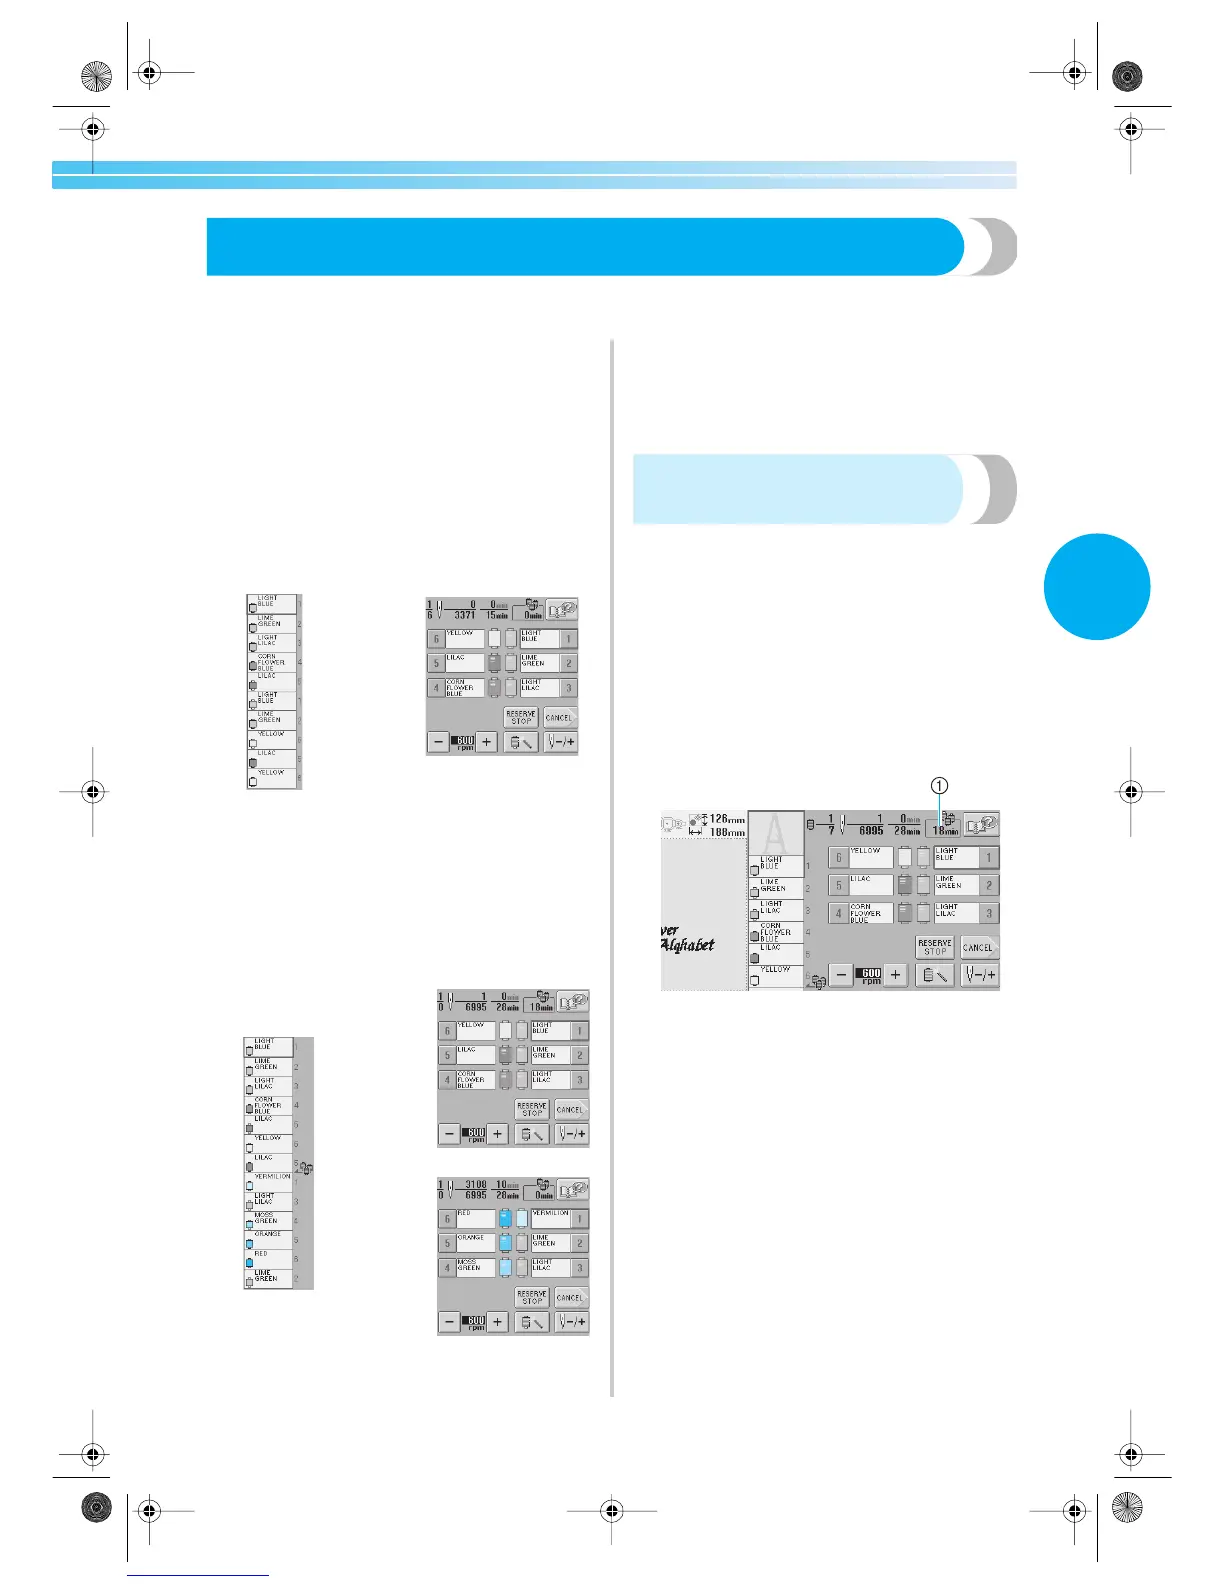
For example, for a pattern with six thread colors
and ten thread color changes, the thread colors
are assigned as shown below.
For a pattern with seven or more thread colors,
the thread spool information is updated when the
seventh thread color is needed.
Afterward, the machine adjusts the assignment of
thread colors to reduce the number of times that
the thread spools will have to be changed.
For example, for a pattern with ten thread colors
and thirteen thread color changes, the thread
colors are assigned as shown below.
Since the thread colors on needle bars 2 and 3 will be
used again after the thread spools are changed, they will
not be replaced. However, different colors are assigned
to the other needle bars.
Checking if thread spool
changes are necessary
When selecting a pattern, the number of thread
changes can be viewed, however, which thread
colors are used in the pattern cannot be checked on
this screen. Whether or not and when thread spools
will need to be changed can be checked with the
following indicators.
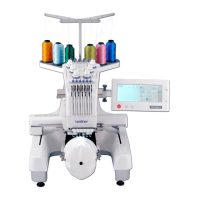
Time until the spools must be changed
This indicator shows the amount of time until the
next spool change. When the embroidering
screen is displayed, if a length of time appears
here, at least one spool change will be required.
1 Time until the spools must be changed
1 Needle bar 1
2 Needle bar 2
3 Needle bar 3
4 Needle bar 4
5 Needle bar 5
1
2
6 Needle bar 6
5
6
1 Needle bar 1
2 Needle bar 2
3 Needle bar 3
4 Needle bar 4
5 Needle bar 5
6 Needle bar 6
5 Change thread spools here.
7 Needle bar 1
3
8 Needle bar 4
9 Needle bar 5
10 Needle bar 6
2
Sapphire.book Page 73 Friday, August 1, 2003 9:12 AM

Table of Contents

Other manuals for Brother PR-600

Questions and Answers:

Brother PR-600 Specifications

General IconGeneral
BrandBrother
ModelPR-600
CategorySewing Machine
LanguageEnglish

Summary

Important Safety Instructions

General Safety Precautions

Essential safety guidelines for operating the machine to prevent injury and damage.

FCC Declaration of Conformity

Getting Started: Machine Overview

Pre-Operation Guidance

Key instructions for safe operation, service life, and repair.

License Agreement

Terms and conditions governing the use of the machine's content.

Machine Structure and Precautions

Warning Labels and Embroidery Card Precautions

Identification of warning labels and specific precautions for embroidery cards.

Media Care (CompactFlash & Floppy)

Guidelines for the proper care of CompactFlash and floppy disks.

Machine Structure and Features

Six-Needle Embroidery Overview

Explanation of the machine's six-needle embroidery capability.

Additional Machine Features

Details on other functionalities like LCD, safety mechanisms, and thread info.

Manual Navigation and Initial Setup

How to Search Information in the Manual

Methods for finding specific information within the manual using titles or keywords.

Getting Ready: Initial Setup Procedures

Steps for identifying parts, accessories, and setting up the machine.

Embroidering Tutorial: Core Operations

Operating Precautions

Crucial safety measures for powering on, needle, and bobbin handling during operation.

Needle and Bobbin Management

Essential precautions for proper needle and bobbin usage.

Pattern Selection and Editing

Guidance on choosing, modifying, and previewing embroidery patterns.

Hooping Fabric and Frame Attachment

Instructions for properly hooping fabric and attaching the embroidery frame securely.

Upper Threading and Sewing Process

Procedures for threading the upper thread and initiating the embroidery sewing process.

Other Basic Procedures and Settings

Needle Replacement and Frame Management

Detailed steps for changing needles and correctly using embroidery frames.

Thread Tension Adjustment

How to adjust thread tension for optimal stitch quality.

Saving and Managing Patterns

Instructions for saving, editing, and deleting embroidery patterns.

Embroidering Settings Configuration

Automatic Lock Stitch and Speed Settings

How to configure automatic lock stitches and maximum sewing speed.

Color Change and Needle Bar Settings

Managing machine behavior during color changes and needle bar assignments.

Reserved Needle Bar Settings

Manually assigning specific thread colors to needle bars.

Basic Settings and Help Features

Using the Settings Key

Guide to accessing and adjusting machine settings via the dedicated settings key.

Troubleshooting and Error Resolution

Guidance on diagnosing and resolving common machine issues and error messages.

Appendix: Additional Information

Appliqué Sewing Guide

Step-by-step instructions for performing appliqué sewing techniques.

Maintenance Procedures

Guidelines for cleaning and oiling the machine to ensure proper function.

Machine Specifications

Technical specifications of the embroidery machine.

Index

Alphabetical listing of topics and their corresponding page numbers for quick reference.

Related product manuals