ε-9
Auto Sensor Detection (CLAB Only)
3. Auto Sensor Detection (CLAB Only)
When using a CLAB Data Logger, sensors connected to each channel are detected
automatically. This means that you can connect a sensor and immediately start sampling.
1. On the setup screen, select “CLAB” for the “Data Logger” setting.
2. Connect the CLAB Data Logger to the calculator.
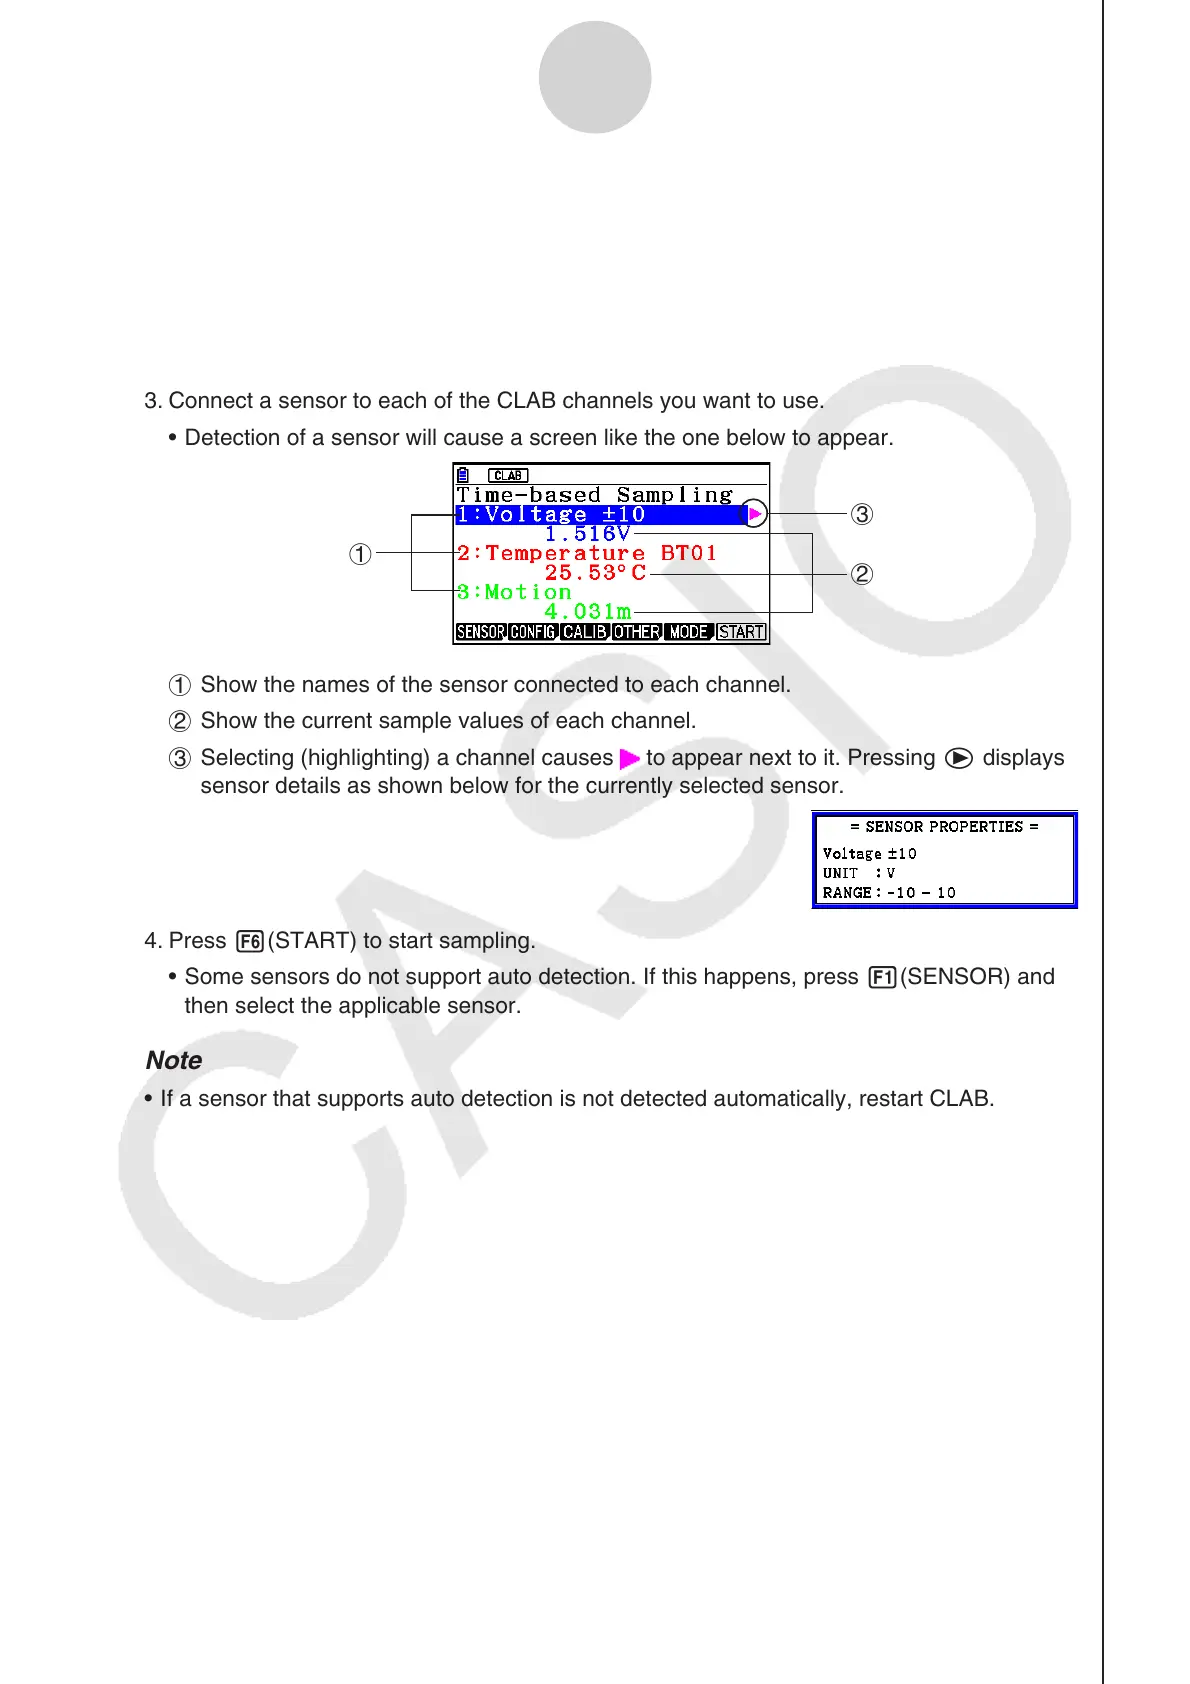
3. Connect a sensor to each of the CLAB channels you want to use.
Detection of a sensor will cause a screen like the one below to appear.
1
3
2
1 Show the names of the sensor connected to each channel.
2 Show the current sample values of each channel.
3 Selecting (highlighting) a channel causes
to appear next to it. Pressing e displays
sensor details as shown below for the currently selected sensor.
4. Press 6(START) to start sampling.
Some sensors do not support auto detection. If this happens, press 1(SENSOR) and
then select the applicable sensor.
Note
If a sensor that supports auto detection is not detected automatically, restart CLAB.
•
•
•
 Loading...