Outdoor Unit SiBE12-908
227 Removal Procedure
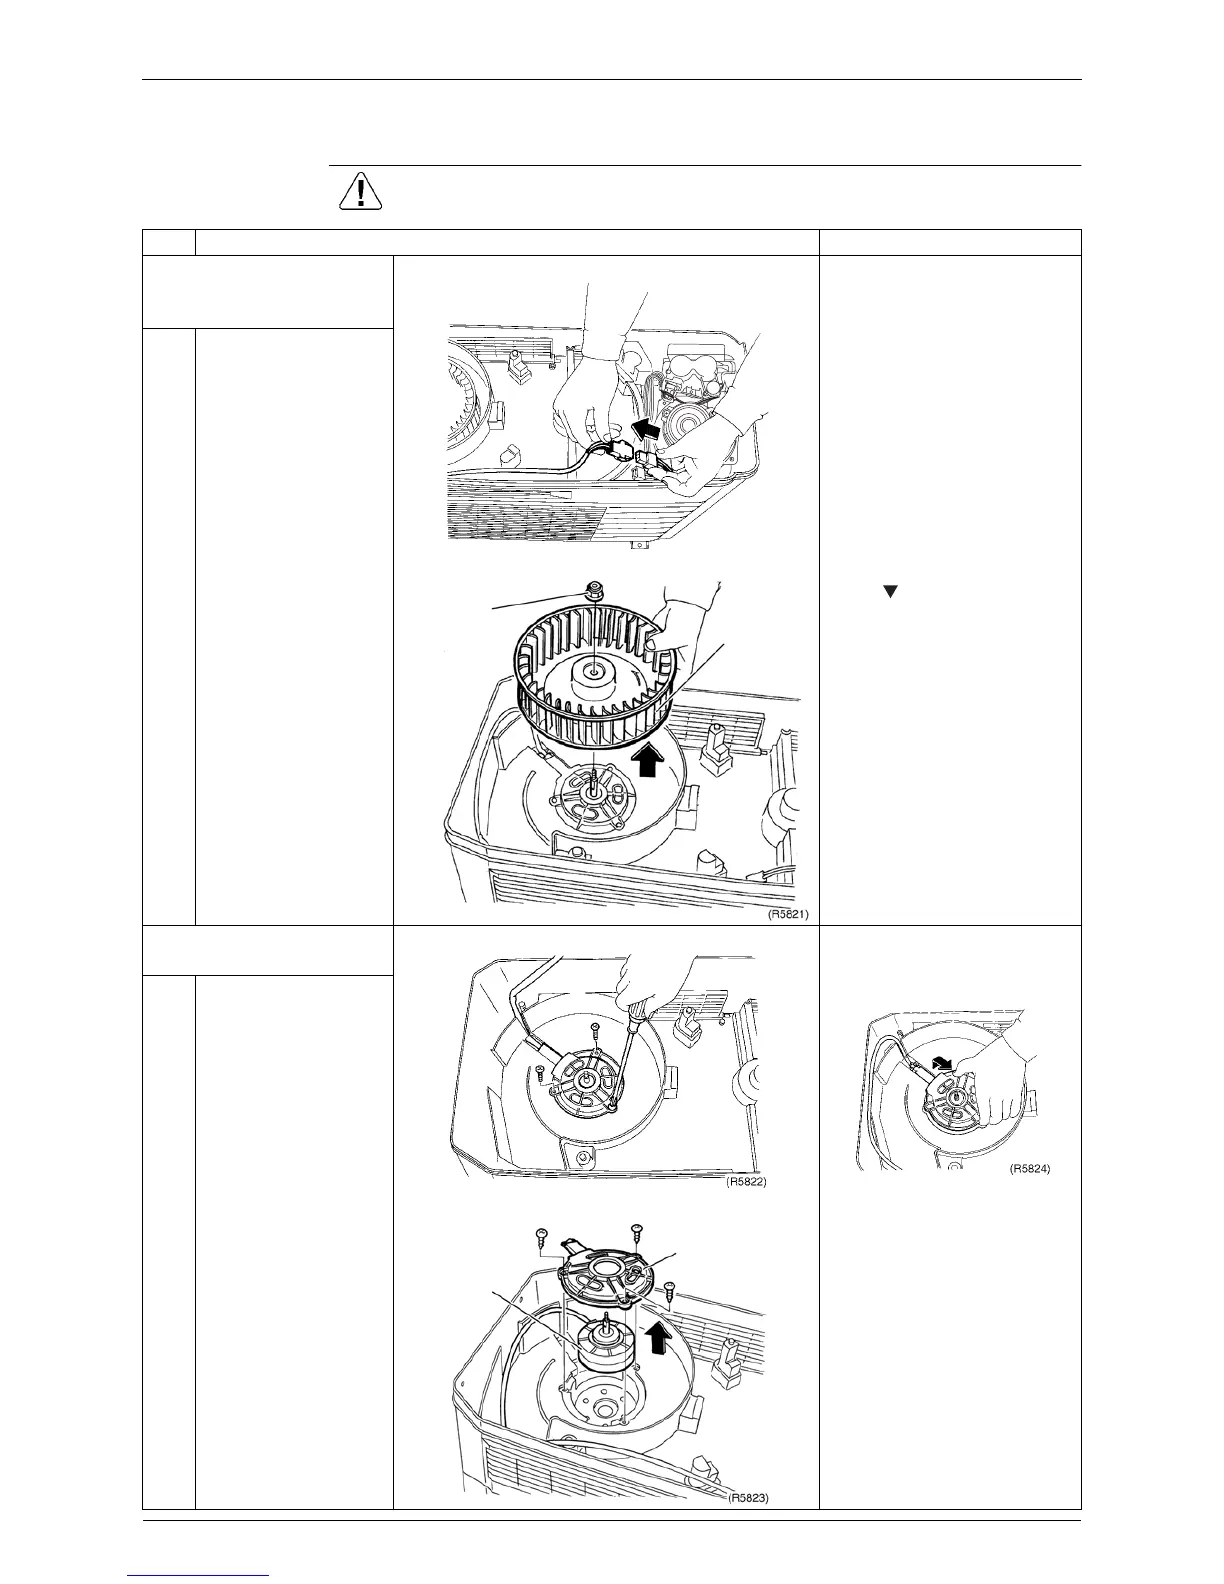
2.6 Removal of Hygroscopic Fan Rotor / Hygroscopic Fan Motor
Procedure Warning Be sure to wait 10 minutes or more after turning off all power supplies
before disassembling work.
Step Procedure Points
1. Removal of the
hygroscopic fan rotor
ASSY
Preparation
Remove the humidifying
rotor according to "Removal
of Humidifying Rotor".
1
Disconnect the
connector for fan motor
and remove the bell
mouth on adsorption
side.
2
Unscrew the fan fixing
nut (M6) of the
hygroscopic fan rotor
ASSY (sirocco fan rotor
ASSY) and remove.
When reassembling, align
the mark and D cut of the
motor shaft.
Spanner size: 10mm
2. Removal of the
hygroscopic fan motor
Lift the motor cover first and
pull out.
1
Remove the 3 screws
of the motor cover.
2
Remove the
hygroscopic fan motor.
(R9928)
Fan fixing
nut
Hygroscopic
fan rotor
ASSY
Hygroscopic
fan motor
Motor cover

 Loading...