3.
4.
5.
6.
7.
8.
9.
•
•
10.
•
•
11.
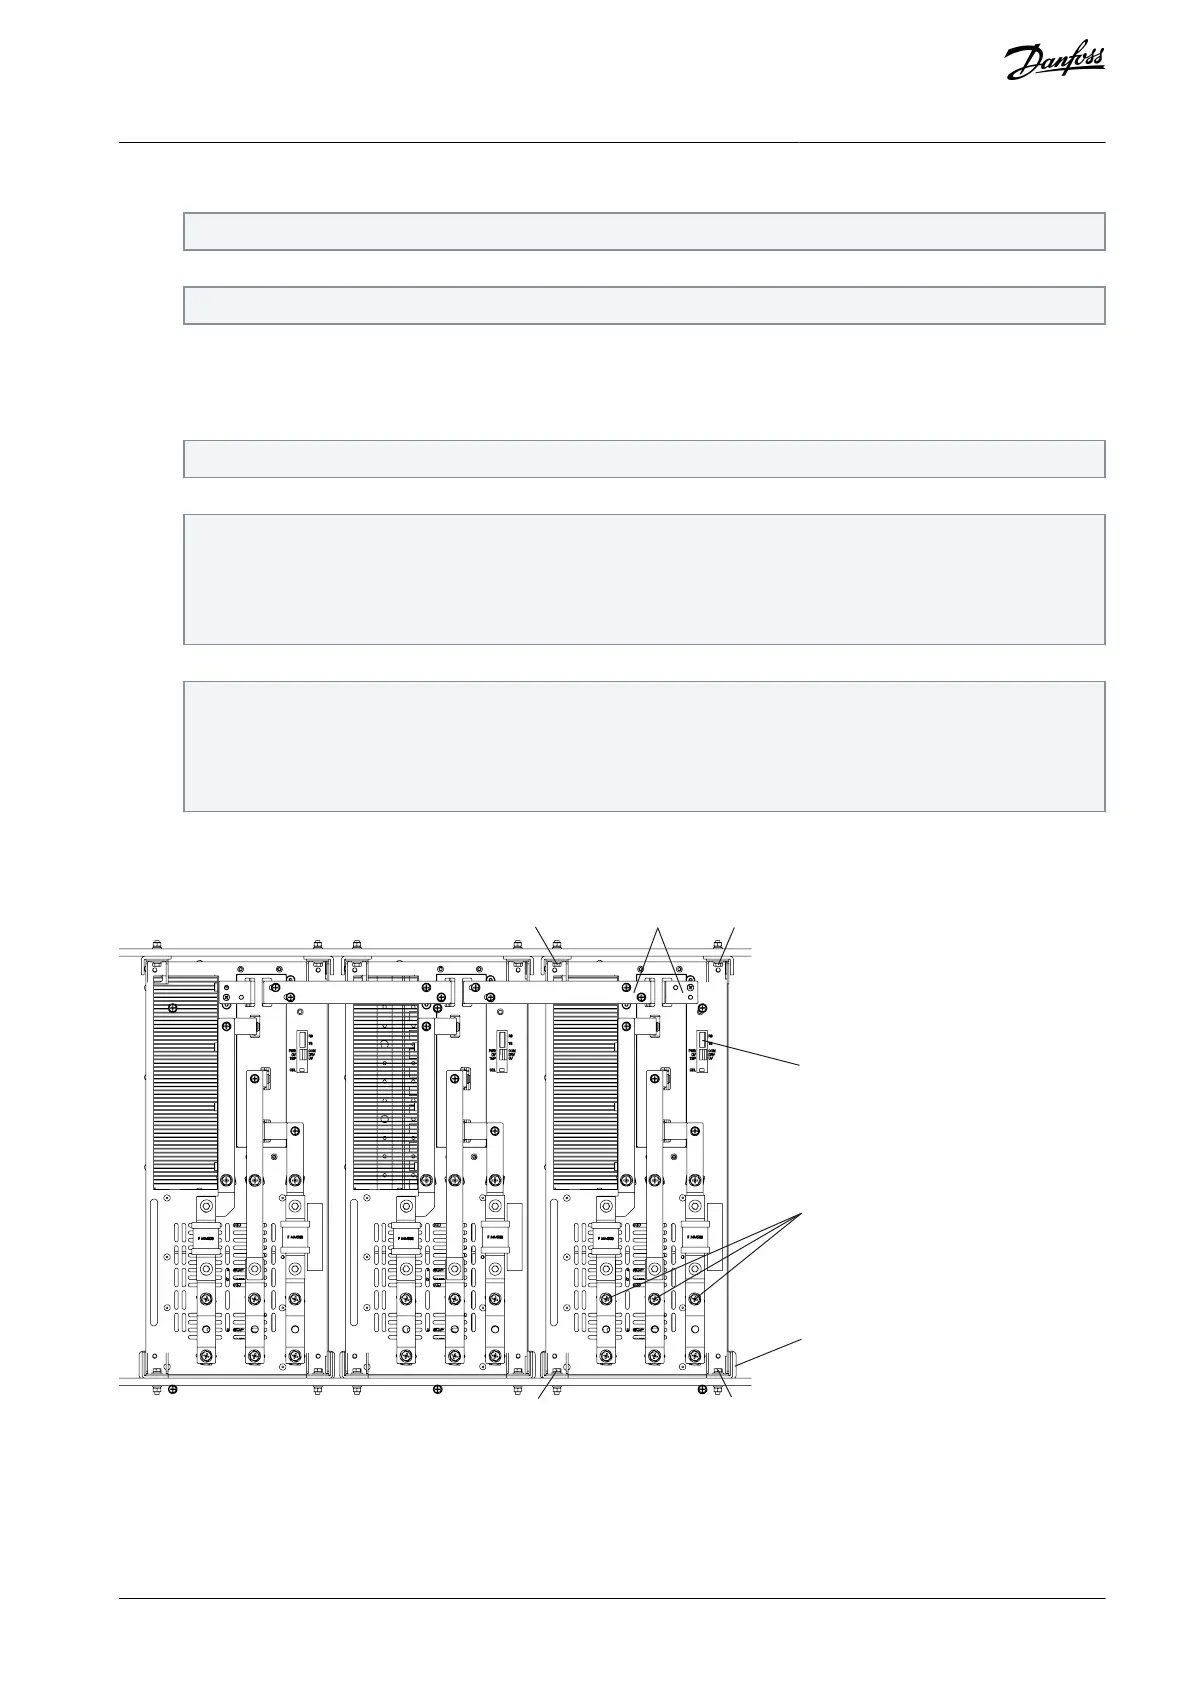
Remove the fixed screws on the 3-phase input terminals (C). Retain the screws carefully.
Use an M8/M10 torque sleeve wrench.
To release the power cell from the brackets (D), remove the screws in front of the power cell. Save the screws carefully.
Use an M6 torque wrench.
Pull out the power cell along the guide rails (E).
Check the nameplate of each power cell. Confirm that the nameplate of the new power cell matches the old one.
Push the new power cell into place on along the guide rail.
Mount the power cell on the brackets.
Use an M6 torque wrench to install the screws. Tighten the screws to torque 9.8±0.2 Nm.
Mount the 3-phase input cables on the power cell terminals.
Use an M8/M10 torque sleeve wrench. The fixing order from outside to inside is flat washer, spring washer, screw nut.
Tightening torques:
M8 screws: 9.8±0.2 Nm.
M10 screws: 24.5±0.5 Nm.
Mount the combination screws on the interconnection busbars.
Use an M6/M8 torque sleeve wrench.
Tightening torques:
M6 screws: 7.8±0.2 Nm.
M8 screws: 9.8±0.2 Nm.
Connect the fiber optical wiring on the power cell.
9.8.2.1 Diagram of the Power Cell Replacement
Illustration 81: Power Cell Replacement
AQ363633621020en-000201 / 172F3117 | 89Danfoss A/S © 2021.06
Maintenance
VACON® 1000
Operating Guide
 Loading...