IAuto Setup I
Preparations ···
··
·
..
··
..··
..
·· ..
·
..··
..
···
..
····
..
·
..
· ·
·· ..
·19.20
Auto Setup··
..
· ··20
• Auto Setup
20,
21
fJ Error Messages
21
Operations·
··
· ·
..
·
..
·
..
·
..
·
···
..
··22
Example of Display of DefaultValues ·
..
· · ·
..
· 23
Speaker Setup.... ·
..
··
....
···
..
·
..
···
··········
..
···
..
·· ..
···
..
···
..
···
..
······
···
..
23
o
-iii
Speaker Configuration 23
II
Subwoofer Mode Setup ·
..
· ·
..
· · ·23
II
-1IiJ
Distance ·
..
·
..
· ·
..
·
..
· ·24
1m
Crossover Frequency
..
····
.. ·· ..
· ·
..
··
..
·
..
·
..
·····
..
·
..
··
..·· ..
·
····
..
·24
II
Test
Tone
24,25
Input
Setup·
..
·· ..
···
..
·
..
·····
..
·
..
··
25
0,
fJ
HDMlln
Assign · · · ····25
II
-iii
Digital
In
Assign · ·
..
· · · 25
II
iPod
Assign ·
..
··26
II
-1m
Component
In
Assign 26
II
-III
Video Convert 26
II
Audio Delay·······
..
·····
..
·
..
···
..
··
.. ·· ..
·
..
·
..
····· ······
···
..
····· 26
1111
EXT
IN
Subwoofer Level · · ·
..
·
..
· · · 26
II
Auto Preset
Memory
· · ·
..
· · ·27
1m
Antenna Aiming ······
···
..
·
..
··
····
..
·
..
··
·····
···
..
·· ··
..
·27
Option Setup··
..
·
..
·
···
..
·27
o Amp Assign·
..
· ··27
fJ
-II
Volume Control ·
27,
28
•
-II
2ch
Direct/Stereo Custom 28
II
Auto Surround Mode 29
III Room
EO
Setup 29
III Direct Mode Setup · ·
..
· ·29
IIiJ
Remote
ID
Setup · · ·
..
·
..
· ·
..
· ·29
ENGLISH
Contents
IGetting Started I
Accessories·· ········2
Cautions on Handling································.····································3
Cautions
on
Installation············ 3
About
the
Remote Control
Unit
3
Inserting the Batteries····································································3
Operating
Range
of
the Remote Control Unit································3
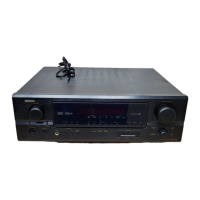
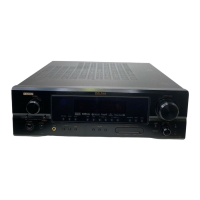
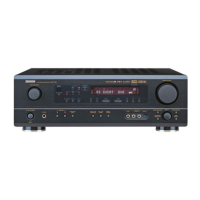
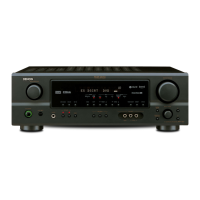
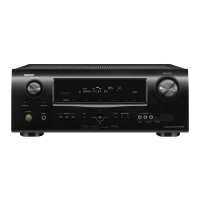
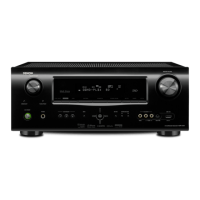
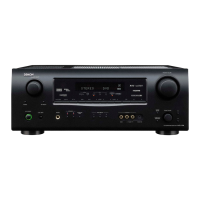
Part Names and Functions·····························································4
Front Panel···· 4
Display ·····································4
Rear
Panel·
..
····
..
·
..
·
..
·
..
···
..
·
..
·
..
········ 5
Remote Control Unit 6
!Connections ' I
Preparations· 7
Cables Used for Connections 7
Video Conversion Function··
..
··
..·· ..
·
..
·
..
· ·
..
·
..·· ..
·
.. ··
···
..
·
..
··
..
··
..
·8
Speaker Connections·· ·
..
··
···
..·· ..
·8
Speaker Installation 8
Speaker Connections 9
Connecting Equipment
with
HDMI
connectors
.. ··
·
..
10
Connecting the Monitor
..
·· ..
·
·11
Connecting the Playback Components
11
DVD
Player
..
····
..
·
..
·
..
·
..
···
..
···········
..
· ·
..
·· ··
·
..
·
..
···
·· ..
·
..
·· ..
··
11
CD
Player
·· ..
·12
iPod®····························································································12
TV/CABLE Tuner
..
···········
....
·······
..
·
..
········
..
···
..
·
..
···
······
···
..
···
..
·····13
Connecting the Recording
Components
· ·
13
Video Cassette Recorder ·
13
CD
Recorder / MD Recorder /Tape Deck · · ·
..
14
Connections to Other Devices ·
..
14
Video Camera / Game Console
14
Component with Multi-ehannel Output connectors ·
15
XM connector··
..
· ·
·· ··
..
······ ·
..
·
..
·
..
· ···
15
Antenna terminals
··
·
..
·
..
· ·
..
·
··
..
········
..
·
..
··
..
·
..
·· ..
·
..
· ·
..
·16
Multi-zone
17
Connecting the Power Cord ·
..
··
..
·
..
·
..
· · · ·
17
Once Connections are Completed · ·
17
1
I~nrtions
~
Menu Map......
..
.
Examples of Front Display ·
..
I
System
Setup
..
18
· ·
18
ISunound Modes I
Standard Playback ·
·29,30
Surround Playback
of
2-channel Sources
..
29
Playing Multi-ehannel Sources (Dolby Digital,
DTS,
etc.) ·30
DSP Simulation Playback ·.·................
..
· 30
Stereo Playback······················.···.······.························.···.···.··.······30
Direct Playback ·30
Ihqmemr
I
Surround Parameter····
..
·····
·· ..
····· ····· ·
..
·
..
···
··
···
..
·31
Tone
Control....
..
32
Room
EO
·······························33
RESTORER·
..
···
..··
··
..
·
..
·
..
·· ..
······
..
·
..
···
..
····
..
··
..
· ·
..
· ·
··
..
···33
Night Mode · ·33
!Infonnlltion
'-""
i'
I
o Status 34
fJ
Audio Input
Signal
· ·
..
· · 34
II
Quick Select ·34
 Loading...