3
4. Display
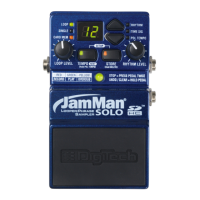
The main purpose for the Display is to
show the currently selected loop memory
location. It also shows information during
store/copy procedures, setup options, file
deletion, and card formatting procedures.
5. Power Jack
Connect the included PS200R DC power
supply here. The JamMan
®
Solo can only
be powered by using the external adapter.
6. Loop Select buttons
The Loop Select buttons are used for
selecting different loop memories and
making selections when in the Setup
menu.
7. Rhythm LED
This red LED will light when selecting the
Rhythm guide track to record and play with.
8. Time Signature LED
This red LED lights when selecting the
Time Signature for a new loop memory
location. You can select from 2 to 15
beats per measure. This means if you
want to record in 5/4 time, select 5 in the
Display. To record in 7/8 time, select 7,
and so forth. Note that Time Signature can
only be changed for a memory location
that has no phrase recorded in it.
9. Auxiliary Input
This 1/8” input accepts a mono or stereo
line level source from a portable CD or
MP3 player. All audio recording at the
Auxiliary input is recorded in mono.
