Eaton 9155 UPS (8–15 kVA) User’s Guide 164201553—Rev H0 43
44..44 SSttaabbiilliizziinngg tthhee CCaabbiinneett
NOTE 1 For seismic installations, you MUST order and install an Eaton 9155 UPS seismic kit; do
not use the following instructions.
NOTE 2 For non-seismic installations, you MUST install the stabilizing bracket on all 3-high
cabinets. The stabilizing bracket is optional for 2-high cabinets.
To stabilize the cabinet(s):
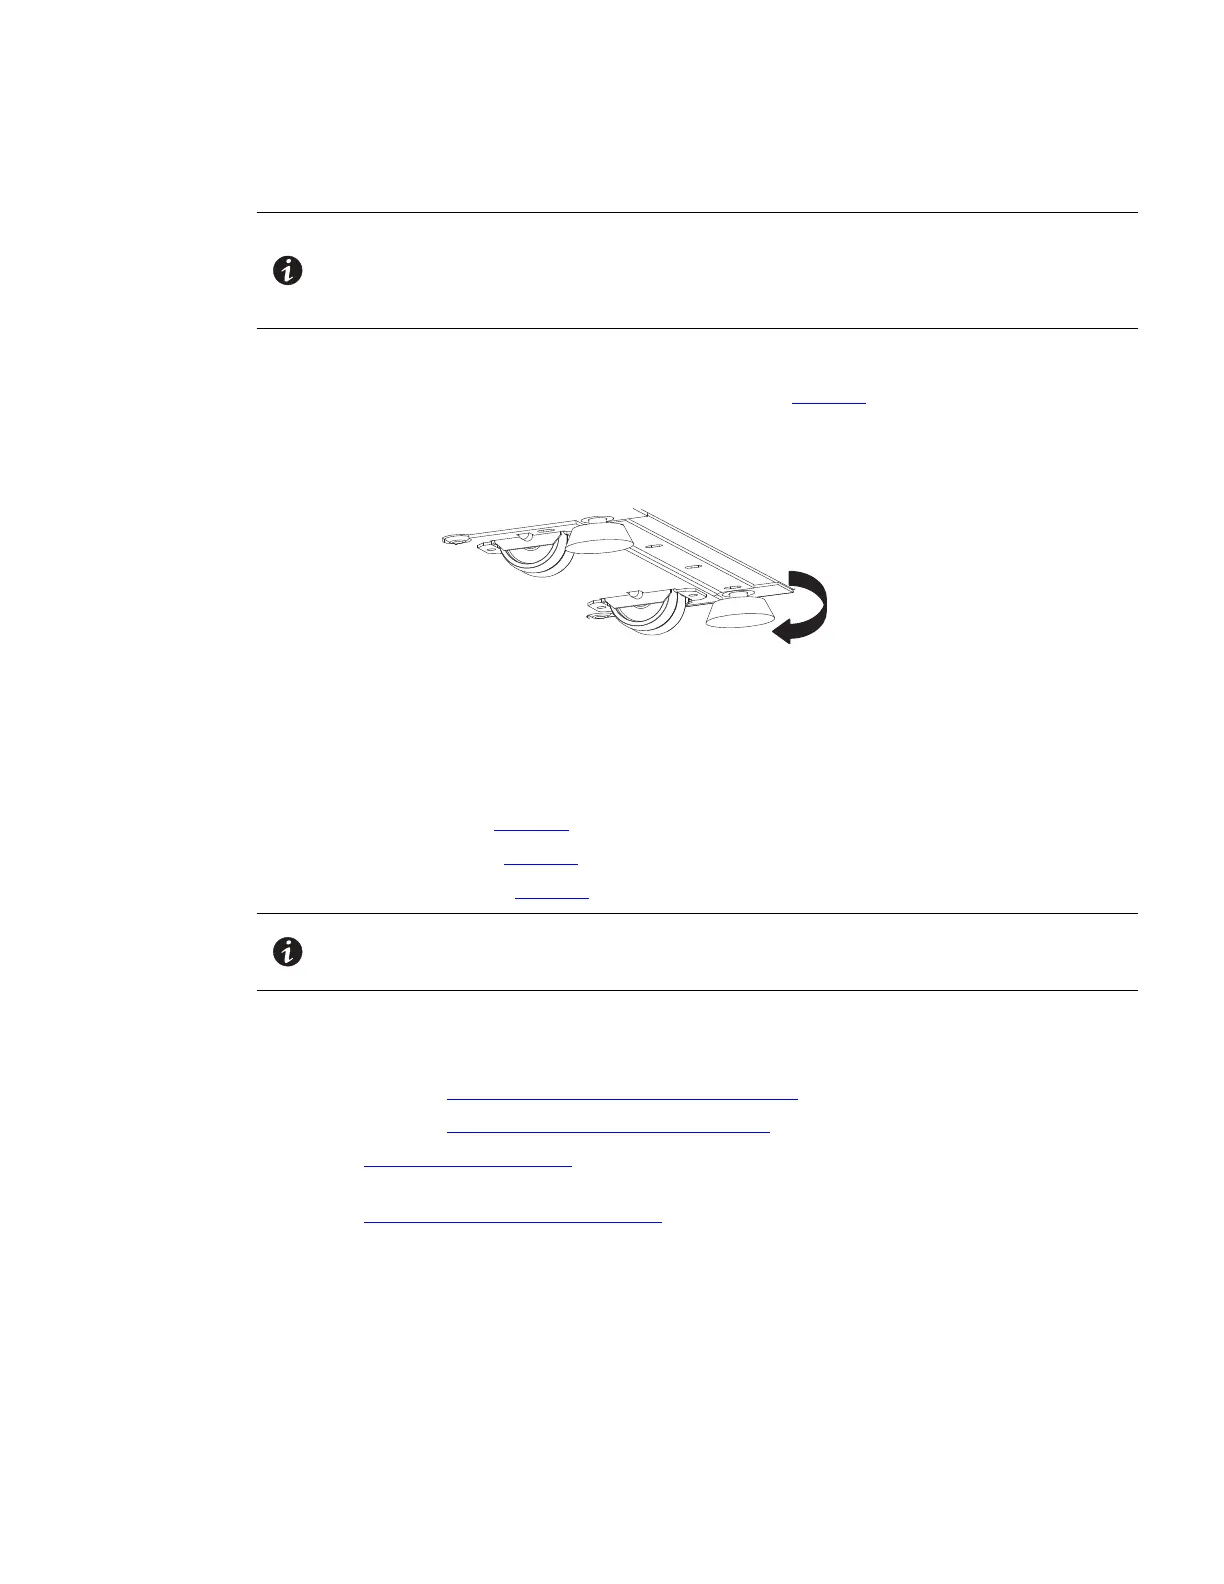
1. Lower the leveling feet to prevent the cabinet from rolling (see Figure 28).
Figure 28. Lowering the Leveling Feet
2. Attach the stabilizing bracket to the bottom of the cabinet rear panel using the retained hardware from the
shipping pallet according to the cabinet configuration:
• For one cabinet, see Figure 29.
• For two cabinets, see Figure 30.
• For three cabinets, see Figure 31.
NOTE No more than three cabinets can be attached together. For four cabinets, use two of the
two-cabinet installations. For five cabinets, use one three-cabinet and one two-cabinet
installation.
3. Use the holes and slots in the bottom of the bracket to attach the cabinet to the flooring if desired.
4. Continue to one of the following sections:
• See paragraph 4.5 Internal Battery Tray Wiring Connections to install the internal battery tray wiring.
• See paragraph 4.6 Extended Battery Module Installation to install optional EBMs.
• See Chapter 6 Communication to install UPS communication options, such as X-Slot cards or remote
emergency power-off (REPO).
• See Chapter 7 UPS Operating Instructions to start up the UPS system.
UPS System Installation
 Loading...