5-2
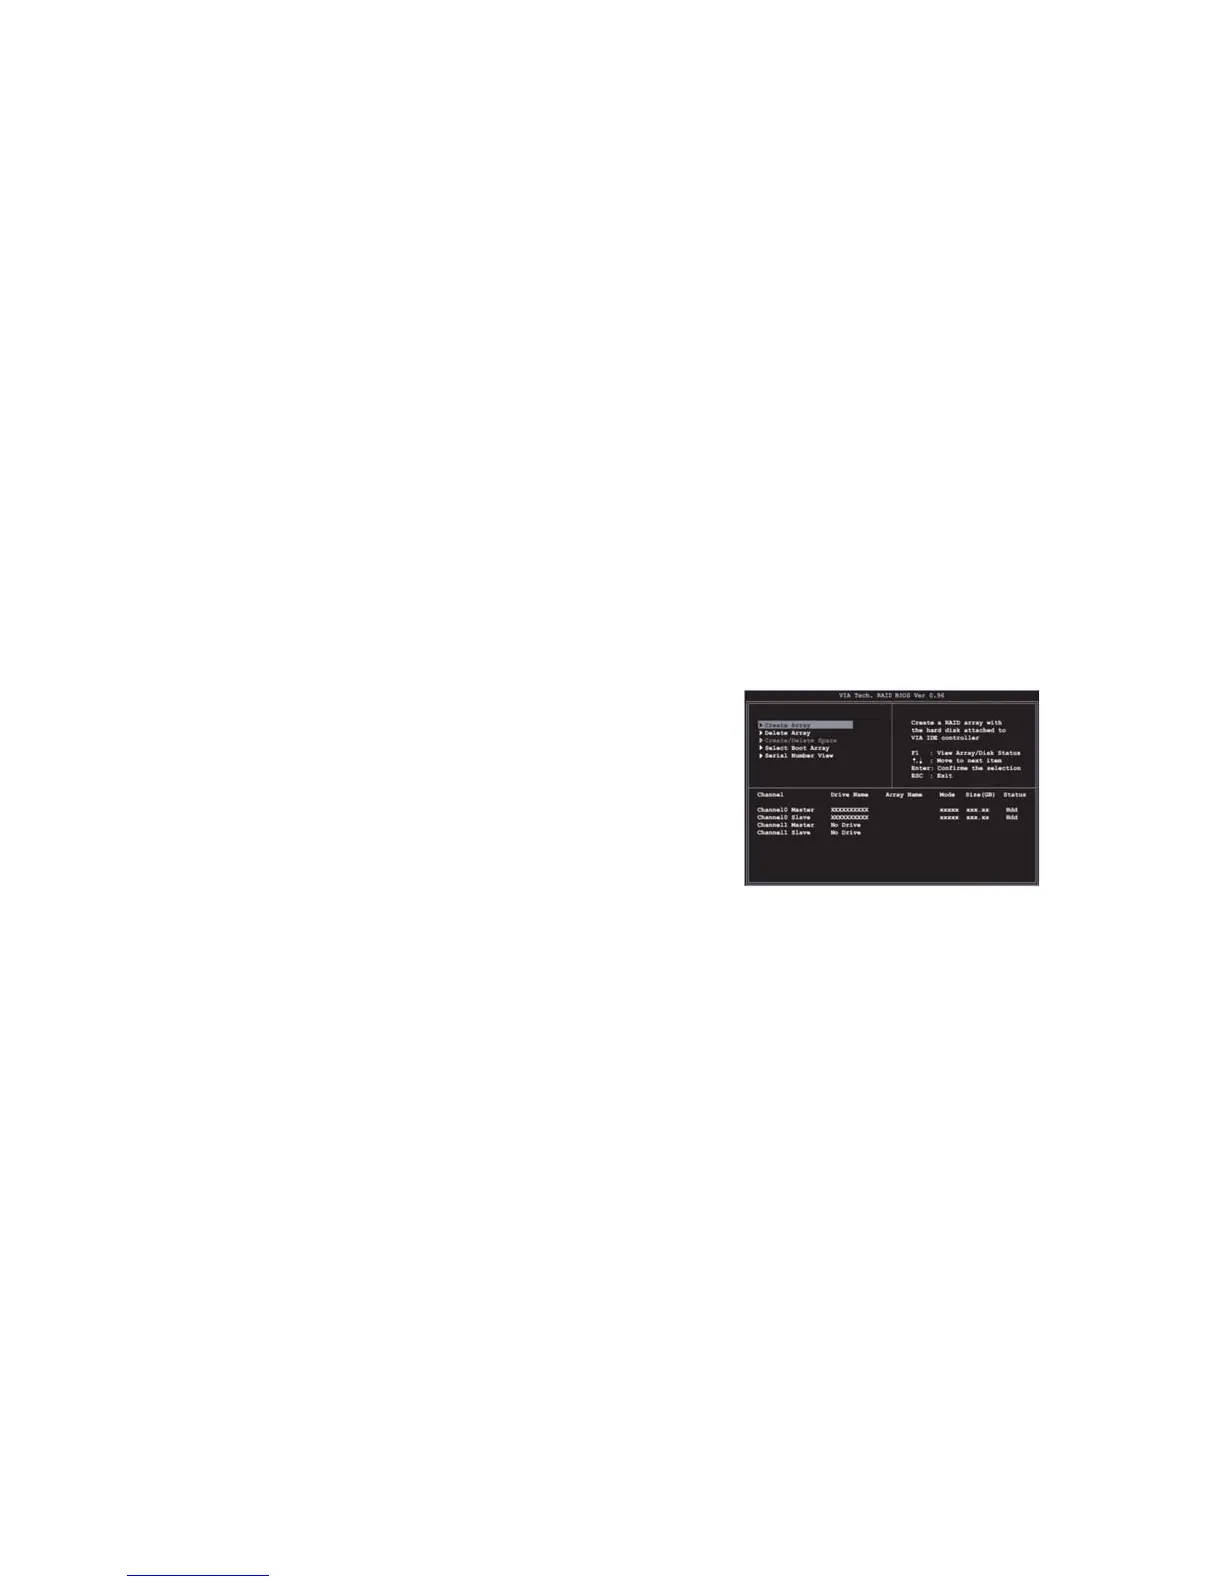
5.1-2 Entering VIA Tech RAID BIOS Utility
1 Boot-up your computer
2 During POST, press <TAB> to enter VIA RAID configuration util-
ity. The following menu options will appear.
Note: The RAID BIOS information on the setup screen shown is for reference only. What
you see on your screen may not by exactly the same as shown.
On the upper-right side of the screen is the message and legend box. The
keys on the legend box allow you to navigate through the setup menu op-
tions. The message describes the function of each menu item. The following
lists the keys found in the legend box with their corresponding functions.
new Serial ATA cable (4-conductor) which supports the Serial ATA
protocol and a Serial ATA power cable.
Either end of the Serial ATA data cable can be connected to the SATA
hard disk or the SATA connector on the motherboard.
iii
1 Install the Serial ATA hard disks into the drive bays.
2 Connect one end of the Serial ATA cable to the motherboard’s
primary Serial ATA connector (SATA1).
3 Connect the other end of Serial ATA cable to the master Serial ATA
hard disk.
4 Connect one end of the second Serial ATA cable to the motherboard’s
secondary Serial ATA connector (SATA2)
5 Connect the other end of Serial ATA cable to the secondary Serial
ATA hard disk.
Note: Please note that SiS180 does not support hot plug function.
6 Connect the Serial ATA power cable to the power connector on
each drive.
7 Proceed to section “Entering VIA Tech RAID BIOS Utility” for the
next procedure.
 Loading...