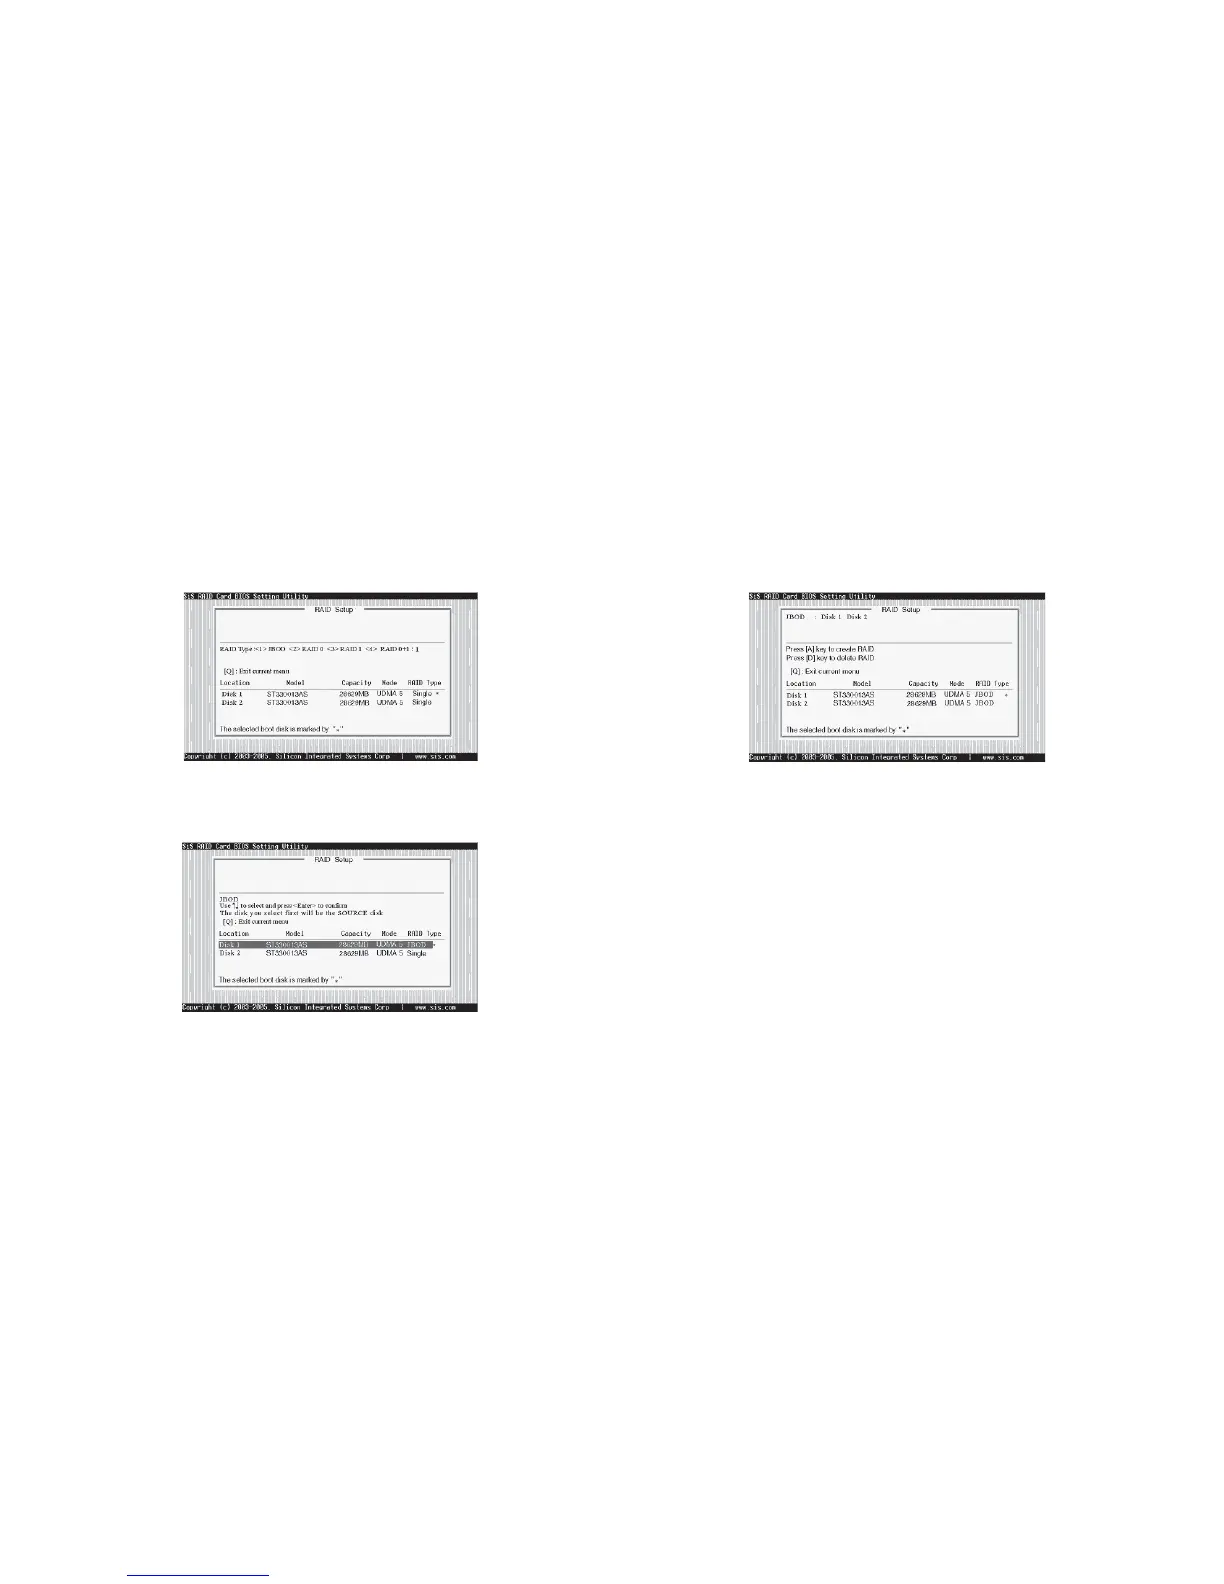
5-21
on step 5. Besides, you also can select <2>Manual Create, see
following steps.
5. After all steps finished, press <Q> until escape the setup menu and
JBOD array will be show on the top of the main frame.
6. Press <Q> again to exit this BIOS utility and the red message frame
will show as the same age as the creation of the RAID 0 array. Press
<Y> and <Enter> to save changes.
7. Once the array has been created, you will need to FDISK and format
the array as if it were a new single hard drive.
5.9-6 Creating a RAID 0+1 (Stripe-Mirror) Array
♦ SIS180 supports Stripe-Mirror array with 4 drives.
To create an Stripe-Mirror array, follow these steps:
1. Press <A> to start creating a RAID array.
2. Press <4> and <Enter> to select RAID 0+1.
4. Use <> <> to select disk, and press <Enter> to select disk, <Q>
to exit. When you press <Enter> on the disk you wanted, the RAID
Type will be changed from Single to JBOD.
 Loading...