EasyManua.ls Logo

Electrolux AWF 1210 User Manual

Electrolux AWF 1210
59 pages
To Next Page IconTo Next Page
To Previous Page IconTo Previous Page
Page #12 background imageLoading...
Page #12 background image
SOI/DT 2002-06 eb 12 599 35 27-25
2.5 Buttons for washer-dryers
2.5.1 “ELECTRONIC DRYING”
It is possible to select three different electronic levels of dryness: one for
COTTON and one for SYNTHETICS cycles:
L19 Ö Extra dry (cotton)
L20 Ö Store dry (cotton)
L21 Ö Iron dry (cotton)
L22 Ö Store dry (synthetics)
The drying time is automatically calculated by the "Fuzzy" logic.
The drying phase can be performed either as automatic drying phase (non stop programme), if
previously selected together with the washing programme, as well as a separate drying phase.
2.5.2
DRYING TIME”
When this button is pressed it is possible to select (5 minutes a time) from 10
to 130 minutes drying for COTTON cycles and from 10 to 100 minutes for
SYNTHETICS cycles.
The drying cycle can be selected both as automatic drying and as separate
drying cycle.
L23 Ö drying (full power)
L24 Ö synthetic drying (half-power)
2.6 “START/PAUSEbutton
START: After selecting the programme and the desired options, press
the START button to start the programme. The LED positioned above the
button will cease flashing and remain lit. If a delayed start time has been
selected, the countdown will commence; the countdown will be shown on
the display.
PAUSE: When the button is pressed again, the programme currently being
performed is interrupted.
The LED above the button will start to flash. When the cycle is paused,
the door LED switches off and the door can be opened on
condition that:
- the machine is not performing a heating phase
- the water level is not high
- the drum is not in movement
When the appliance is paused, the programmes can be modified as follows:
The structure can be changed or the programme cancelled (SKIP/RESET button). In this case,
the water (and detergent) will not be drained and the new cycle will begin with water in the tub.
If it is preferred to restart the new cycle without saving water and detergent, it is necessary first
to select a drain phase and then the new programme.
The FABRICS and the TEMPERATURES can be modified only during the washing phase; in
this case, the cycle will be restarted from the beginning.
The SPIN can be modified before the start of the final spin cycle.
All the cycle OPTIONS can be modified before the commencement of the phase to be
modified.
DRYING selections can be modified before the starting of the drying phase.
To re-start the cycle, press the START/PAUSE button again.
Water drain and spin cycle: after the "rinse hold" phase press this button to start the cycle with the
drain and final spin again.

Table of Contents

Question and Answer IconNeed help?

Do you have a question about the Electrolux AWF 1210 and is the answer not in the manual?

Electrolux AWF 1210 Specifications

General IconGeneral
BrandElectrolux
ModelAWF 1210
CategoryWasher
LanguageEnglish

Summary

Control Panel

Start/Pause Functionality

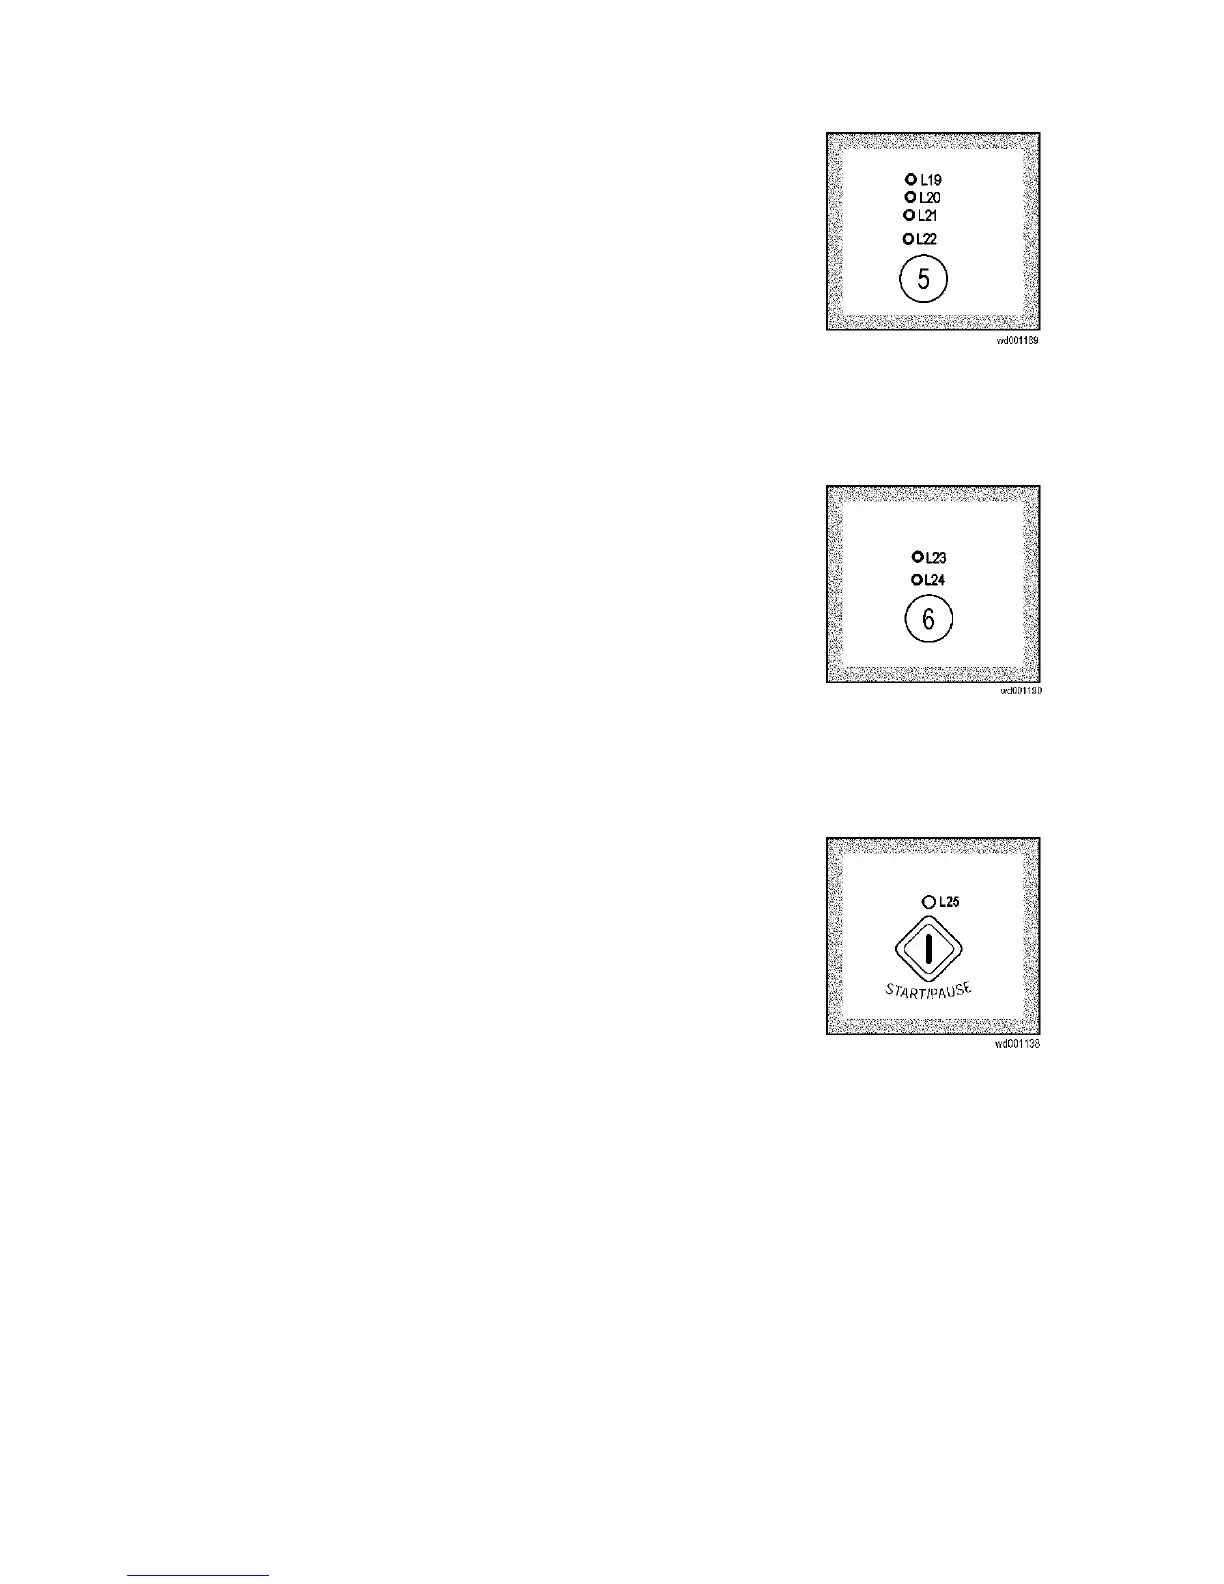
Explains the operation of the START/PAUSE button for program control and pausing.

Washing Programmes

Washing Programme Charts

Fast Unbalance Control System (FUCS)

Explains the FUCS mechanism for managing unbalanced loads during spin cycles.

Technical Characteristics

EWM2000 Electronic Control Unit Overview

Describes the main control unit, including PCB and display board functions.

Electronic Pressure Switch Operation

Details the function and working principle of the analog electronic pressure switch.

Instantaneous Door Safety Device

Explains the mechanism and conditions for the instantaneous door safety device.

Motor Power Supply Circuitry

Explains how the main PCB powers the motor and the function of the AC/DC converter.

Drying System Functionality

Drying Circuit Components and Temperature Control

Details the drying circuit, its components, and how temperature is regulated.

Diagnostics and Configuration

Accessing Diagnostics and Configuration

Guides on entering the diagnostics system, performing tests, and running cycles.

Diagnostic System Tests

Details the steps and functions tested within the diagnostic system.

Running the Diagnostics Cycle

Describes how to navigate through diagnostic phases and interpret test results.

Understanding Alarm Codes

Lists common alarm conditions and their causes, displayed via codes or flashing LEDs.

Reading Last Alarm Condition

Explains how to retrieve and interpret the last recorded alarm code.

Detailed Alarm Code Reference

Provides a comprehensive table of alarm codes, LED indications, fault descriptions, effects, and possible causes.

Main PCB Configuration Procedure

Guides on configuring the main PCB with a specific code for model compatibility.

Configuration Code Entry and Verification

Explains how to read, enter, and verify the 16-digit configuration code.

Circuit Diagrams

Related product manuals