Printing Photos
Tips when Printing Photo Projects
is section explains important points to note when creating photo projects.
Shooting (Camera Settings)
Creating a photo project begins with shooting. e data storage format and size (resolution) are also important
points.
Some items only need to be set for the rst time, while some items need to be set every time according to the
subject.
Items that only need to be set the rst time
❏ Color spaces: Select sRGB if you are unsure.
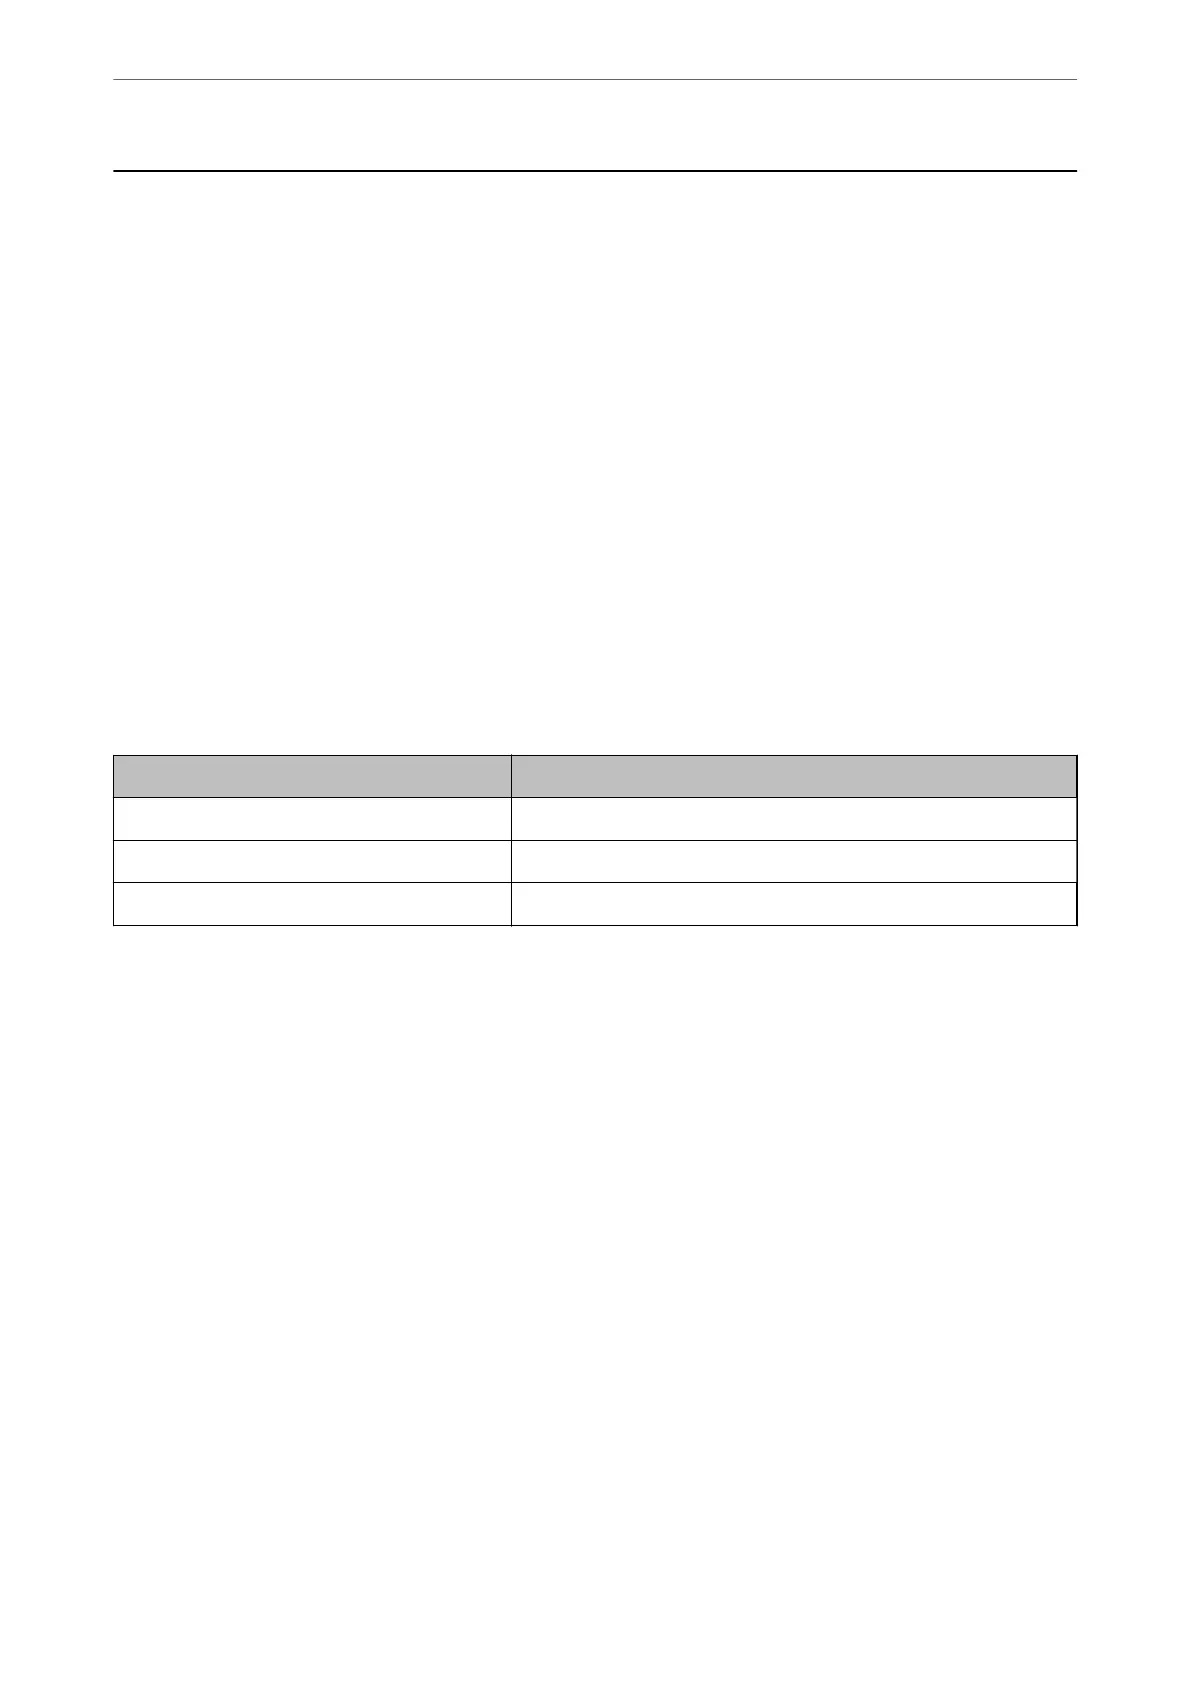
❏ Storage size: We recommend saving at a resolution that suits the paper size you will use for printing, using the
table below as a guide.
Print Size Number of Pixels
A2/entire sheet 24 million (5830 x 4120)
A3/half sheet 18 million (5050 x 3570)
A4/8x10 in/10x12 in 12 million (4120 x 2920)
❏ Data format: We recommend selecting RAW when editing and printing photo data, or select JPEG just printing.
Items that need to be set every time
Set the following appropriately according to the subject.
❏ Select A mode (aperture priority auto) from shooting mode and control the F value (aperture) to set the amount
of burring.
❏ Exposure: Set an approximate value to avoid halation or black defects.
❏ Shutter speed: Set the speed to avoid blurring.
❏ ISO speed: We recommend setting this as low as possible.
❏ White balance: Set an approximate setting according to the subject.
Raw Development and Editing (Printed Finish)
is process is as important as shooting to complete photo projects.
is allows you to edit photos (or perform color correction, gradation correction, cropping, and so on) with
applications
*
such as Adobe Photoshop or Lightroom, and save them in JPEG or TIFF format.
*You can also perform RAW development using the camera soware.
❏ Adjust the color temperature to match the subject or the scene.
Printing
>
Printing Photos
>
Tips when Printing Photo Projects
40
 Loading...