Inspection Route
17
17.1 General
FLIR Inspection Route is a solution that streamlines thermal inspections and simplifies
data collection and reporting. The solution includes the Inspection Route camera option
as well as FLIR software support for preparation and post-processing.
With the Inspection Route function, the camera guides the operator along a predefined
route of inspection points, where images and data are collected in a structured manner.
FLIR Inspection Route speeds up post-processing and reporting by ensuring that nothing
is missed and that all inspection results are organized right from the start.
The inspection work flow is defined by an inspection route file, with a high degree of flexi-
bility. It is possible to configure an automated work flow, where the camera automatically
sets the status and steps to the next inspection point when an image is saved. The oper-
ator can also manually select the status, add comments, and add more images and
videos.
The inspection route work flow typically involves the following steps:
1. Prepare the inspection route file, using one of the following methods:
• FLIR thermography software that has inspection route support.
• Your own solution. The FLIR Thermal SDK can be used to build your own export/
import software or to interface your existing asset management system.
• Create a file in the camera.
• Manually edit a file.
2. Put the inspection route file prepared as above onto a memory card.
3. Insert the memory card into a camera that has the Inspection Route option.
4. Perform the inspection using the camera.
5. Insert the memory card into a computer and import the results into FLIR thermogra-
phy software or your own image management and reporting system.
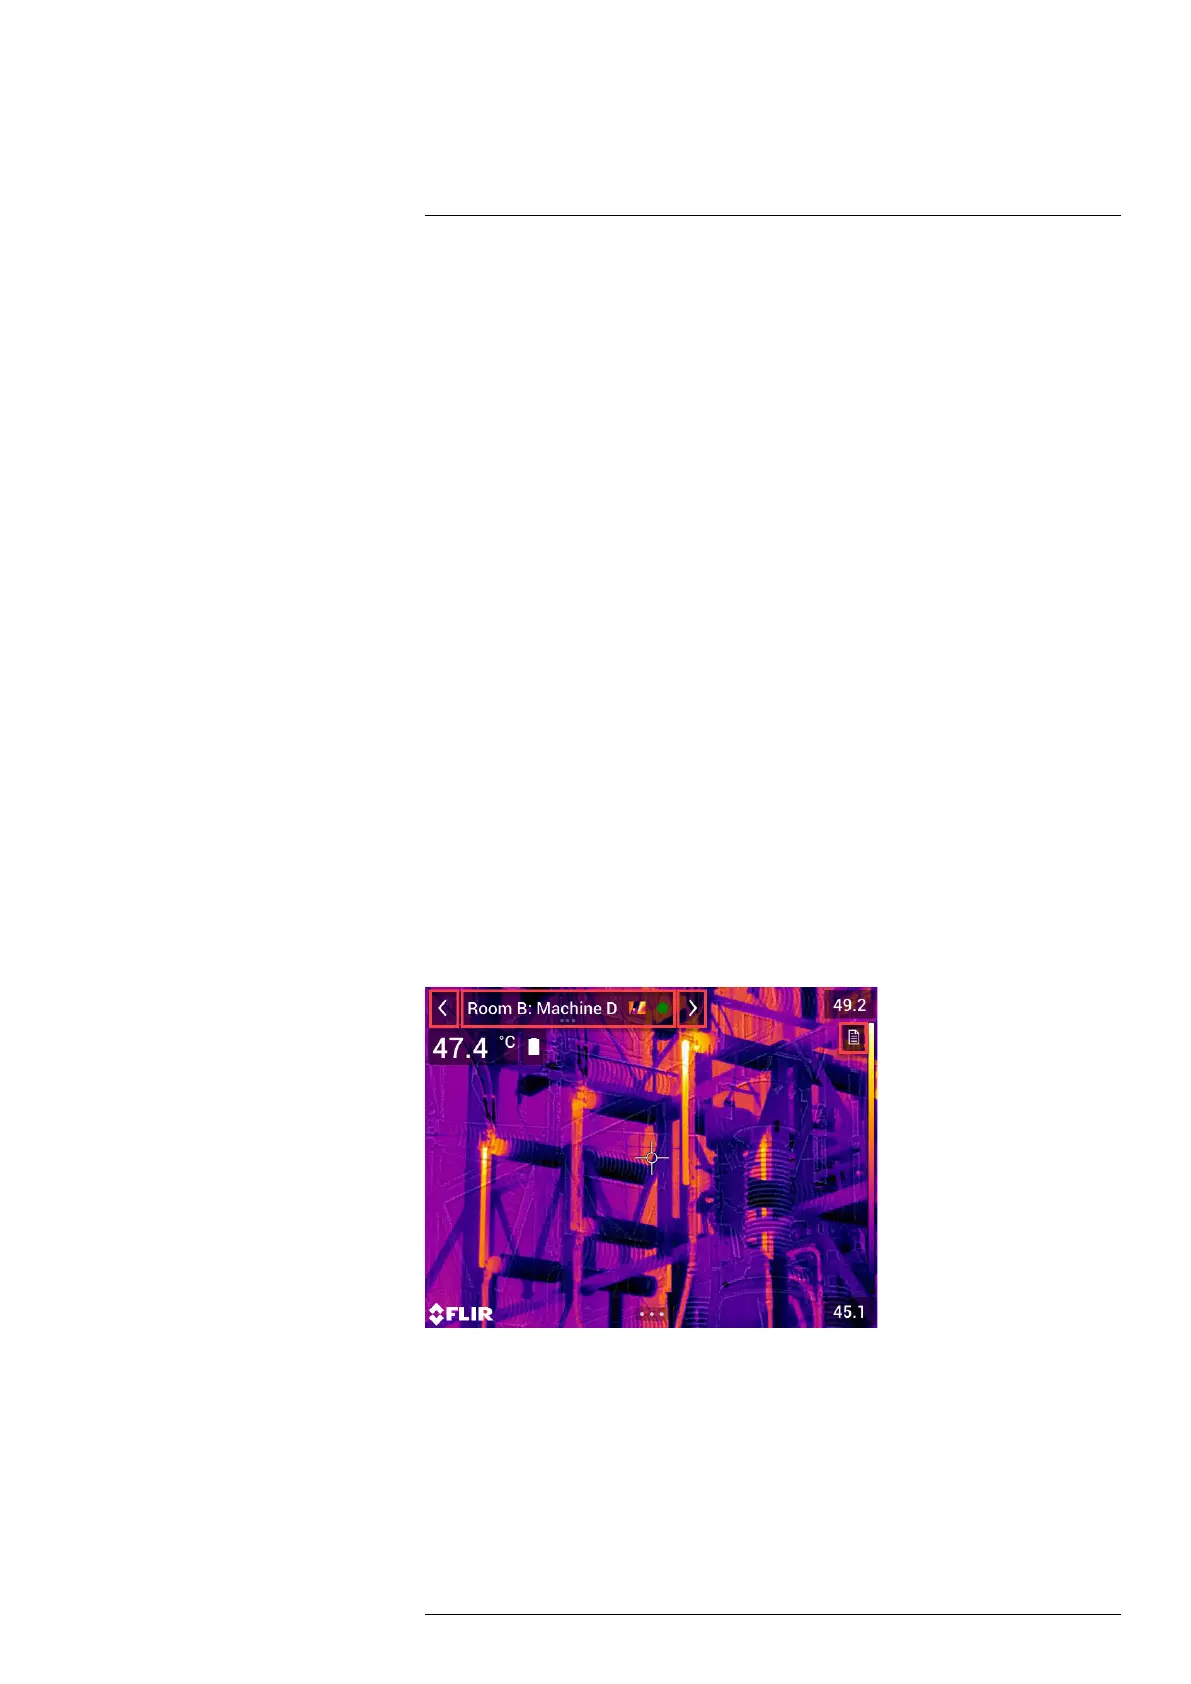
17.2 User interface
The Inspection Route overlay consists of the following parts:
• Back arrow
Tap to go to the previous inspection point.
• Current point indicator
◦ Displays the name of the current inspection point.
◦ Displays an image icon if there is an image saved for the inspection point.
◦ Displays the status of the inspection point.
#T810587; r. AA/74078/74713; en-US
78
 Loading...