5. Pry the bulb body out of the holder
from top to bottom using the a
uxiliary
tool → Fig. 173
2 .
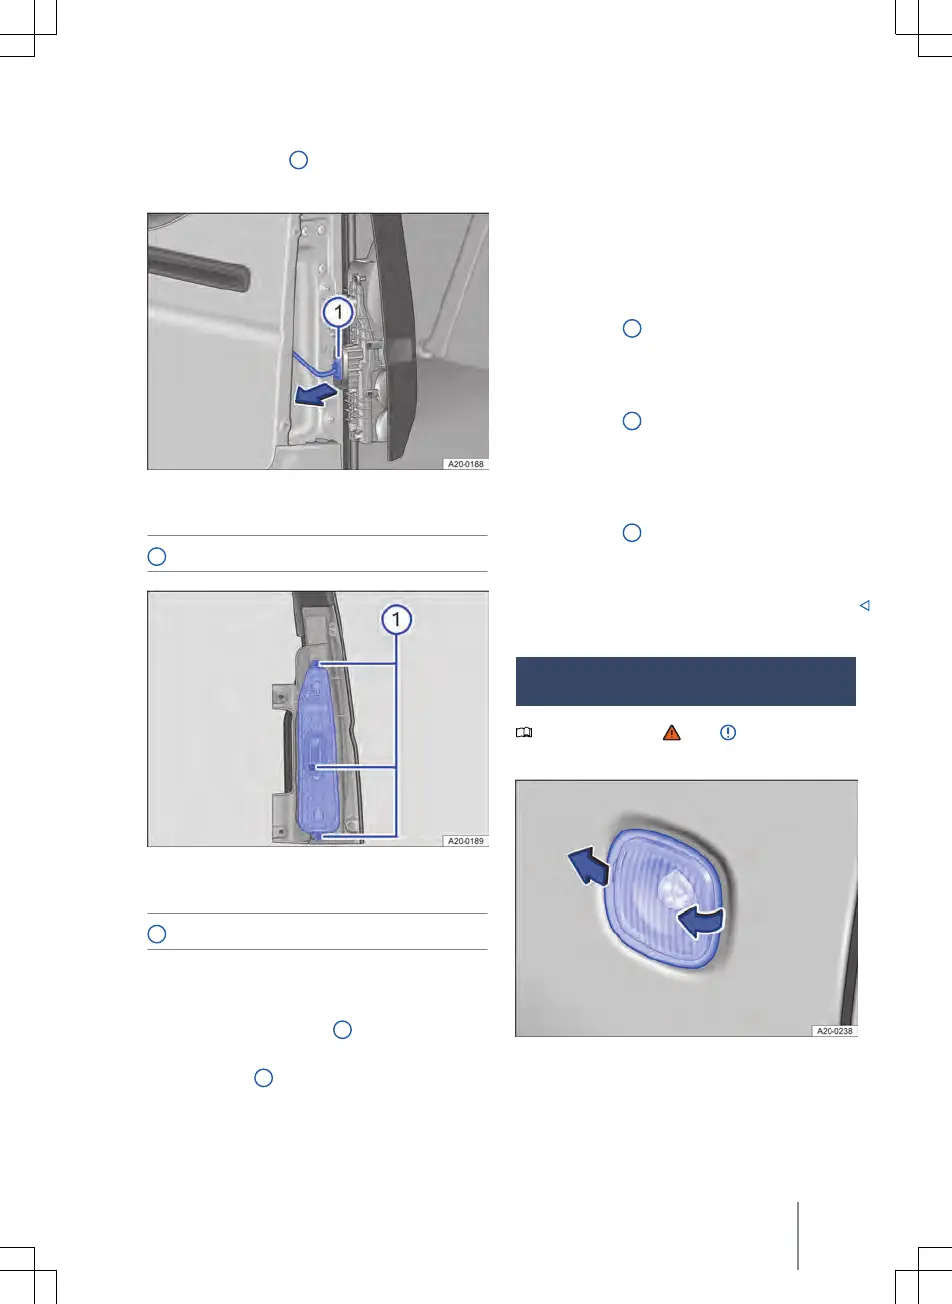
Changing the bulb
Fig. 174 On the tail light cluster: disc
onnect-
ing the connector.
1
Connector.
Fig. 175 On the tail light cluster: removing
the bulb holder.
1
Screw.
The actions should only be carried out in
the specified order:
1.
Pull o the connector in the direction of
the arrow → Fig. 174
1 .
2.
Undo three screws with the screwdriver
→ Fig. 175
1 . Insert a suitable inter-
changeable bla
de if necessary.
3. Remove the bulb holder → Fig. 175.
4. Replace defective bulbs with a new
bulb of the same type.
Fit
ting the tail light cluster
The actions should only be carried out in
the specified order:
1. Carefully insert the bulb holder into the
tail light cluster → Fig. 175.
2. Screw the bulb holder onto the tail light
cluster with the three screws
→ Fig. 175
1 .
3.
Check that the bulb holder is fitted cor-
rectly and is securely seated.
4. Plug the connector onto the bulb holder
→ Fig. 174
1 .
5.
Insert the tail light cluster into the
opening in the body and carefully press
into the holder → Fig. 173.
6. Tighten the securing screws
→ Fig. 173
1 .
7
. Check that the tail light cluster is fitted
correctly and is securely seated.
8. Close the boot lid.
Changing the turn signal repeater
bulb
Please refer to and at the start
of the chapt
er on page 295.
Fig. 176 On the side of the vehicle: removing
the turn signal repea
ter.
Changing lights
299
2KF012720AB

 Loading...