NOTICE
You can damage another position in the
elec
trical system by using a fuse with
a higher amp rating.
NOTICE
Dirt and moisture in the fuse boxes can
damage the electrical system.
·
Protect open fuse boxes against the in-
gress of dirt and moisture.
NOTICE
Incorrect handling of the fuse box can
c
ause damage to the vehicle.
·
Carefully remove the fuse box covers and
fit them correctly again aer completing
work.
This chapter does not refer to all the
fuses loc
ated in the vehicle. These
should be changed only by a qualified
workshop.
Fuses in the dash panel
Please refer to and at the start
of the chapter on page 300.
Le-hand drive: opening the fuse box in
the dash panel
Fig. 178 Fuse box c
over in the dash panel:
le-hand drive vehicle, on the le-hand side
of the steering wheel.
1
Lug.
1. Open the storage compartment and
empty it if nec
essary → Fig. 178.
2. Push the retaining lug upwards in the
direction of the arrow and at the same
time open the stowage compartment
further and remove in the direction of
the arrow until you can access the fuse
carrier → Fig. 178
1 .
3.
To install, press the stowage compart-
ment into the mounts on the dash pan-
el until it audibly clicks into place on
both sides.
4. Close the stowage compartment.
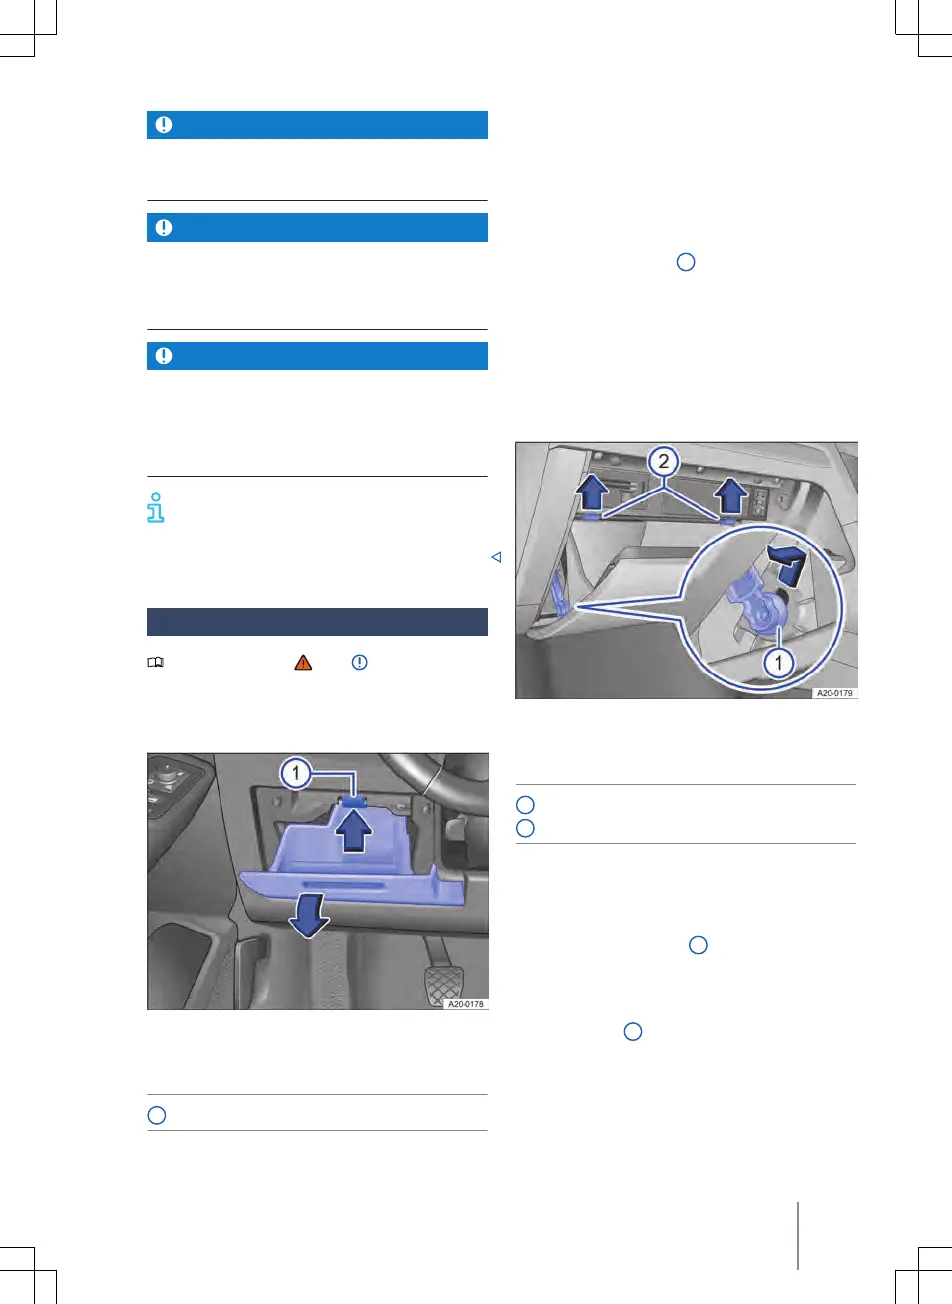
Right-hand drive vehicle: opening the
fuse box in the dash panel
Fig. 179 Fuse box c
over in the dash panel:
right-hand drive vehicle, on the front passen-
ger side (illustration).
1
Restrictor.
2
Catch.
1. Open the glove box and empty if neces-
sary → Fig. 1
79.
2. Push the restrictor upwards into the
opening of the holder and pull out to
the side → Fig. 179
1 .
3.
Push catches upwards in the direction
of the arrow and at the same time open
the stowage compartment further
→ Fig. 179
2 .
4
. To install: move the stowage compart-
ment into position. Insert the restrictor
into the opening of the holder and push
down until you hear it engage. Carefully
push the stowage compartment for-
Changing fuses
301
2KF012720AB

 Loading...