Holden Spark (Next Gen) Owner Manual (GMK-Localising-Holden-9507018) -
2016 - crc - 11/19/15
180 Vehicle Care
18. Rotate the wrench, checking
the correct position of the jack,
until the wheel is clear of the
ground.
19. Unscrew the wheel nuts and
place in a clean, dry place.
20. Exchange the wheel on the
vehicle with the spare wheel.
21. Clean the wheel nuts and
thread before replacing, then
lightly tighten with the wheel
nut wrench.
22. Lower the vehicle by reversing
the jacking procedure.
23. Remove the jack from under
the vehicle.
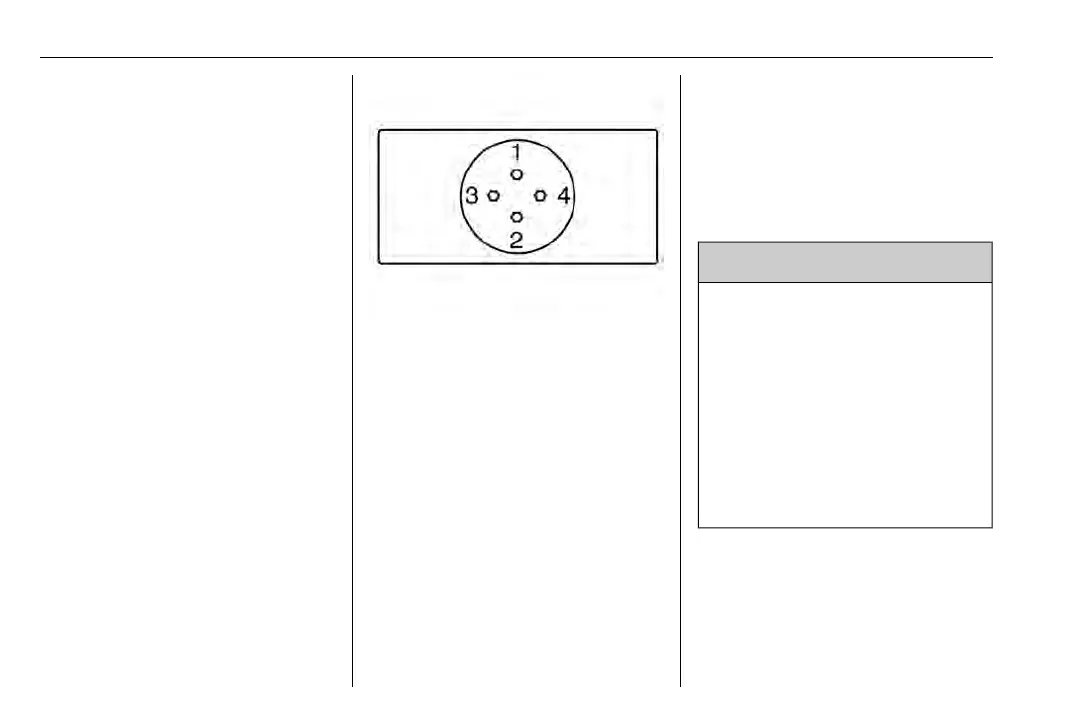
24. With the wheel on the ground,
use the wheel nut wrench to
tighten the wheel nuts in the
sequence shown.
25. Reinstall the wheel cover,
if fitted.
Align the cutout with the tyre
valve and while holding the
cover in position, tap around
the circumference with
your hand.
Note
Ensure the cover is securely
attached around the entire
circumference.
26. Replace the flat tyre and tools
in the load compartment.
27. Lift the rear seatback upwards
and push firmly back into
place.
28. Have the flat tyre replaced or
repaired.
{
Warning
As soon as possible after
changing a wheel, have the wheel
nuts tightened with a torque
wrench to 140 Nm (Newton
metres). Wheel nuts must be
tightened evenly to the correct
torque, as wheel nuts which have
not been tightened properly could
eventually allow the wheel to
come off while the vehicle is
moving.
Storing a replaced wheel in the
load compartment using a
strap
Use the strap located in the tool kit.
Vehicle tools. Tools 0 170.

 Loading...