OTHER ELECTRICAL
Without Circuit Protector
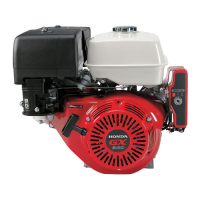
Check continuity between the terminals at each switch
position.
If the correct continuity is not obtained, replace the
combination switch
(page 11-3)
.
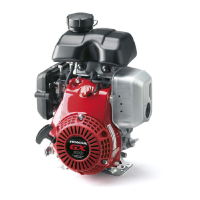
SILICON RECTIFIER INSPECTION
Remove the silicon rectifier (page 11-4).
Check continuity between the terminals. There should
be continuity in one direction only. Replace the rectifier
if there is continuity in both directions or in neither
direction.
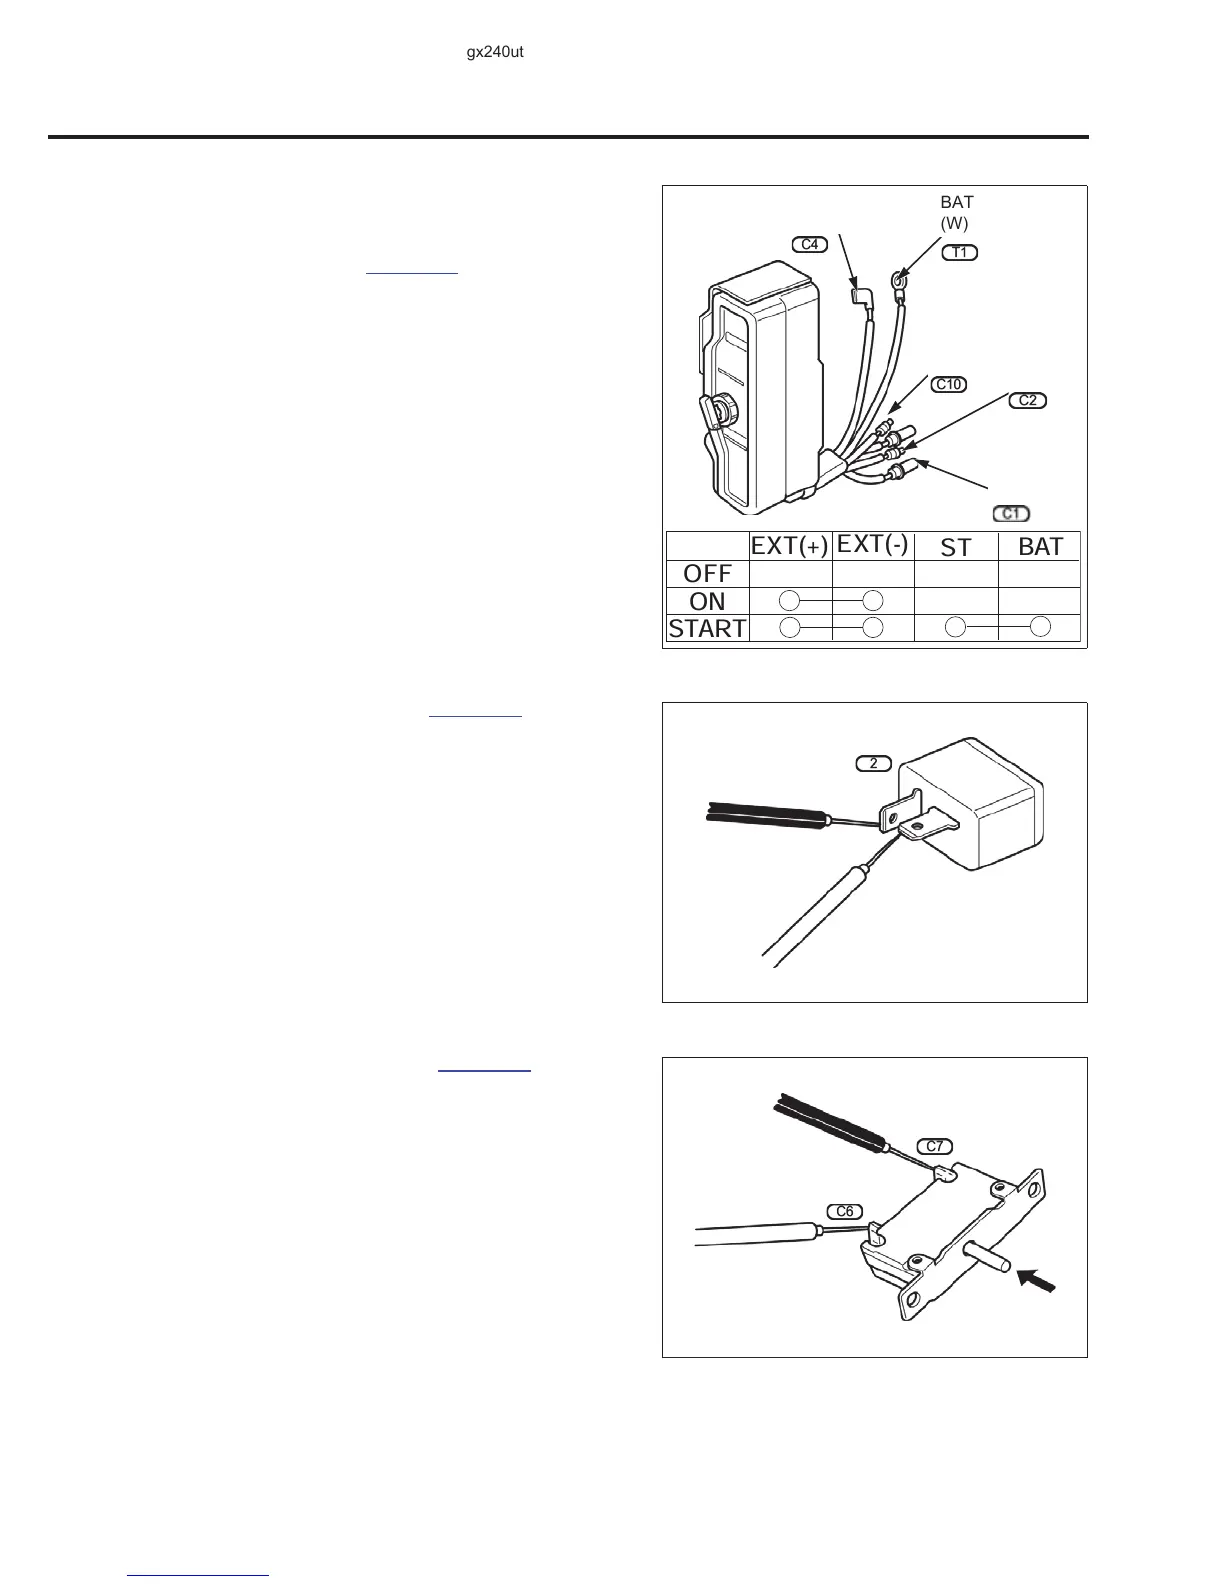
CIRCUIT PROTECTOR INSPECTION
Remove the circuit protector (page 11-4).
Check continuity between the terminals. There should
be continuity in the ON position (button in) and no
continuity in the OFF position (button out). Replace the
circuit breaker if the correct continuity is not obtained.
ST
(Bl/W)
BAT
(W)
EXT(-)
(Bl)
EXT(+)
(R)
EXT(+)
EXT(-)
ST
BAT
OFF
ON
START
BAT
(W)
 Loading...