CRANKCASE
CRANK PIN O.D.
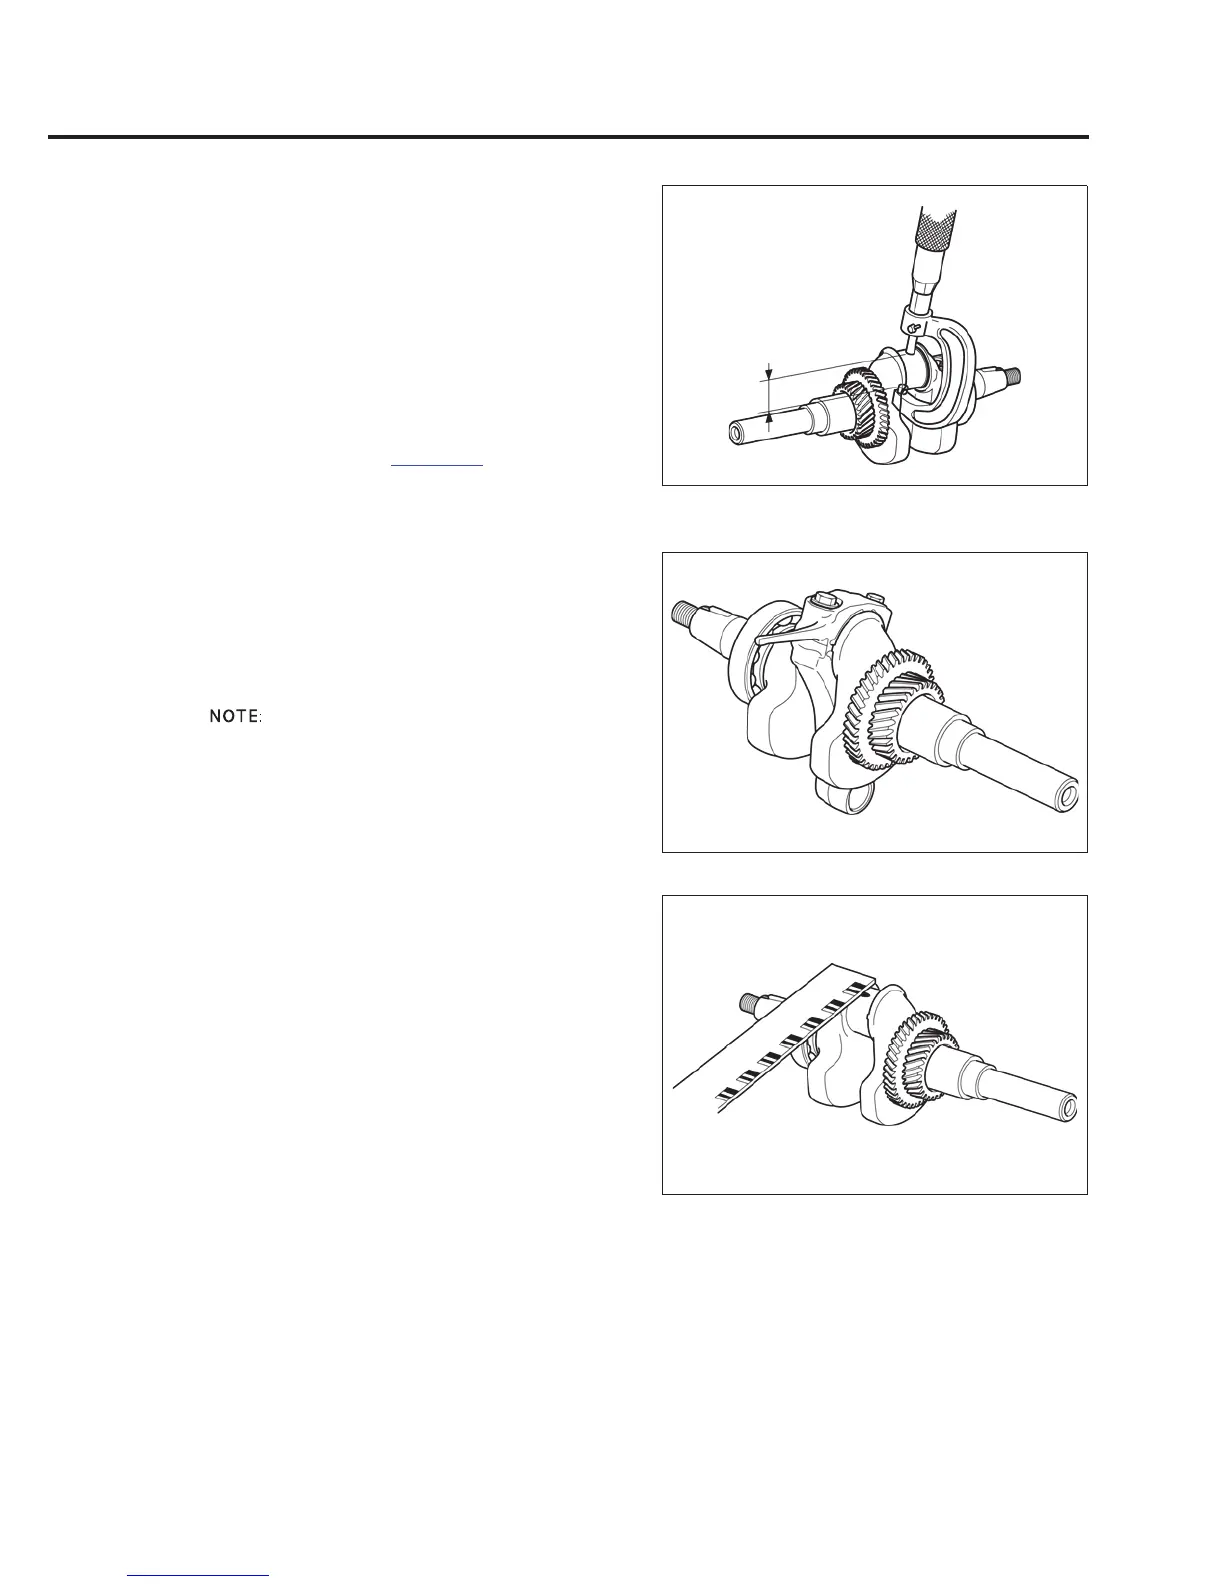
Measure the crank pin O.D. of the crankshaft.
If the measurement is less than the service limit,
replace the crankshaft (page 13-5).
CONNECTING ROD BIG END OIL
CLEARANCE
Clean all oil from the crank pin and connecting rod big
end surface.
Place a piece of plastigauge on the crank pin, install the
connecting rod upper and the connecting rod lower, and
tighten the connecting rod bolts to the specified torque.
Do not rotate the crankshaft while the plastigauge is in
place.
Remove the connecting rod and measure the
plastigauge.
If the clearance is more than the service limit, inspect
the connecting rod big end I.D. and the crank pin O.D.
If necessary replace the part that is not within the
service limit and reinspect the clearance.
GX240/GX270
STANDARD: 32.975 – 32.985 mm
(1.2982 – 1.2986 in)
SERVICE LIMIT: 32.92 mm (1.296 in)
GX340/GX390
STANDARD: 35.975 – 35.985 mm
(1.4163 – 1.4167 in)
SERVICE LIMIT: 35.93 mm (1.415 in)
TORQUE: 14 N·m (1.4 kgf·m, 10 lbf·ft)
STANDARD: 0.040 – 0.064 mm
(0.0016 – 0.0025 in)
SERVICE LIMIT: 0.12 mm (0.005 in)
 Loading...