Servicing Your Honda
137
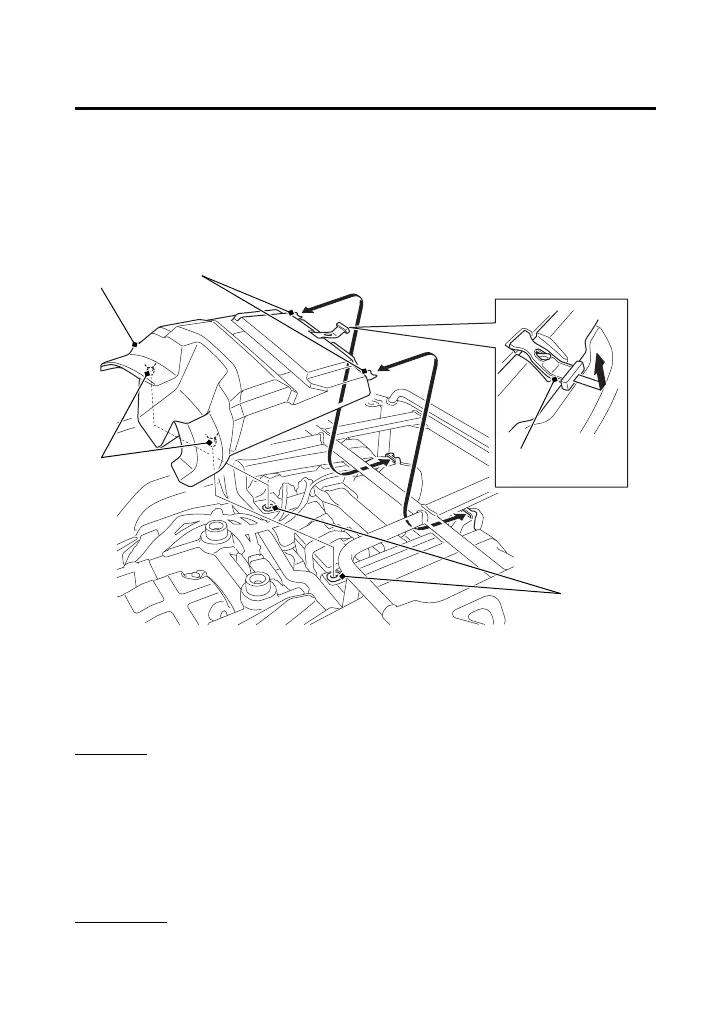
Rear Fender Cover Removal
Refer to Safety Precautions on page 125.
The rear fender cover must be removed for the battery, fuse
maintenance and to access the owner’s manual, air pressure gauge
and 40 A spare fuse.
Removal
1.
Remove the seat (page 136).
2.
Unhook the rubber strap (1).
3.
Firmly pull the studs (2) from the grommets (3).
4.
Slide the rear fender cover (4) forward to disengage the tabs (5).
5.
Remove the rear fender cover.
Installation
Install the rear fender cover in the reverse order of removal.
(1) rubber strap
(3)
(2)
(1)
(5)(4)
(2) studs
(3) grommets
(4) rear fender cover
(5) tabs
19 TRX500FA6 (ED)-32HR66400.book 137 ページ 2018年5月22日 火曜日 午前11時8分

 Loading...