2-16
Installing the Switch
Installation Procedures
6. (Optional) Install Stacking Cables
Note Hot swapping stacking cables is supported. You can install or remove a
stacking cable with the switch powered on.
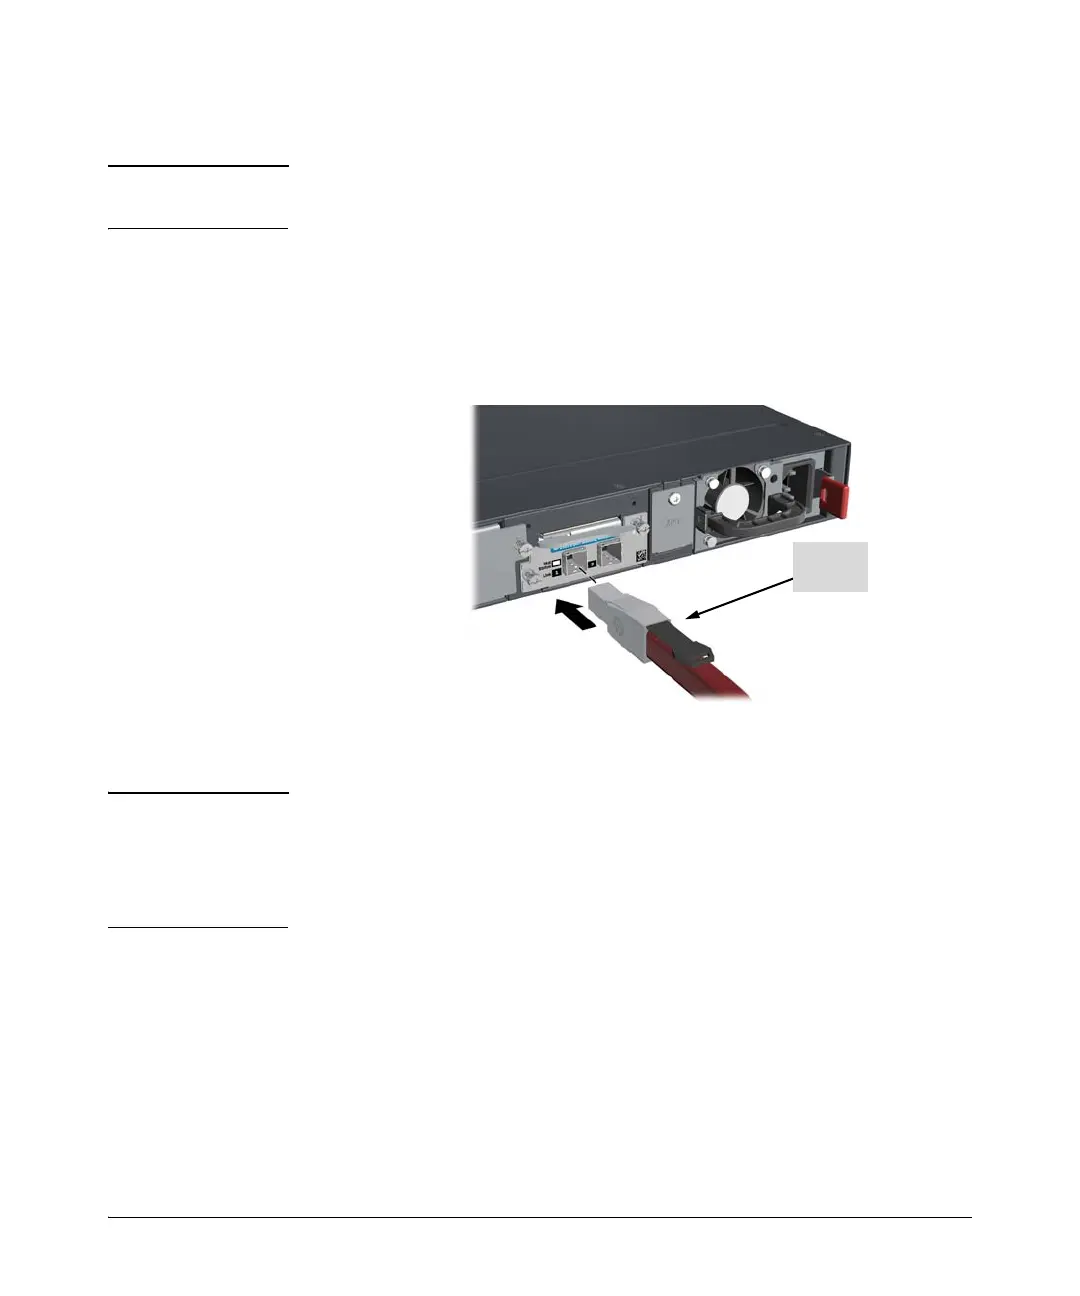
a. Make sure that the stacking cable connector is oriented with the tab
on top, as shown in figure 2-14. Then slide in the stacking cable into the
module connector until the cable clicks into place. Pull on the cable connector
(not the tab) to make sure that it is fully latched.
Figure 2-14. Installing a stacking cable
b. Connect the other end of the cable to a Stacking Module in another HP 2920
switch. See page 2-25 for connectivity.
Note When switch power is on, and one end of the stacking cable is inserted the
Link and Mdl LEDs blink orange until the other end is connected to another
switch stacking module. The LEDs turn solid green when the cable is fully
seated at both ends and a link is established. For more stacking LED
information, see Table 1-4 on page 1-10.
To remove the stacking cable pull the tab on the stacking cable connector
straight out.
 Loading...