4. Rotate the drive cage to the upright position.
5. If the device is a media card reader, disconnect the internal USB cable from the system board. If
the device is a diskette drive, disconnect the power and data cables from the back of the drive.
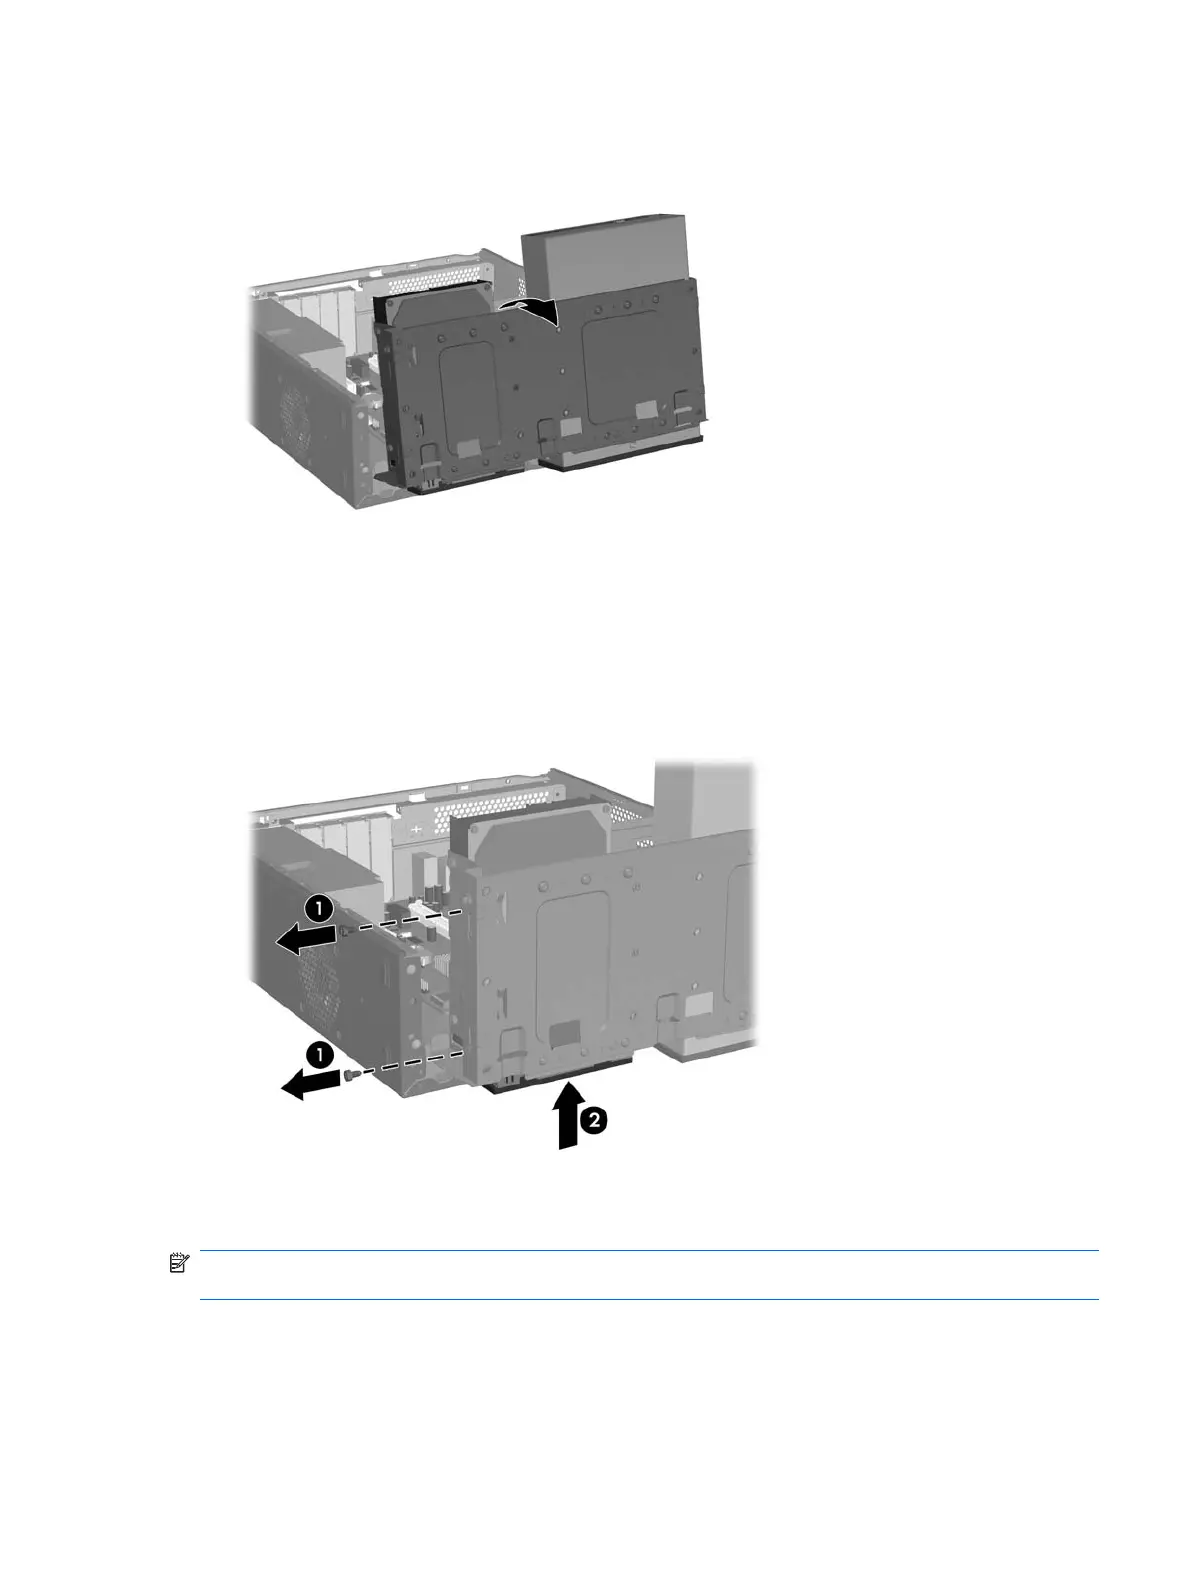
6. Remove the two retainer screws that secure the drive to the bay (1), and then slide the drive forward
and out of the bay (2).
To replace the drive, reverse the removal procedure.
NOTE: If you are installing a drive in the external 3.5-inch drive bay for the first time, use a flat-blade
screwdriver to pry out the metal shield covering the bay.
Hard Drive
A Torx T-15 screwdriver is needed to remove and install the guide screws on a hard drive.
Drives 97
 Loading...