Chapter 2
Installing the System
Cabling and Powering On the Server
86
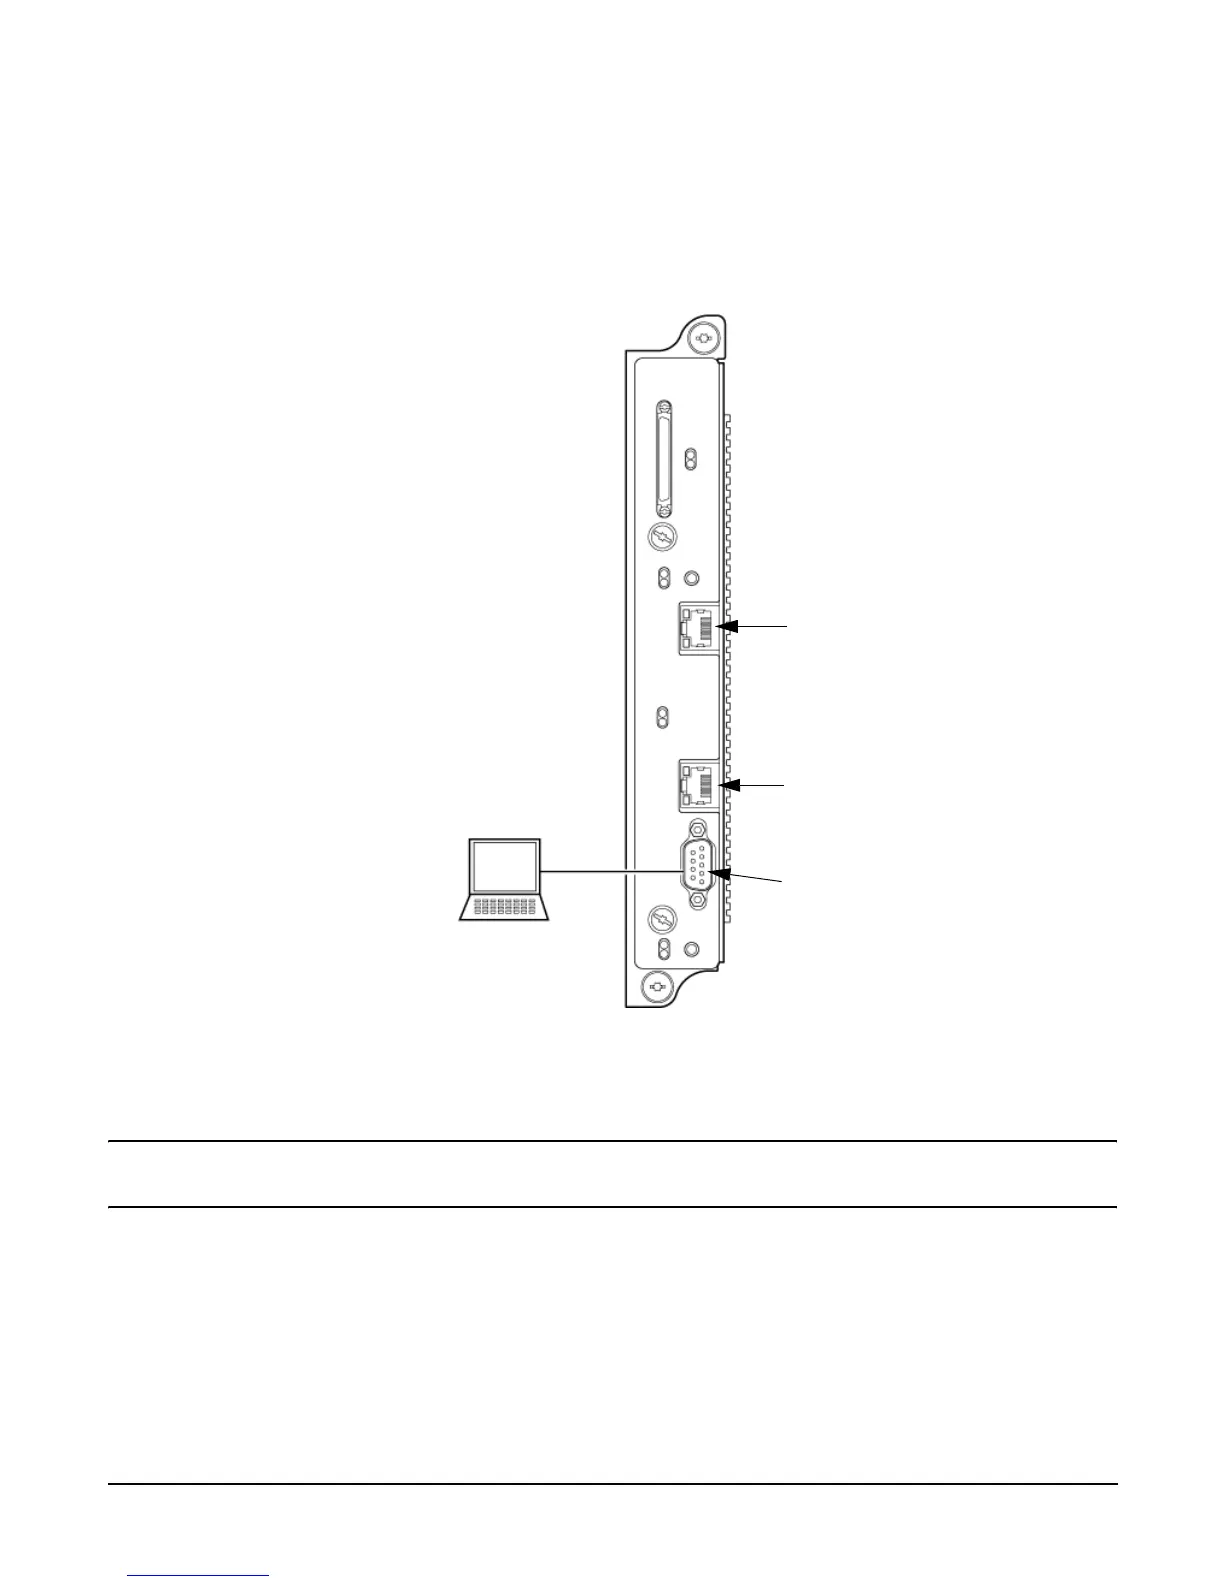
Step 1. Connect one end of a null modem cable (9-pin to 9-pin) (Part Number 5182-4794) to the RS-232
Local port on the core I/O card (the DB9 connector located at the bottom of the core I/O card). Refer
to Figure 2-30.
Figure 2-30 LAN and RS-232 Connectors on the Core I/O Board
NOTE The ability to telnet to the MP LAN port is available once the MP is configured via
the RS-232 Local port.
Step 2. Connect the other end of the RS-232 cable to the CE Tool.
Turning On Housekeeping Power and Logging In to the MP
After connecting the serial display device, the power to the server cabinet is ready to be supplied to get a login
prompt for the management processor (MP). Connecting the power cords allows power to flow to the bulk
power supplies (BPS) located at the front of the server cabinet, which in turn provides housekeeping power
(HKP).
RS-232 UPS Port
SYSTEM LAN Port
RS-232 Remote Port
GSP LAN Port
RS-232 Local Port
System LAN
(Customer LAN -
Assigned /dev/lan0)
MP LAN
(Assigned /dev/lan1)
RS-232 Local Port
CE Tool
(PC)
 Loading...