3. Remove the memory fan duct (Memory fan duct on page 26).
4. Remove the front card guide and fan (see Front card guide and fan on page 26).
5. Remove the memory fan (Memory fan on page 27).
6. Remove the system board (see System board on page 29).
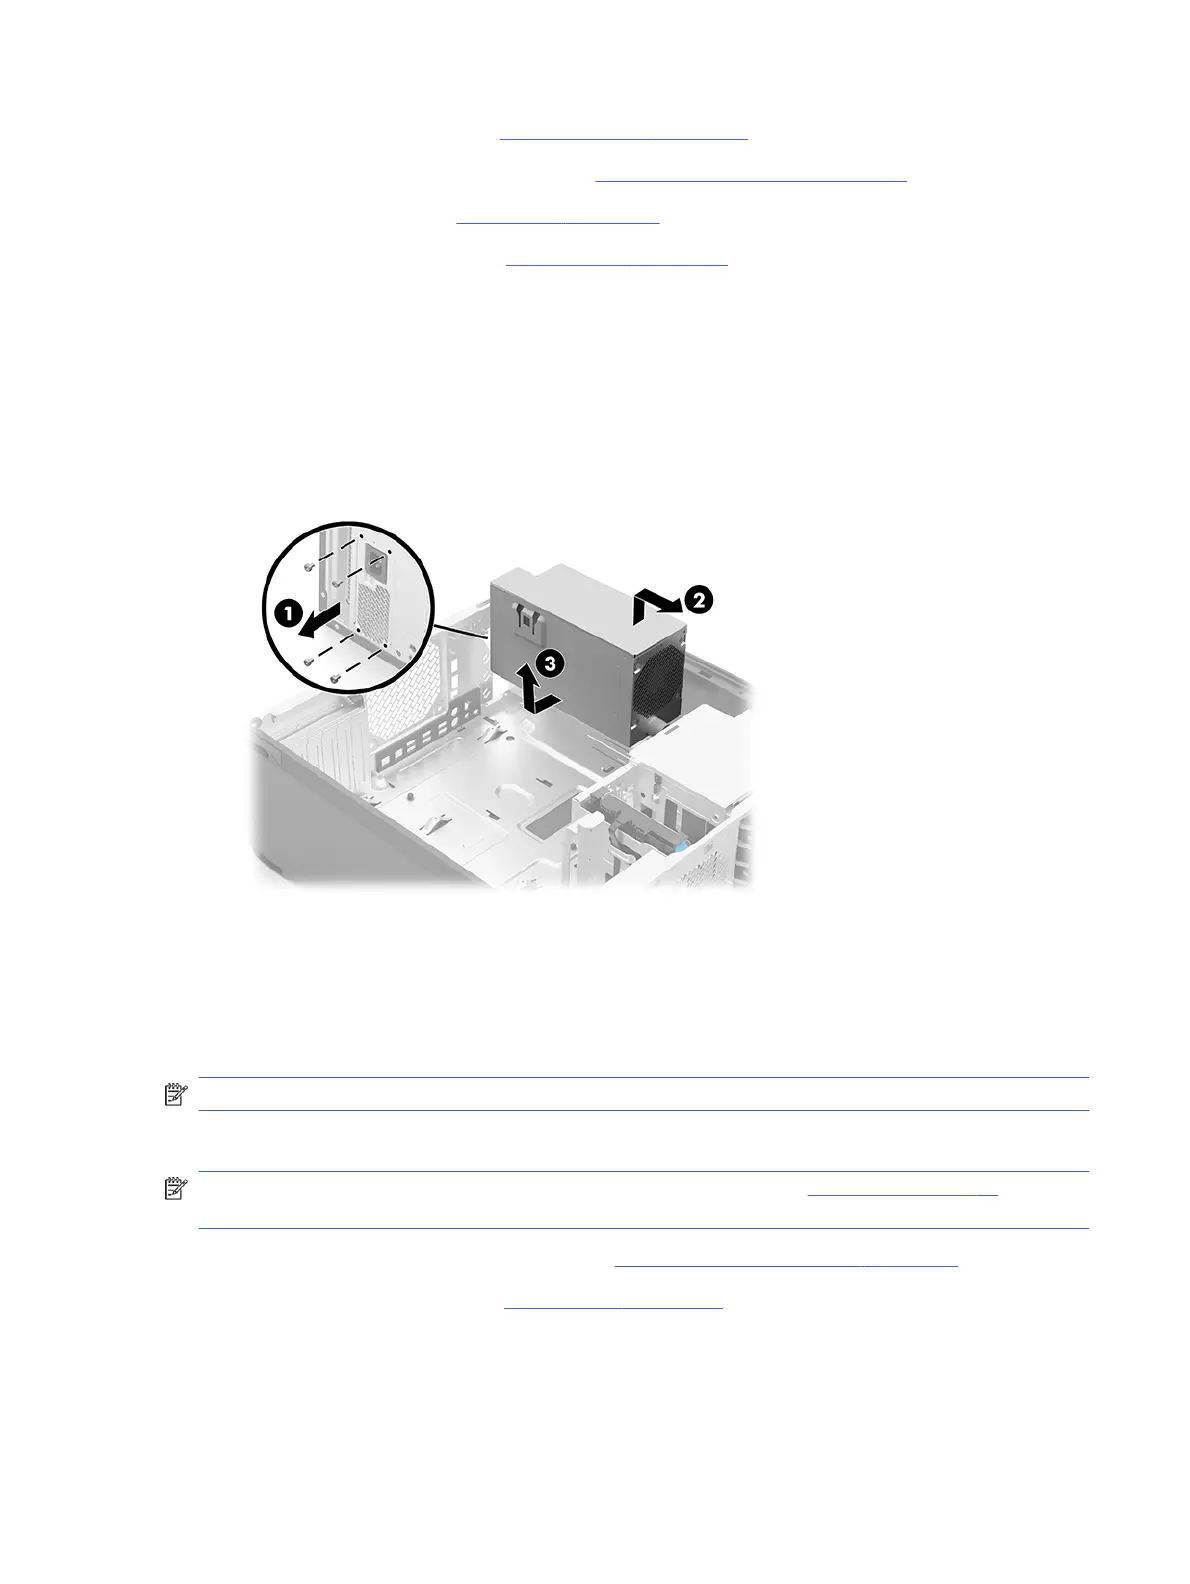
Remove the power supply:
1. Remove the four Torx15 M5.0 × 12.0 screws (1) that secure the power supply to the computer.
2. Lift the front edge of the power supply (2), and then slide it forward to disengage it from the bottom
of the computer chassis.
3. Slide the power supply (3) toward the middle of the computer chassis until it is clear of the
computer right edge, and then remove the power supply.
To install the power supply, reverse the removal procedures.
Heat sink
To remove the heat sink, use these procedures.
NOTE: The heat sink spare part kit includes replacement thermal material.
Before removing the heat sink, follow these steps:
NOTE: When replacing the heat sink, be sure that the processor (see Processor on page 32) is
removed from the defective heat sink and installed on the replacement heat sink.
1. Prepare the computer for disassembly (see Preparation for disassembly on page 18).
2. Remove the access panel (see Access panel on page 20).
Remove the heat sink:
1. Disconnect the heat sink fan cable from the system board (1).
Heat sink
31
 Loading...