10 TUNING THE CHASSIS 31
– After removing the shock absorber, clean it thoroughly.
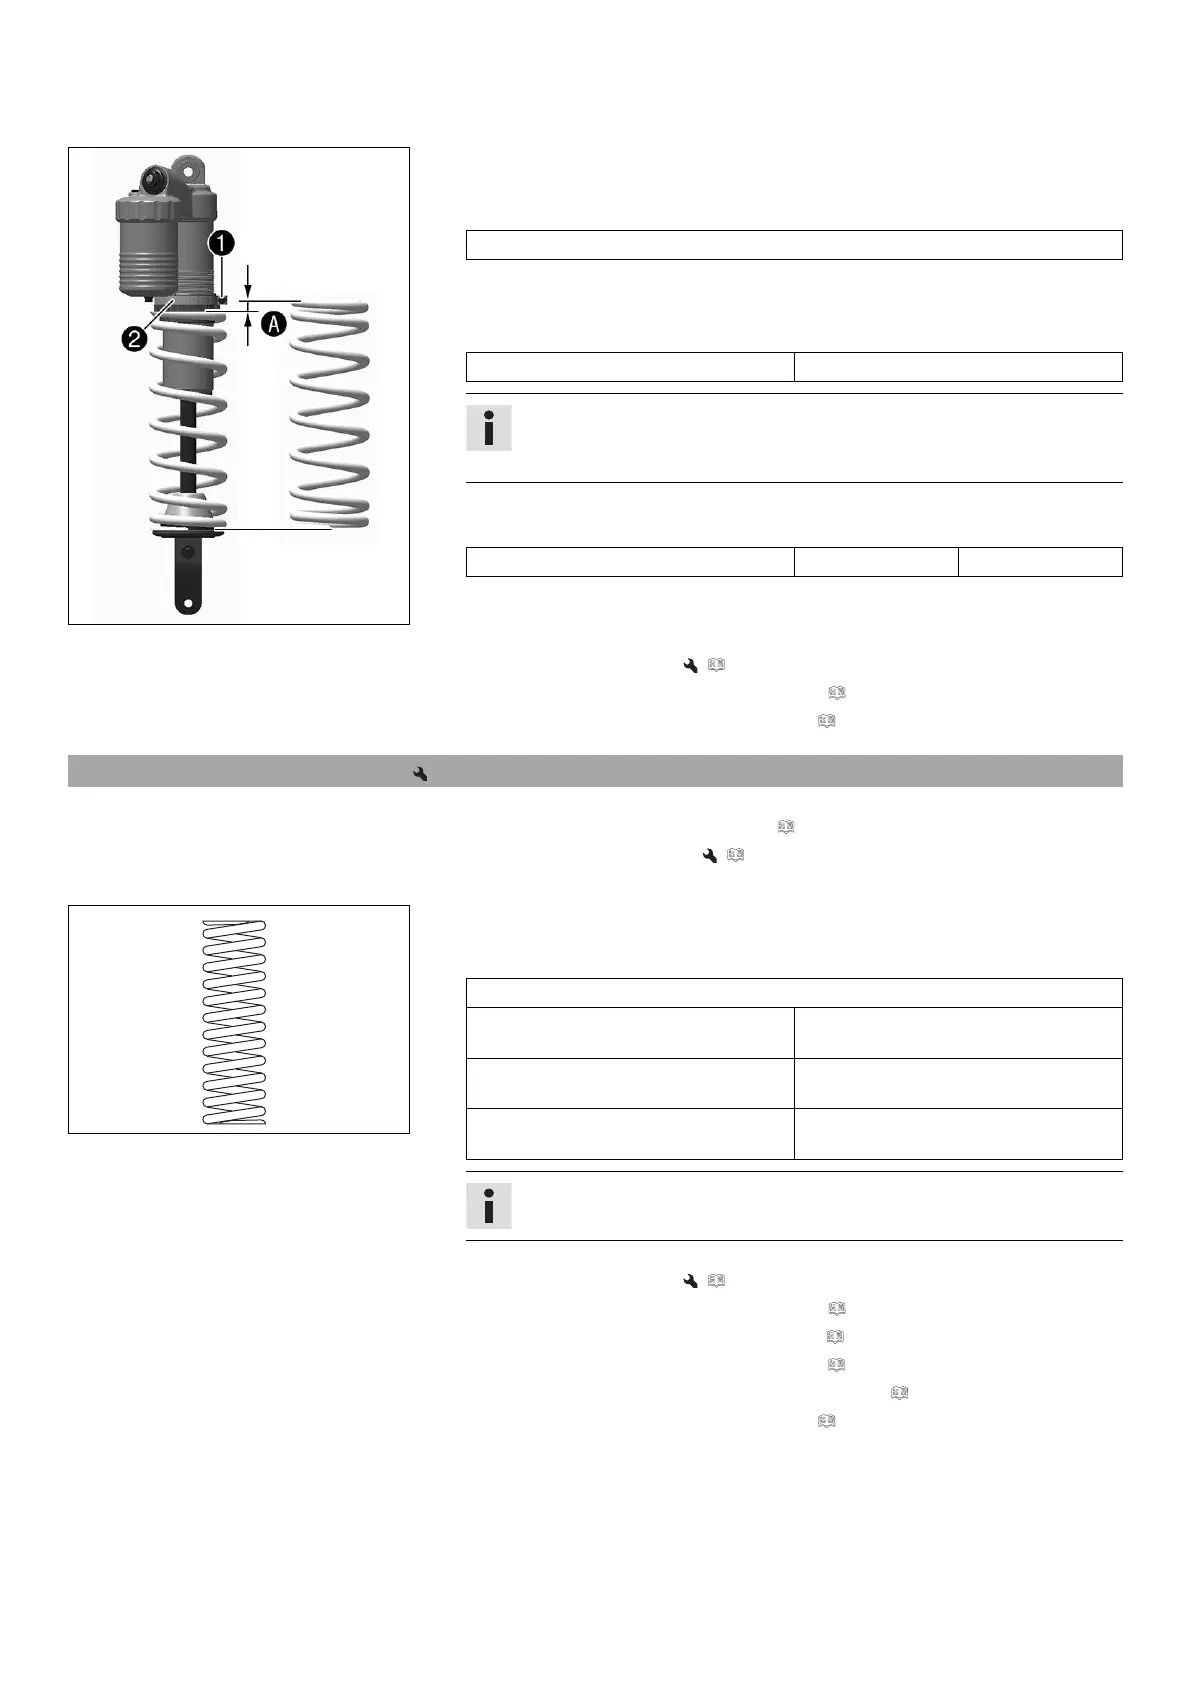
M01133-10
Main work
–
Loosen screw
.
–
Turn adjusting ring
until the spring is no longer under tension.
Hook wrench (T106S)
– Measure the overall spring length while the spring is not under tension.
–
Tighten the spring by turning adjusting ring
to measurement
.
Guideline
Spring preload 6 mm (0.24 in)
Info
Depending on the static sag and/or the riding sag, it may be necessary to
increase or decrease the spring preload.
–
Tighten screw
.
Guideline
Screw, shock absorber adjusting ring M5 5 Nm (3.7 lbf ft)
Finishing work
– Install the shock absorber. ( p. 44)
– Check the free travel of the foot brake lever. ( p. 64)
– Remove the motorcycle from the lift stand. ( p. 35)
10.11 Adjusting the riding sag
Preparatory work
– Raise the motorcycle with a lift stand. ( p. 35)
– Remove the shock absorber. ( p. 42)
– After removing the shock absorber, clean it thoroughly.
B00292-10
Main work
– Choose and mount a suitable spring.
Guideline
Spring rate
Weight of rider: 65… 75 kg (143…
165 lb.)
39 N/mm (223 lb/in)
Weight of rider: 75… 85 kg (165…
187 lb.)
42 N/mm (240 lb/in)
Weight of rider: 85… 95 kg (187…
209 lb.)
45 N/mm (257 lb/in)
Info
The spring rate is shown on the outside of the spring.
Finishing work
– Install the shock absorber. ( p. 44)
– Check the free travel of the foot brake lever. ( p. 64)
– Check the static sag of the shock absorber. ( p. 30)
– Check the riding sag of the shock absorber. ( p. 30)
– Adjust the rebound damping of the shock absorber. ( p. 29)
– Remove the motorcycle from the lift stand. ( p. 35)
 Loading...