A.9.1.2 Performing the White Balance Adjustment
Start the scanner as described in chapter A.6.1. While the start sequence is running, tap
on the touch panel at least three times successively.
At the end of the start sequence the touch panel shows the menu Self Test 1 (Picture 25).
Tap on the field White Balance to activate the adjustment process.
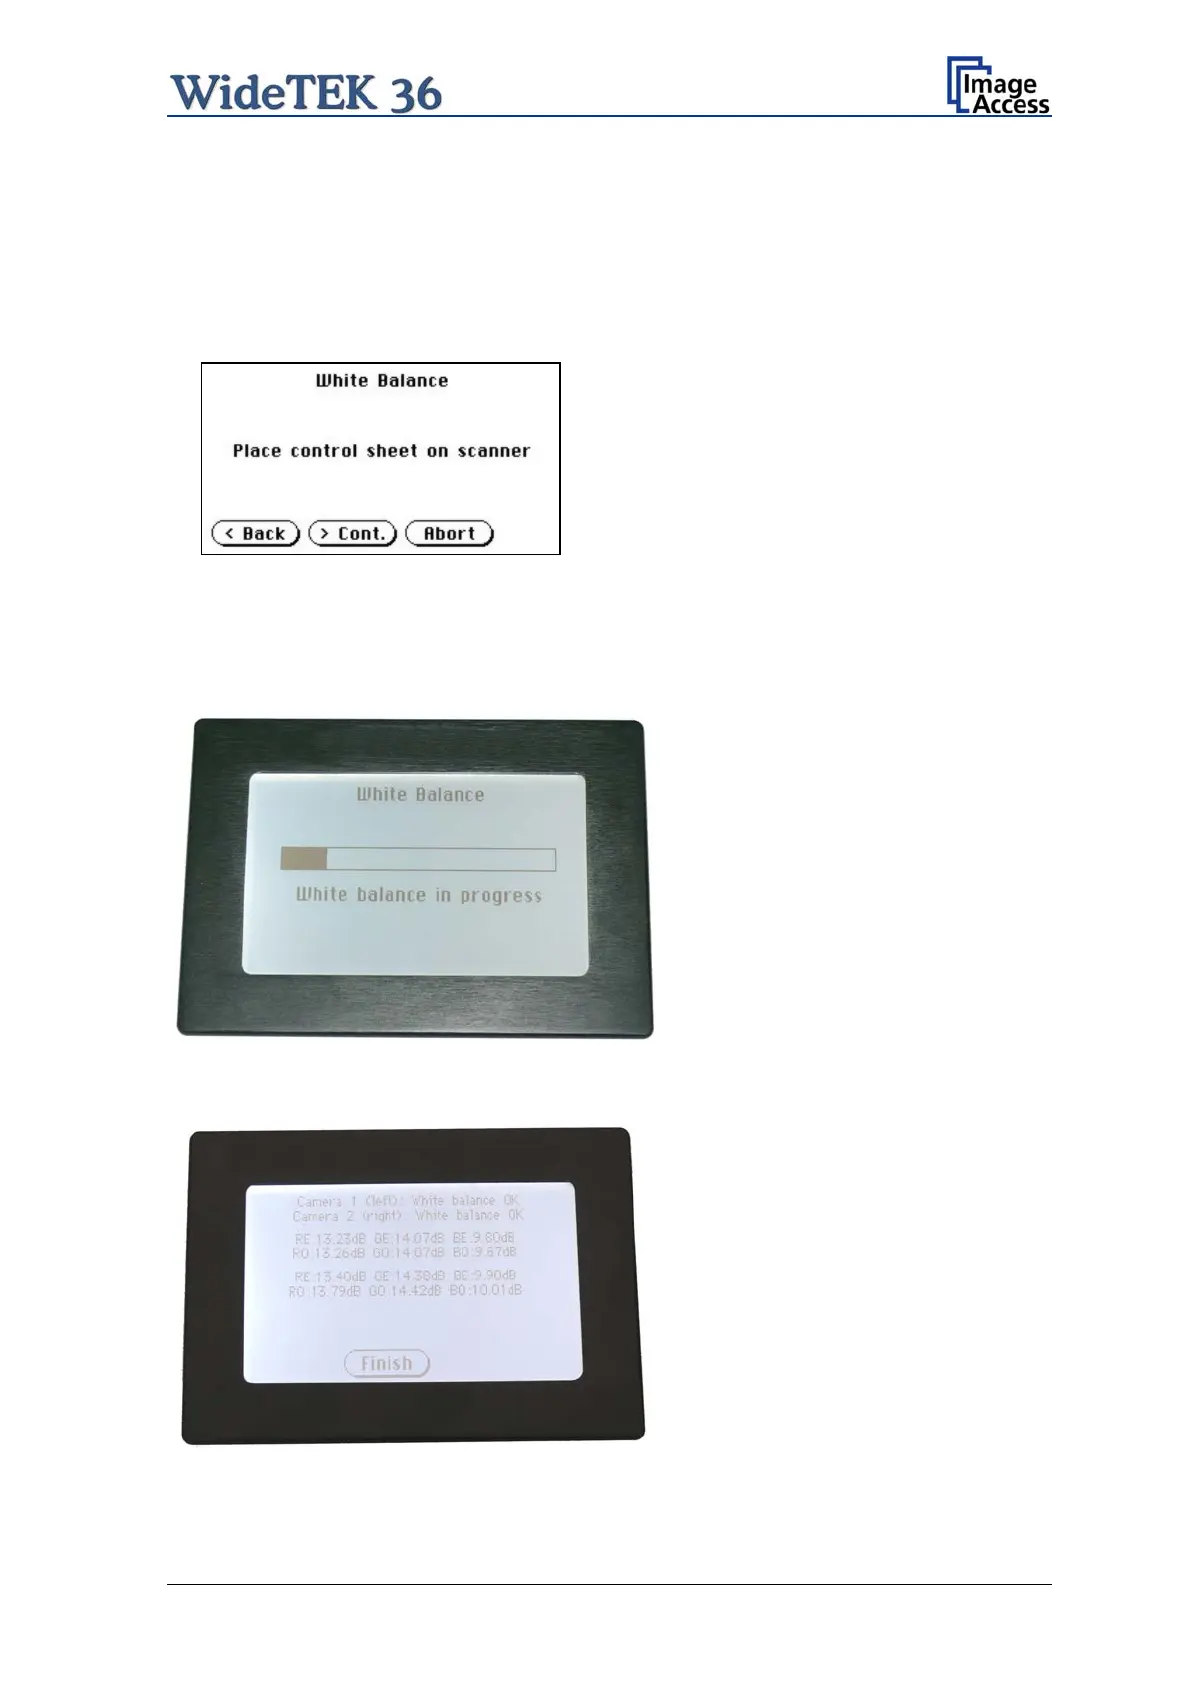
Picture 29: White Balance screen
< Back Returns to the former screen.
> Cont. Starts the measurement.
Abort Stops the measurement and the
display returns to the former
screen.
Place the white balance test target WT36-Z-02-A in the document input. The test target
covers the complete width.
Now tap on > Cont.
Picture 30: Progress indicator
While the white balance adjustment is
running, the touch panel shows a
progress indicator.
Picture 31: White balance result
At the end of the measurement the
result will be displayed in the touch
panel.
Tap on the field Finish to return to
the menu Self Test 1.
Setup and Assembly Manual Page 33

 Loading...


