4-88 4222983 Second Edition
ELECTRICAL
4
3. Move the mow switch to the run position and observe
the digit at position (2).
Does the zero change to a one when the mow
switch is moved to the on position?
YES Mow switch is good. Proceed to the next
step.
NO The mow switch is faulty. Check connections
at switch and/or bench test switch and
replace as needed.
4. Sit in the seat and observe the digit at position (3).
Does the zero change to a one when the seat
switch it engaged?
YES Seat switch is good. Proceed to next step.
NO The seat switch is faulty. Check connections
at switch and/or bench test switch and
replace as needed.
5. Toggle the LCD to the CAN Bus Status Screen.
Figure 4-65
6. Observe the RCU status (4). A flashing display
indicates the controller is not communicating.
Is the RCU communicating with the CAN system?
YES RCU communication is good. Proceed to the
next step.
NO RCU communication is faulty. Check CAN
line connections and 48 Volt input LED on
the RCU.
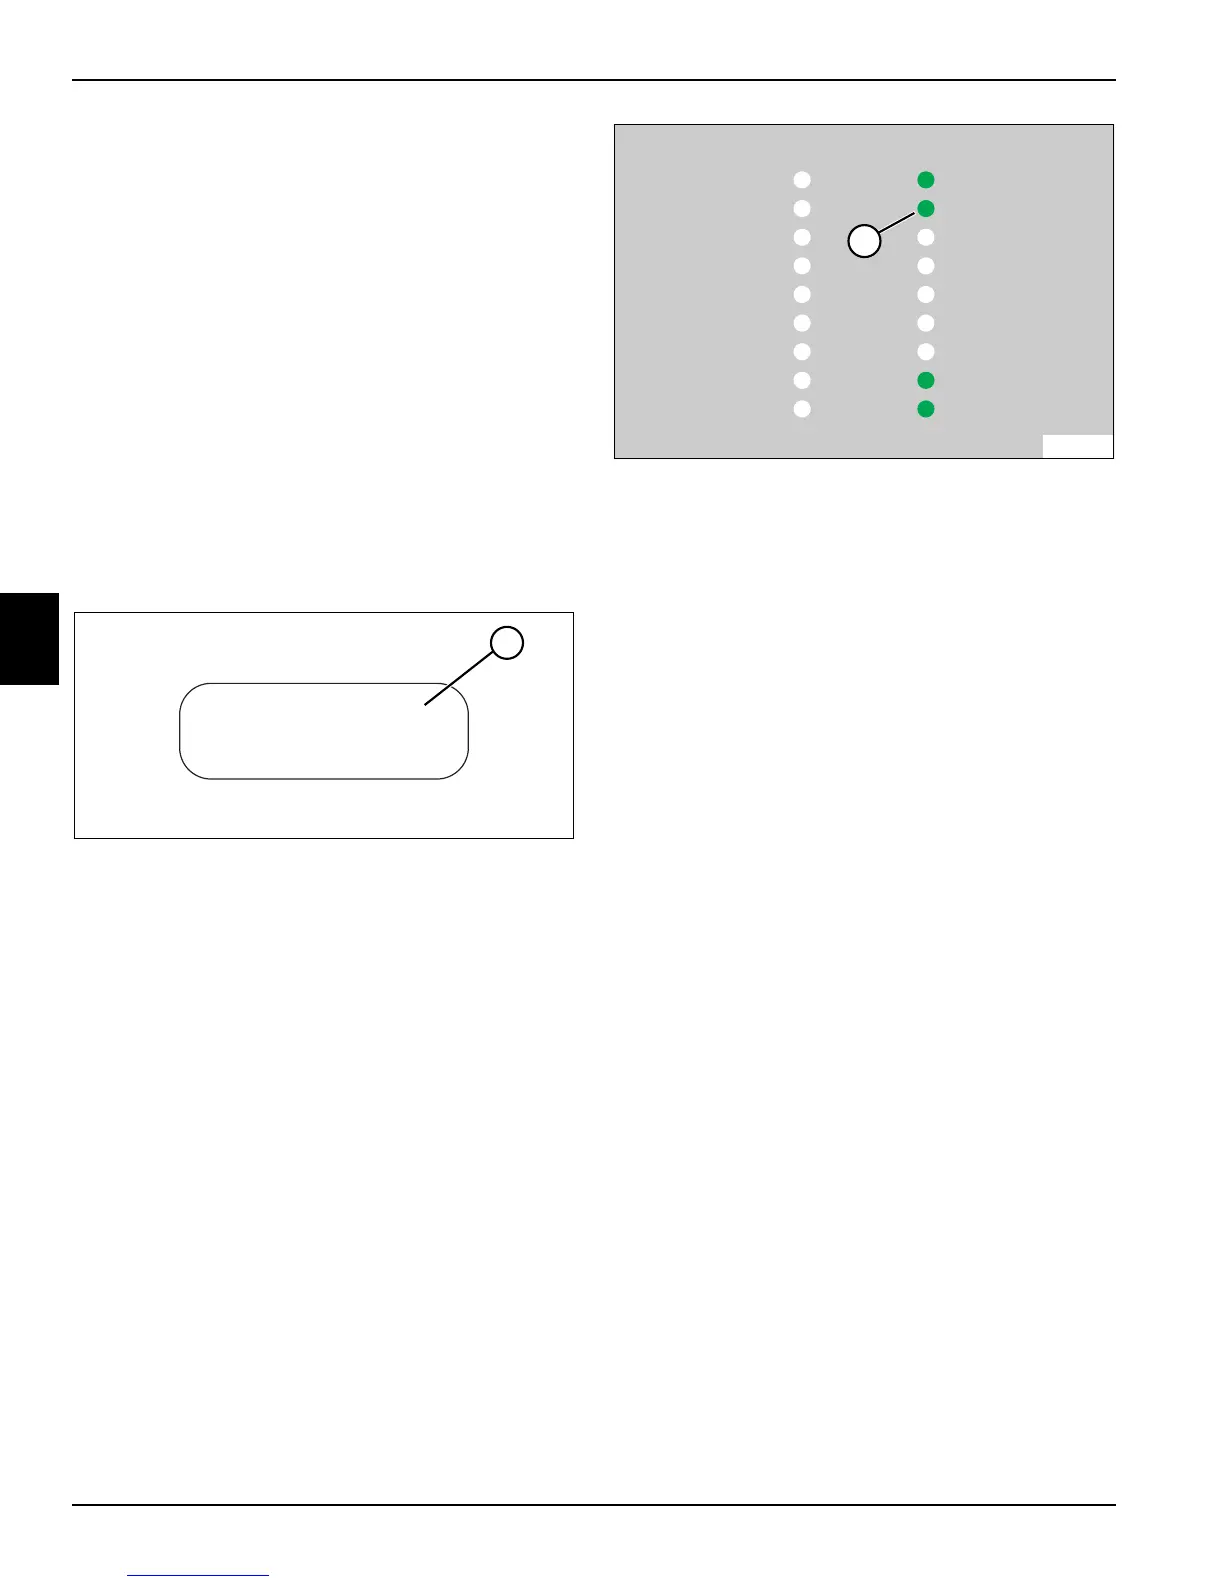
7. Enable the left reel switch, place the mow switch in
the on position, and remove the RCU access plug on
the side of the steering tower.
Figure 4-66
8. Sit in the seat and move the raise/lower switch to the
lower position. Observe the left reel motor output
LED (5).
Does the left reel motor output LED illuminate?
YES The left reel motor output signal is good.
Proceed to the next step.
NO The left reel motor output signal is faulty.
Turn the key switch off, disconnect the left
reel motor connectors. Turn the key switch
on and repeat steps 7 and 8. If results
remain unchanged, replace RCU. If results
change, proceed to next step.
9. Disconnect the left reel motor connector J20 (two
wire connector).
10. Connect a multimeter to the harness side of
connector J20, placing a probe on each pin. Set the
multimeter to VDC.
11. Sit in the seat, enable the left reel switch, place the
mow switch in the on position, move the raise/lower
switch to the lower position and observe the voltage
measurement.
Does the multimeter display 48VDC (+ or -)?
YES The wire harness is good. Proceed to the
next step.
NO Wire harness or connections are faulty.
Perform continuity test and repair/replace as
needed.
12. Disconnect the left reel motor connectors and route
them to the right reel motor. Connect the left reel
motor connectors to the right reel motor. Sit in the
seat, enable the left reel switch, place the mow
switch in the on position, and move the raise/lower to
the lower position.
Does the right reel motor engage?
YES The left reel motor is faulty. Replace as
needed.
CAN MCU RCU
OLM TCU SCU
TN2764
4
CAN RX
CAN TX
LEFT REEL TYPE
LEFT REEL DIR
LEFT ACT LOWER
LEFT ACT RAISE
RIGHT REEL MOTOR
LEFT REEL MOTOR
+48VDC INPUT
1
2
3
4
5
6
7
8
9
RIGHT REEL TYPE
RIGHT REEL DIR
RIGHT ACT LOWER
RIGHT ACT RAISE
CENTER REEL MOTOR
CENTER ACT LOWER
CENTER ACT RAISE
CENTER REEL TYPE
CENTER REEL DIR
10
11
12
13
14
15
16
17
18
TN2822
5

 Loading...