4-150 4222983 Second Edition
ELECTRICAL
4
Fuses
Removal and Installation
See Figures 4-124 and 4-125.
WARNING
1. Park the mower safely. (See “Park Mower Safely” on
page 1-6.)
2. Remove left side cowling. (See “Cowlings” on
page 7-18.)
3. Remove MCU. (See “MCU” on page 4-138.)
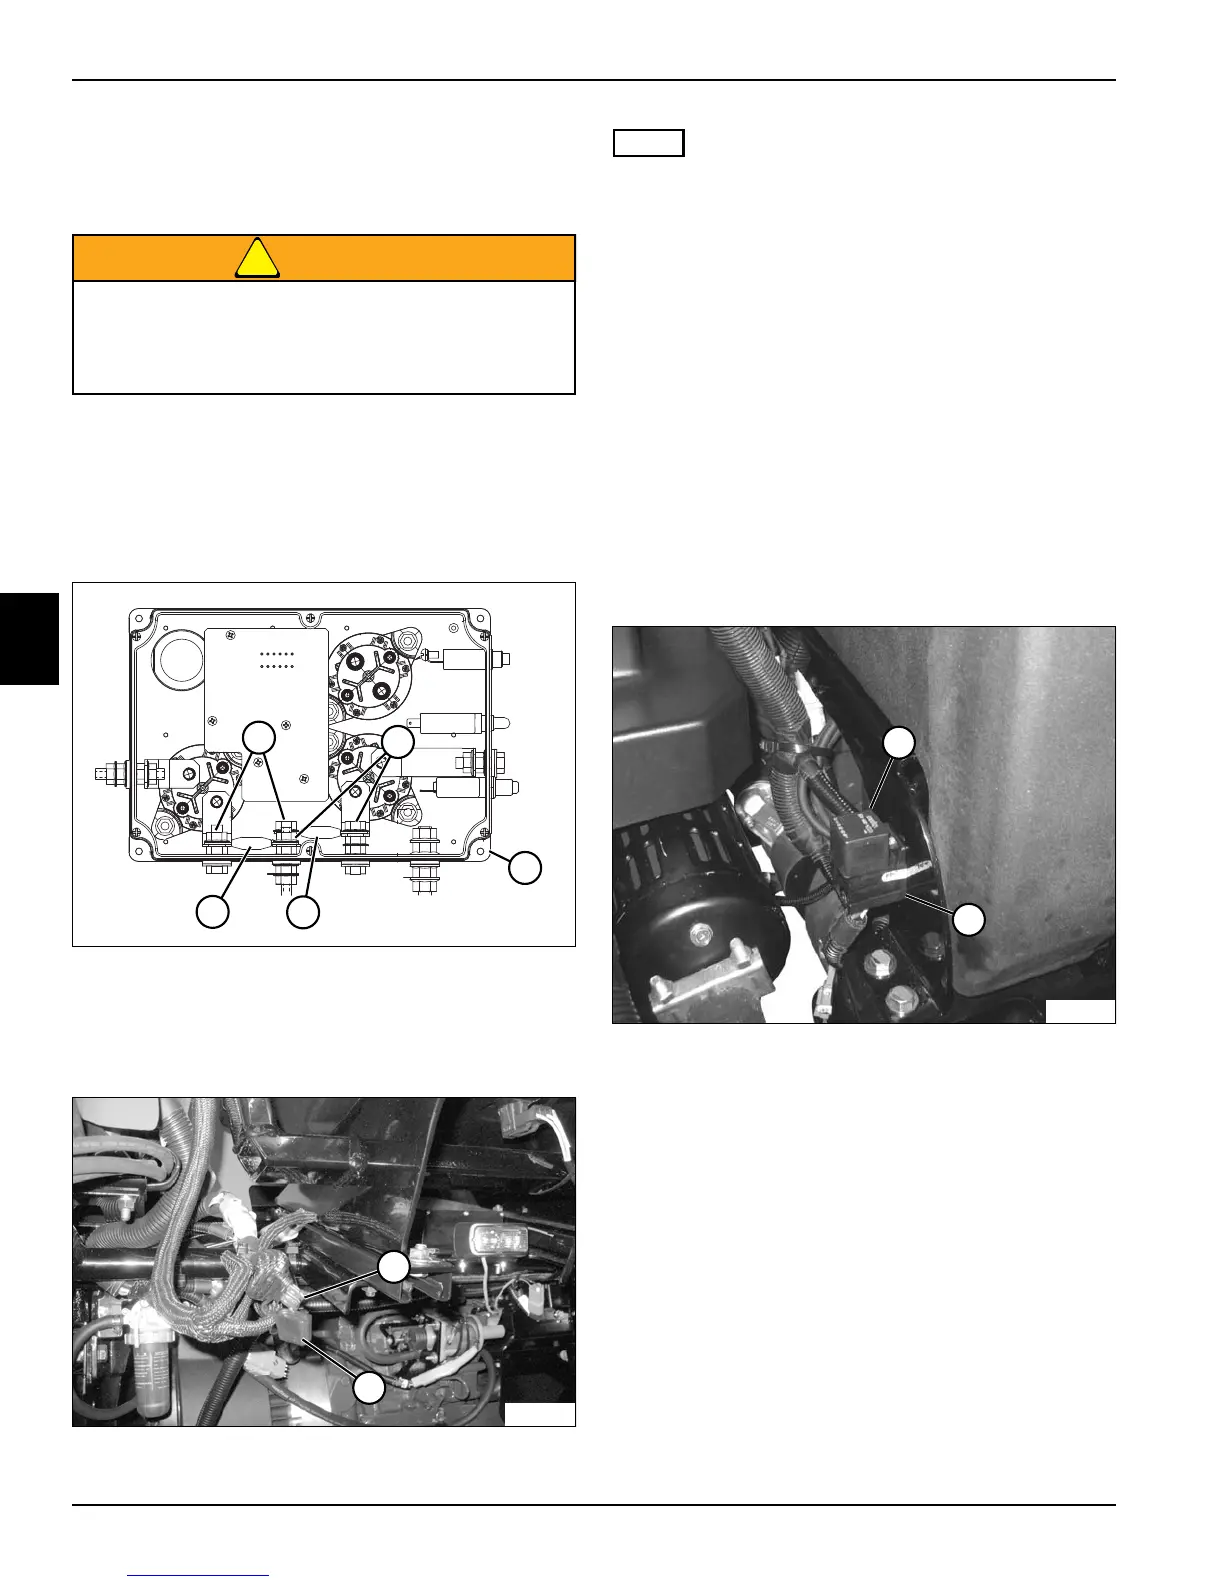
Figure 4-124
4. Remove top cover from the PDU (4).
5. Remove two nuts (2) and remove 300A fuse (1).
6. Remove two nuts (3) and remove 150A fuse (5).
Figure 4-125
NOTE
The accessory socket fuse is located under the seat.
7. Remove the protective fuse cover (7) and remove
accessory socket fuse (6).
Installation Notes
• Install fuses by reversing the order of removal.
• Apply dielectric grease (Jacobsen PN 365422) to
fuse socket prior to installation.
• Tighten nuts (2 and 3) to 80 lb-in. (9 N·m).
Fan Relay
Removal and Installation
See Figure 4-126.
1. Park the mower safely. (See “Park Mower Safely” on
page 1-6.)
Figure 4-126
2. Pull fan relay (1) straight up and remove from relay
base (2).
Installation Notes
• Install fan relay by reversing the order of removal.
• Apply dielectric grease (Jacobsen PN 365422) to
relay base connectors prior to installation.
Be sure that the key switch is off, all electrical
accessories are turned off, and the 12-volt and
48-volt power connectors are disconnected
before starting work on machine.
4
TN2685
1
5
2
3
6
7
TN2686
TN2713
1
2

 Loading...