CUTTING UNITS
4222983 Second Edition 6-23
6
Repair
Reel Leveling Rod
Removal and Installation
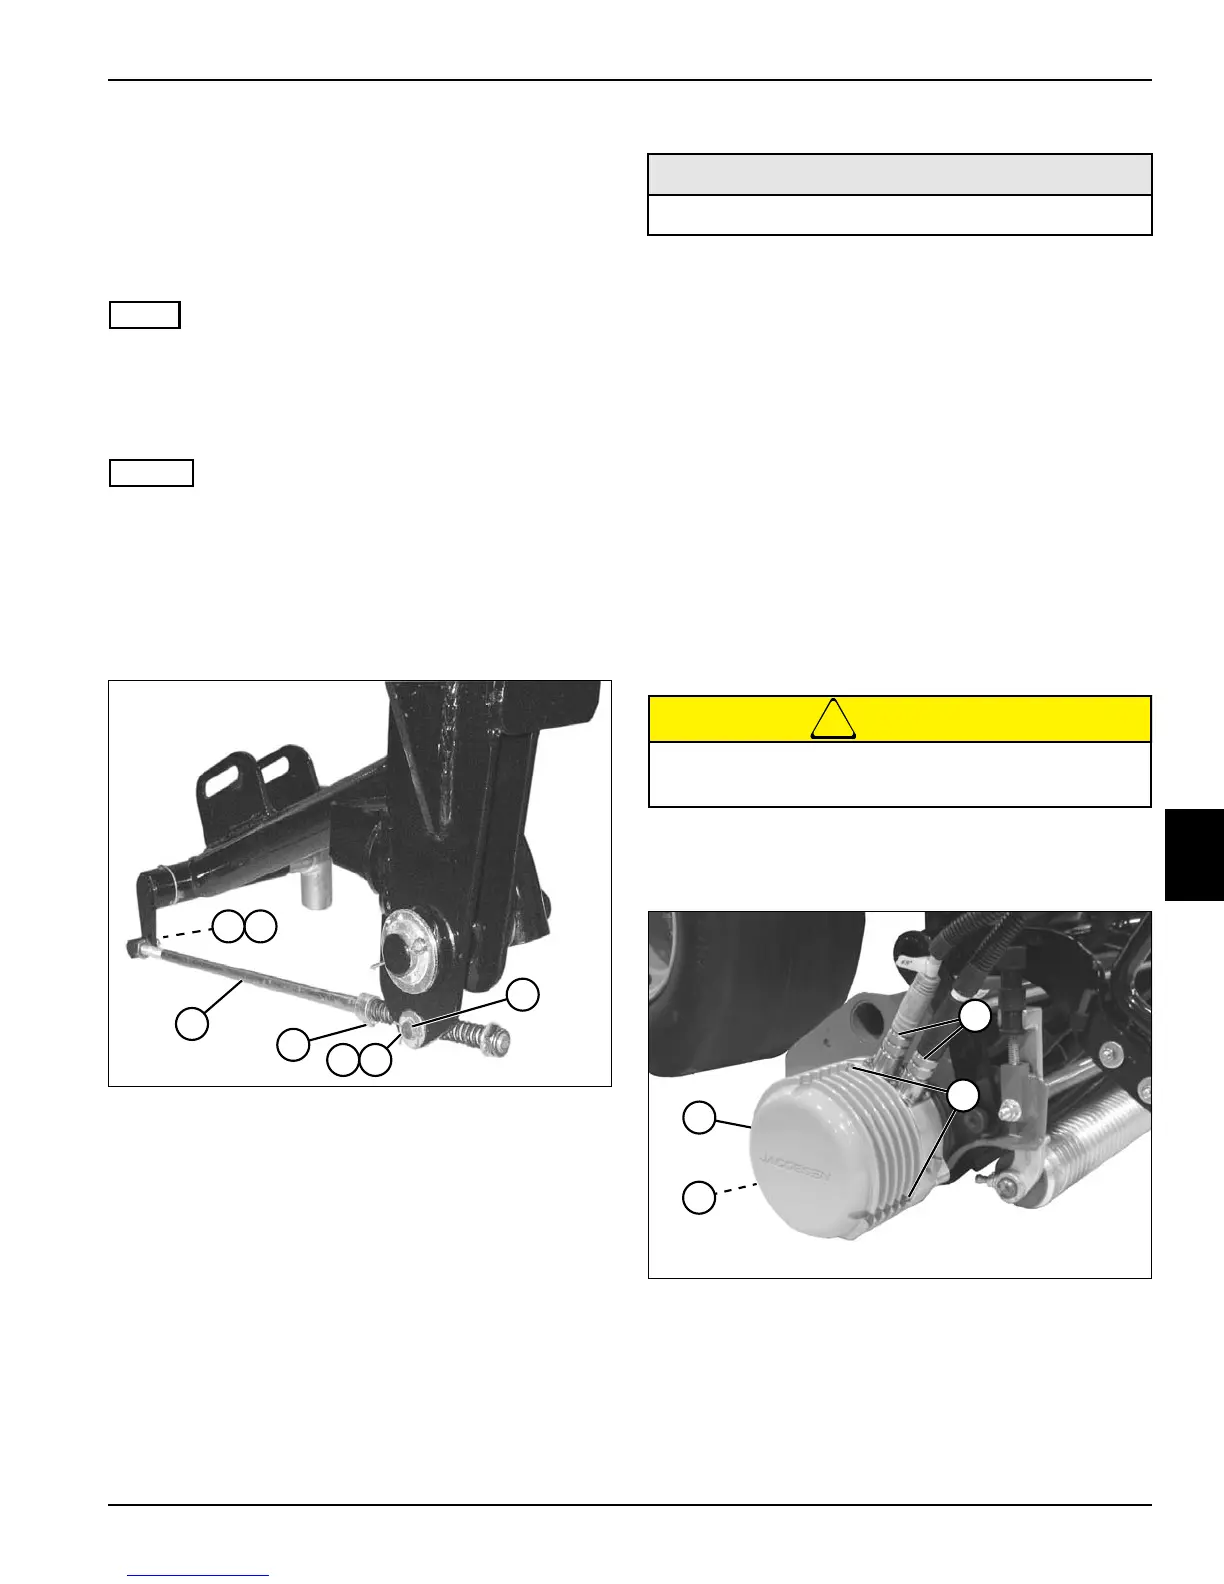
See Figure 6-20.
NOTE
The center reel leveling rod is shown; the right and left
reel leveling rods are similar.
1. Park the mower safely. (See “Park Mower Safely” on
page 1-6.)
NOTES
• For removal purposes, do not place the lift actuator in
the fully down position.
• If working on the center cutting unit, swing the cutting
unit out from the machine and lock into position.
2. Lower the cutting unit to the ground and disengage
all switches.
Figure 6-20
3. Remove cotter pins (1) and flat washers (2).
4. Remove reel leveling rod (5) from machine.
Installation Notes
•
• Apply marine lubrication grease to I.D. of rod
connecting pin (3) and reel leveling rod (5) at area
beneath the springs.
• Apply Loctite
®
242 (Blue) to set screw (4).
• Pre-adjust the reel leveling rod before installation.
(See “Reel Leveling Rod Pre-Adjustment” on
page 6-22.)
• Install reel leveling rod by reversing the order of
removal.
• Level the cutting unit. (See “Cutting Unit Leveling
Adjustment” on page 6-22.)
Reel Drive Motor
Removal and Installation
See Figures 6-21 and 6-22.
CAUTION
1. Park the mower safely. (See “Park Mower Safely” on
page 1-6.)
Figure 6-21
2. Disconnect reel drive motor harness connectors (1).
3. Remove screws (2) and reel drive motor (3).
TN2411
21
5
21
3
4
Required Materials
Loctite
®
242 (Blue)
Use care when handling reel drive motor to avoid
damage to reel drive motor harness connectors.
TN2644
3
1
2
2

 Loading...