12 - 1
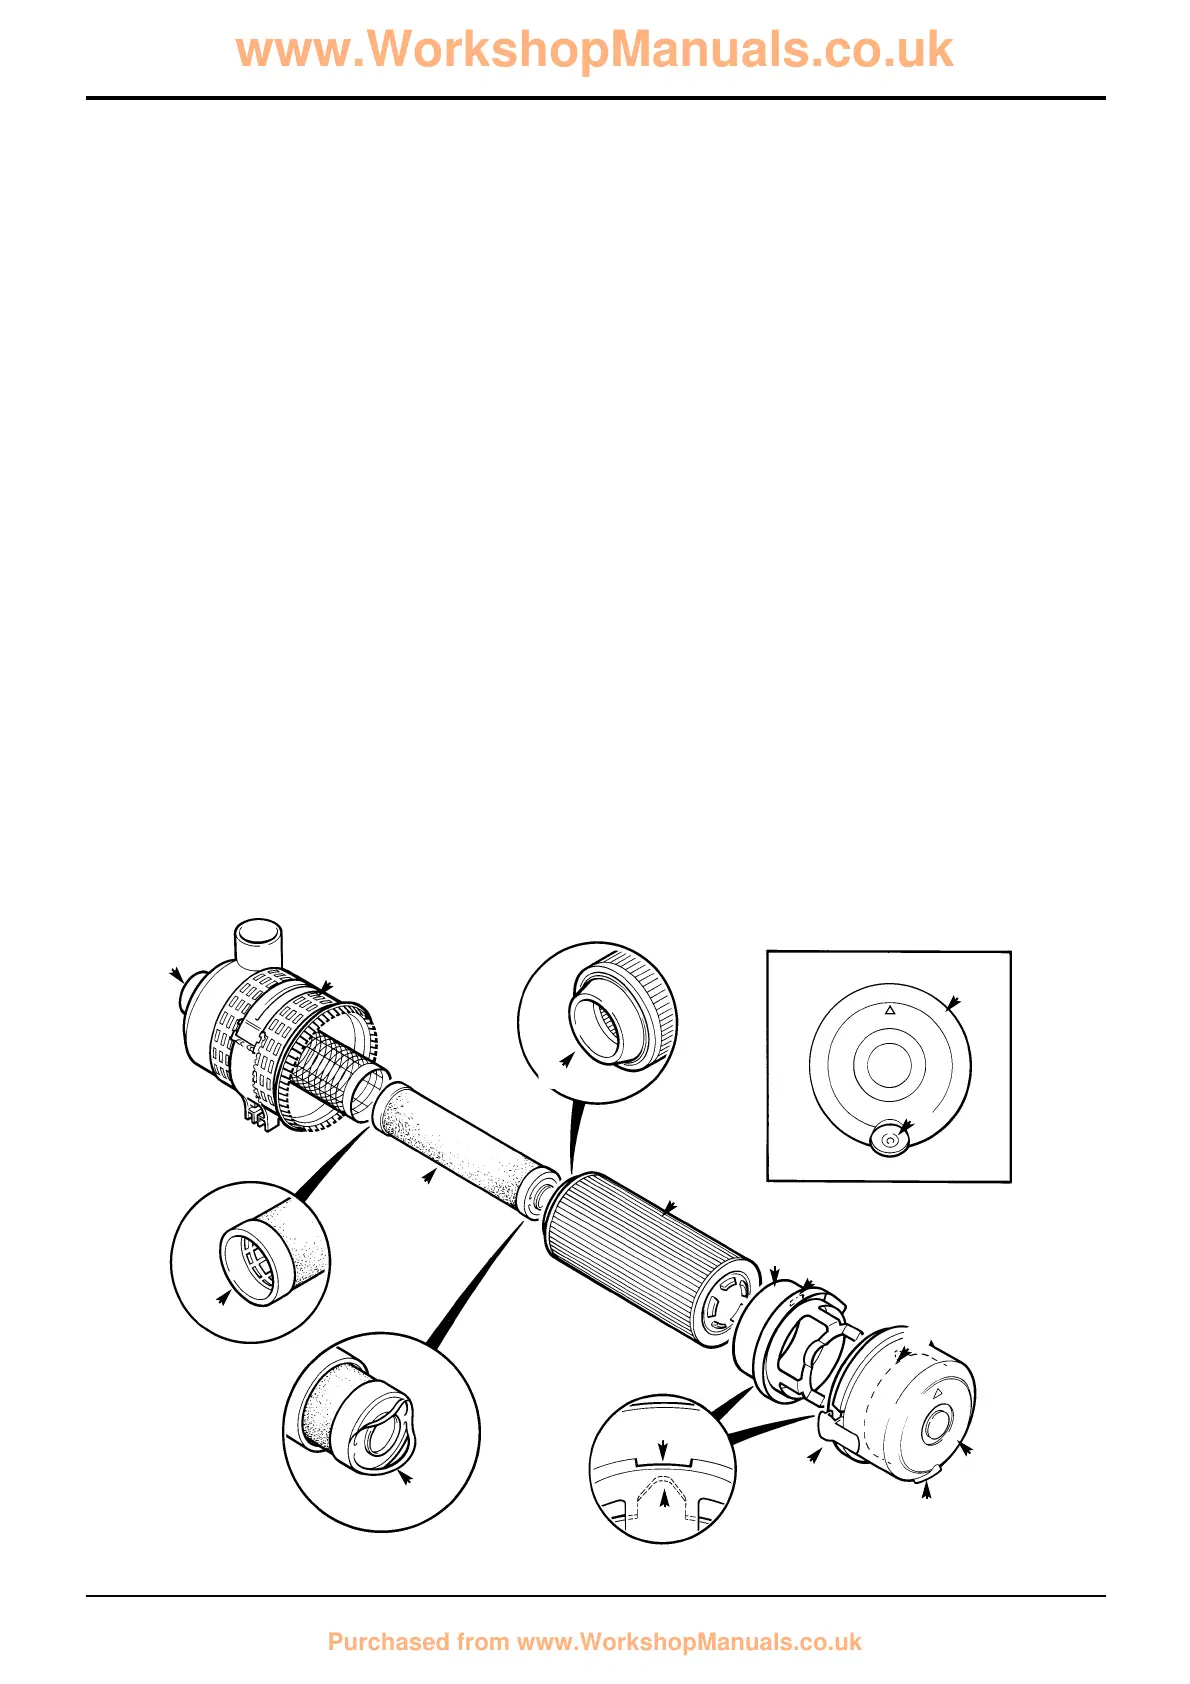
Changing the Elements
!
CAUTION
The outer element must be renewed immediately if the
warning light on the instrument panel illuminates.
2-3-3-1
Note: Do not attempt to wash or clean the elements - they
must only be renewed.
Note: Do not run the engine with the dust valve J removed.
Note: A new inner element must be fitted at least every third
time the outer element is changed. As a reminder, mark the
inner element with a felt tipped pen each time the outer
element is changed.
1 Stop the engine.
2 Remove the engine side panel (left hand side).
3 If changing the inner element, cover the end of the hose
to prevent rain and dirt from getting into the engine.
4 Depress clips B and lift off cover C. Remove outer
element D. Take care not to tap or knock the element. If
the inner element is to be changed, lift up pulls E and
remove inner element F. On turbocharged engines,
remove pulsation ring L.
5 Clean inside the canister H, pulsation ring L, cover C
and dust valve J.
6 Insert the new elements into the canister, pushing them
firmly in so that seals G and K are fully seated. On
turbocharged engines, assemble the pulsation ring L
into the cover, making sure that tongue M fits into slot
N. Fit cover C with dust valve J at the bottom. Push the
cover firmly into position and make sure it is secured by
clips B.
Note: Pulsation ring L is not fitted in this application.
7 Refit the induction hose to stub pipe A. Make sure that
the wire is connected to the Air Filter Blocked switch.
Section 3 Routine Maintenance
9803/3280
Section 3
12 - 1
Issue 1
Engine Air Filter
H
A
G
K
F
D
E
L
N
M
C
J
M
N
B
J
C
S257910
 Loading...