112-4
Section F Transmission
9803/3280
Section F
112-4
Issue 2*
Synchro Shuttle Gearbox
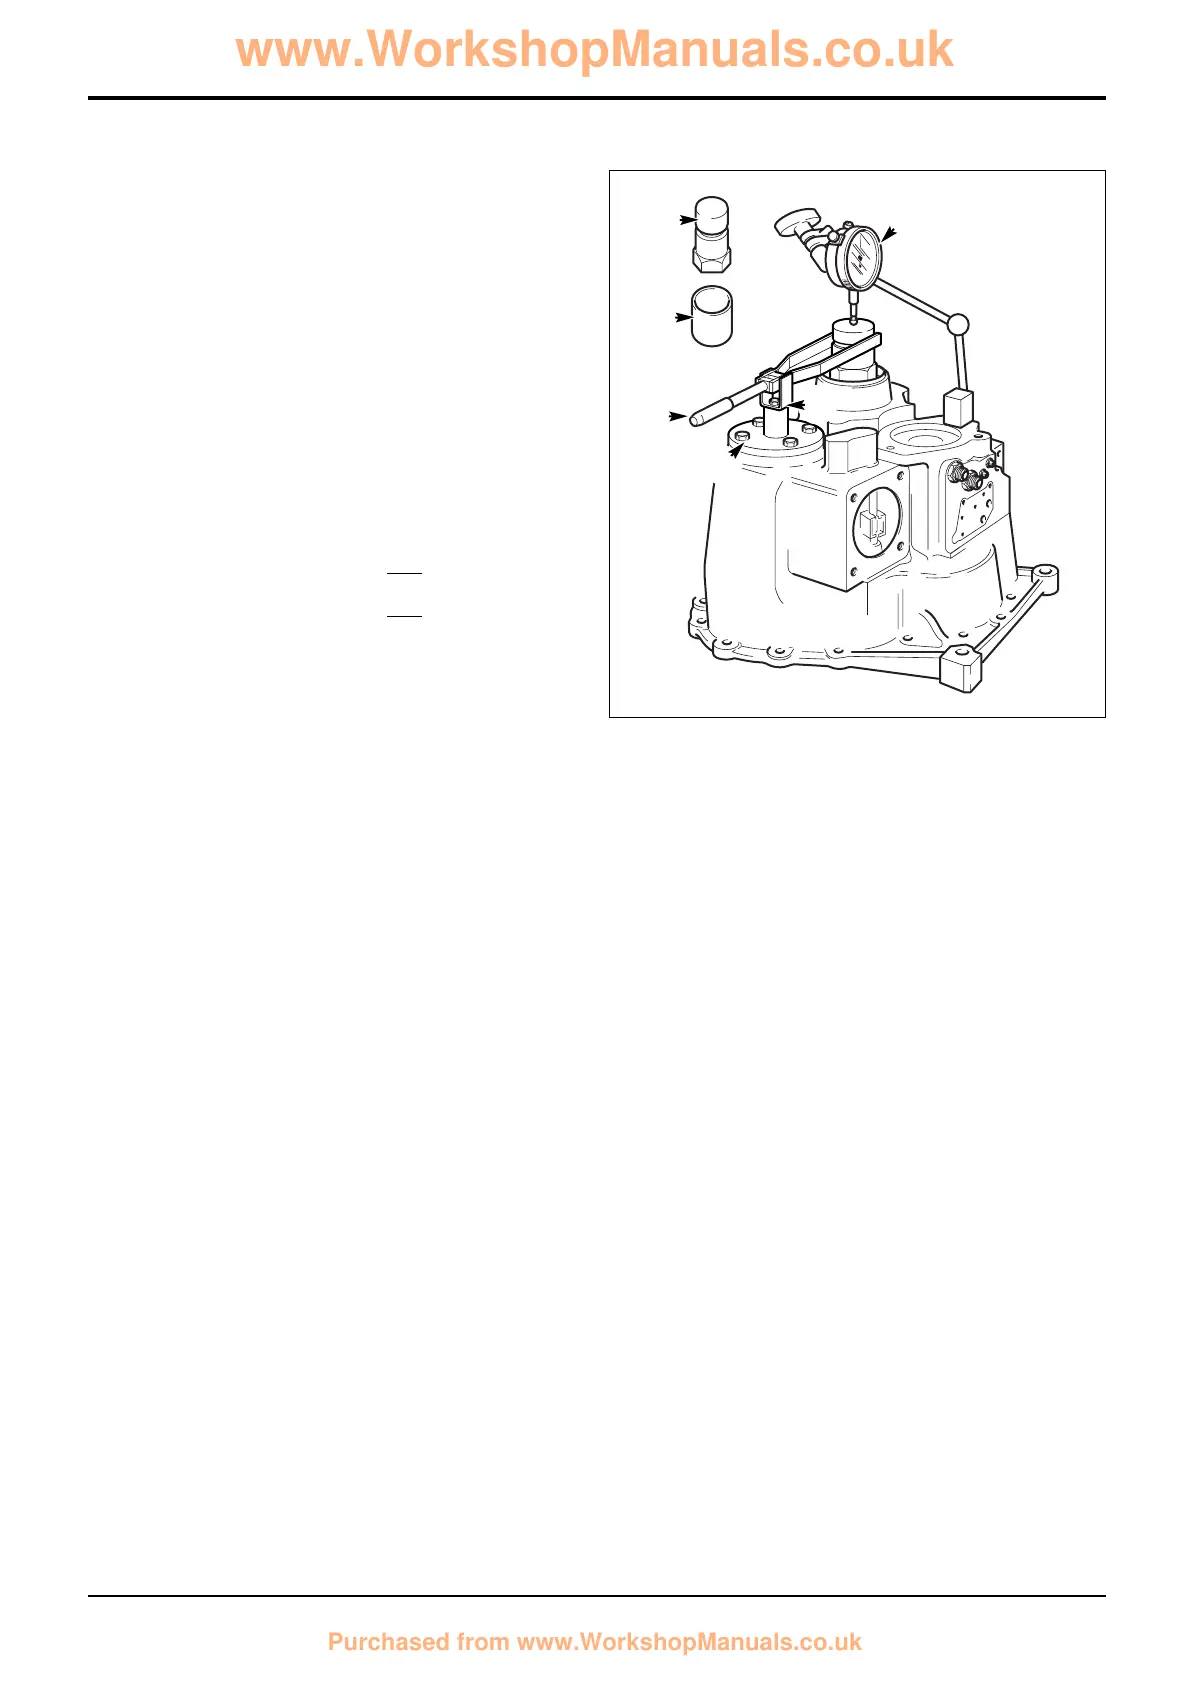
Assembly (cont'd)
11 a Fit dial test indicator E (DTI) .
b Set torque wrench F to 35 Nm and measure the end
float while rotating the output shaft.
c To select the right size spacer, subtract the end
float obtained at step 11b from the solid spacer
(13.70 mm). Also subtract 0.120 mm to allow for
theoretical bearing tolerance and pre load. If there is
no spacer of this size, fit the next smallest spacer.
Example
Service spacer 13.70
Subtract end float 0.41
Total 13.29
Subtract tolerance & preload 0.12
Result 13.17
Use next smallest spacer ie. 13.15
d Remove special nut B and sleeve A. Remove rear
bearing and 13.70 mm spacer. Fit correct size
spacer (Do no fit the oil seal at this stage). Take care
to avoid damaging the outer bearing.
e Fit sleeve A and initially tighten nut B to 50 Nm (36.9
lbf ft). Check there is no end float and rolling torque
less than 1.5 Nm (1.0 lbf ft). If the rolling torque
exceeds 1.5 Nm (1.0 lbf ft) check that the output
shaft has been assembled correctly.
f If the rolling torque measured is too high, fit the next
larger size spacer. If there is end float, fit the next
smaller size spacer.

 Loading...