3
ENGLISH
< Fixing of the rubber cushion and set-up of the sewing machine >
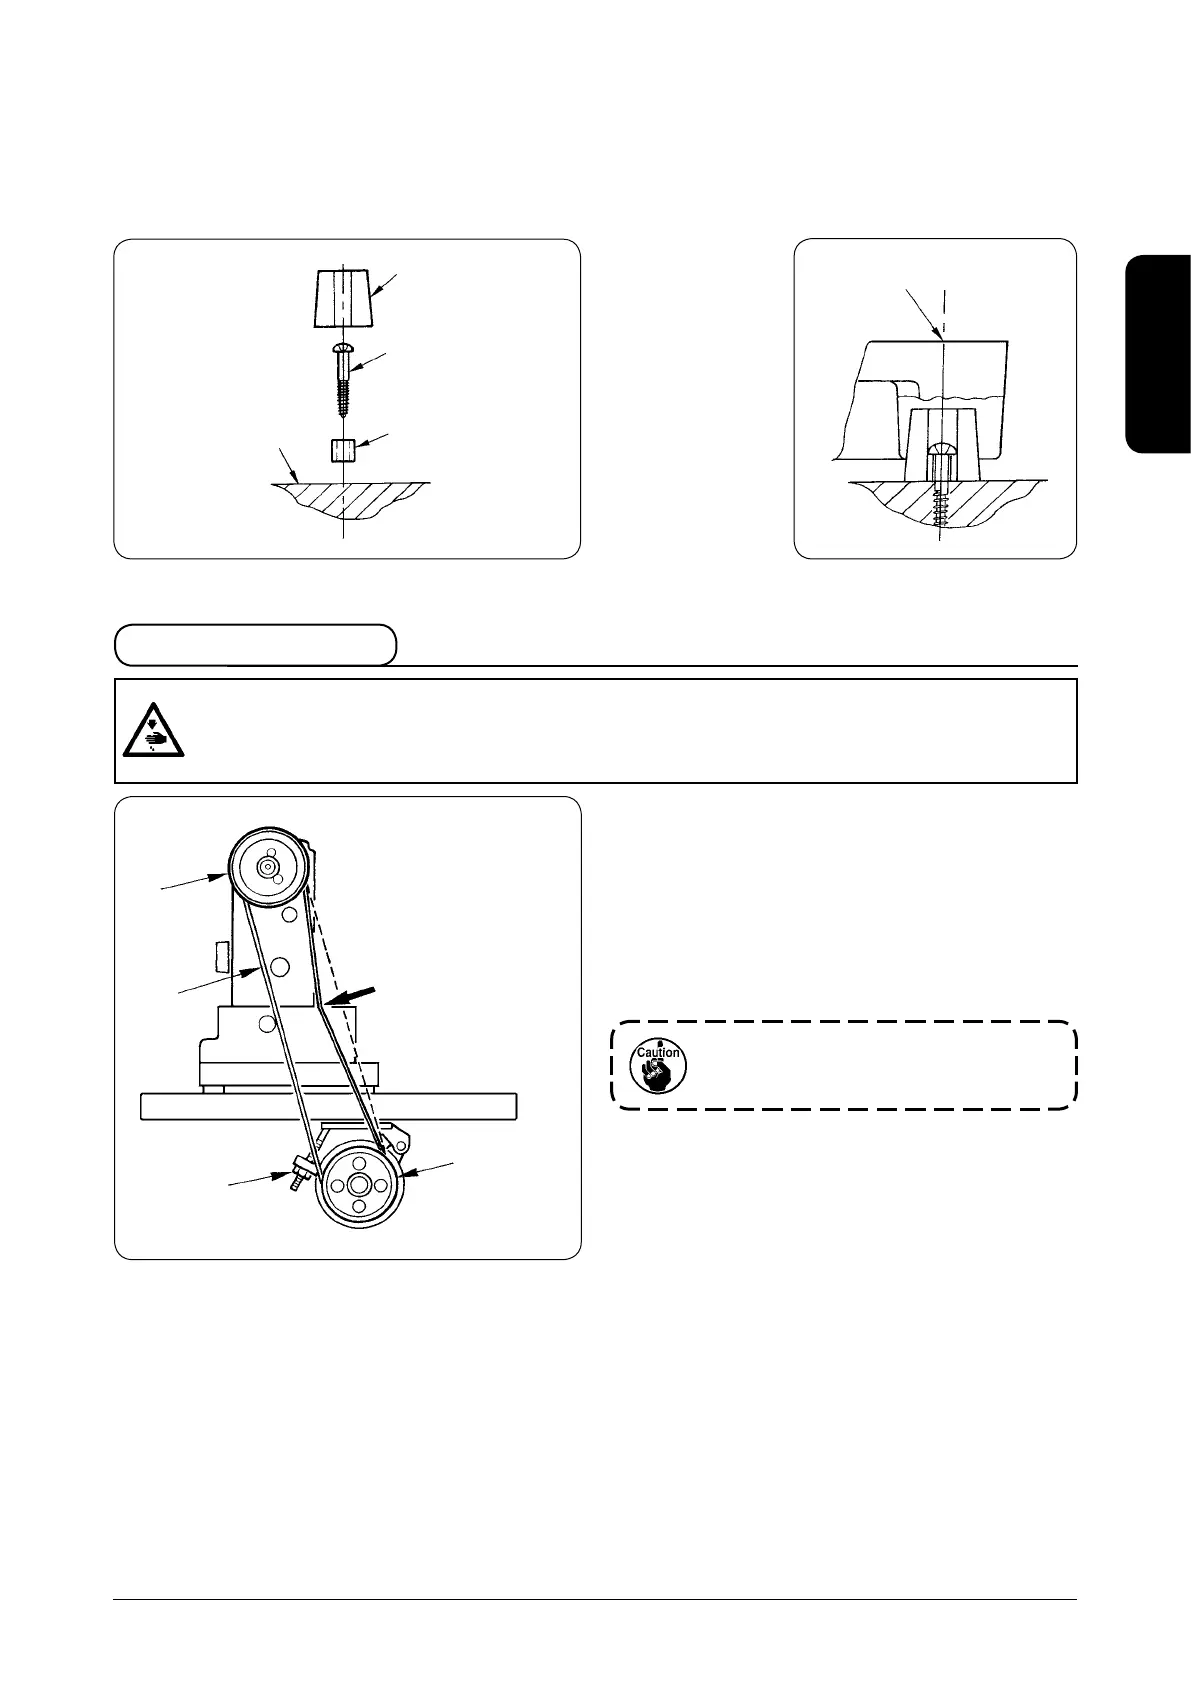
Fit rubber cushions
1
to the wood screws after securely xing collars
3
onto the top surface of table
4
with wood
screws
2
(4 places). (For the position, refer to the drawing of table for reference.)
Adjust the concave (4 places) located on the bottom surface of sewing machine
5
to rubber cushions
1
after se-
curely xing rubber cushions
1
on table
4
and set sewing machine
5
on the table.
→
2
Wood screw
3
Collar
4
Top surface
of table
1
Rubber cushion
5
Sewing machine
1) Fit belt
1
to machine pulley
2
.
2) Turning machine pulley
2
, set the other side of the
belt to motor pulley
3
.
3) Adjust the belt tension so that the belt sags 10 to 15
mm when the center of the belt is pressed with an ap-
proximate 10 N (1.02 kgf) load.
4) Securely x the belt with lock nut
4
when the belt has
been set.
If the deection of the belt is excessive
when the sewing machine is operated,
check again the belt tension.
*
When performing the set-up of DLN-6390, refer to
"2. Installing the motor", p.13.
1. Setting the belt
WARNING :
When replacing the belt, be sure to turn OFF the power to the motor and ascertain that the motor has
totally stopped rotating before starting the work. There is a danger of injury since hands or clothes
may be caught in the belt.
Slack of 10 to 15 mm
3
2
4
1
*
After completion of set-up, install the belt cover
for motor pulley supplied with the motor in accor-
dance with the Instruction Manual for motor.
 Loading...