27
ENGLISH
1
2
3
9
8
!0
a
b
C
E
D
4
b
2
!0
!1
!2
6
5
B
5
7
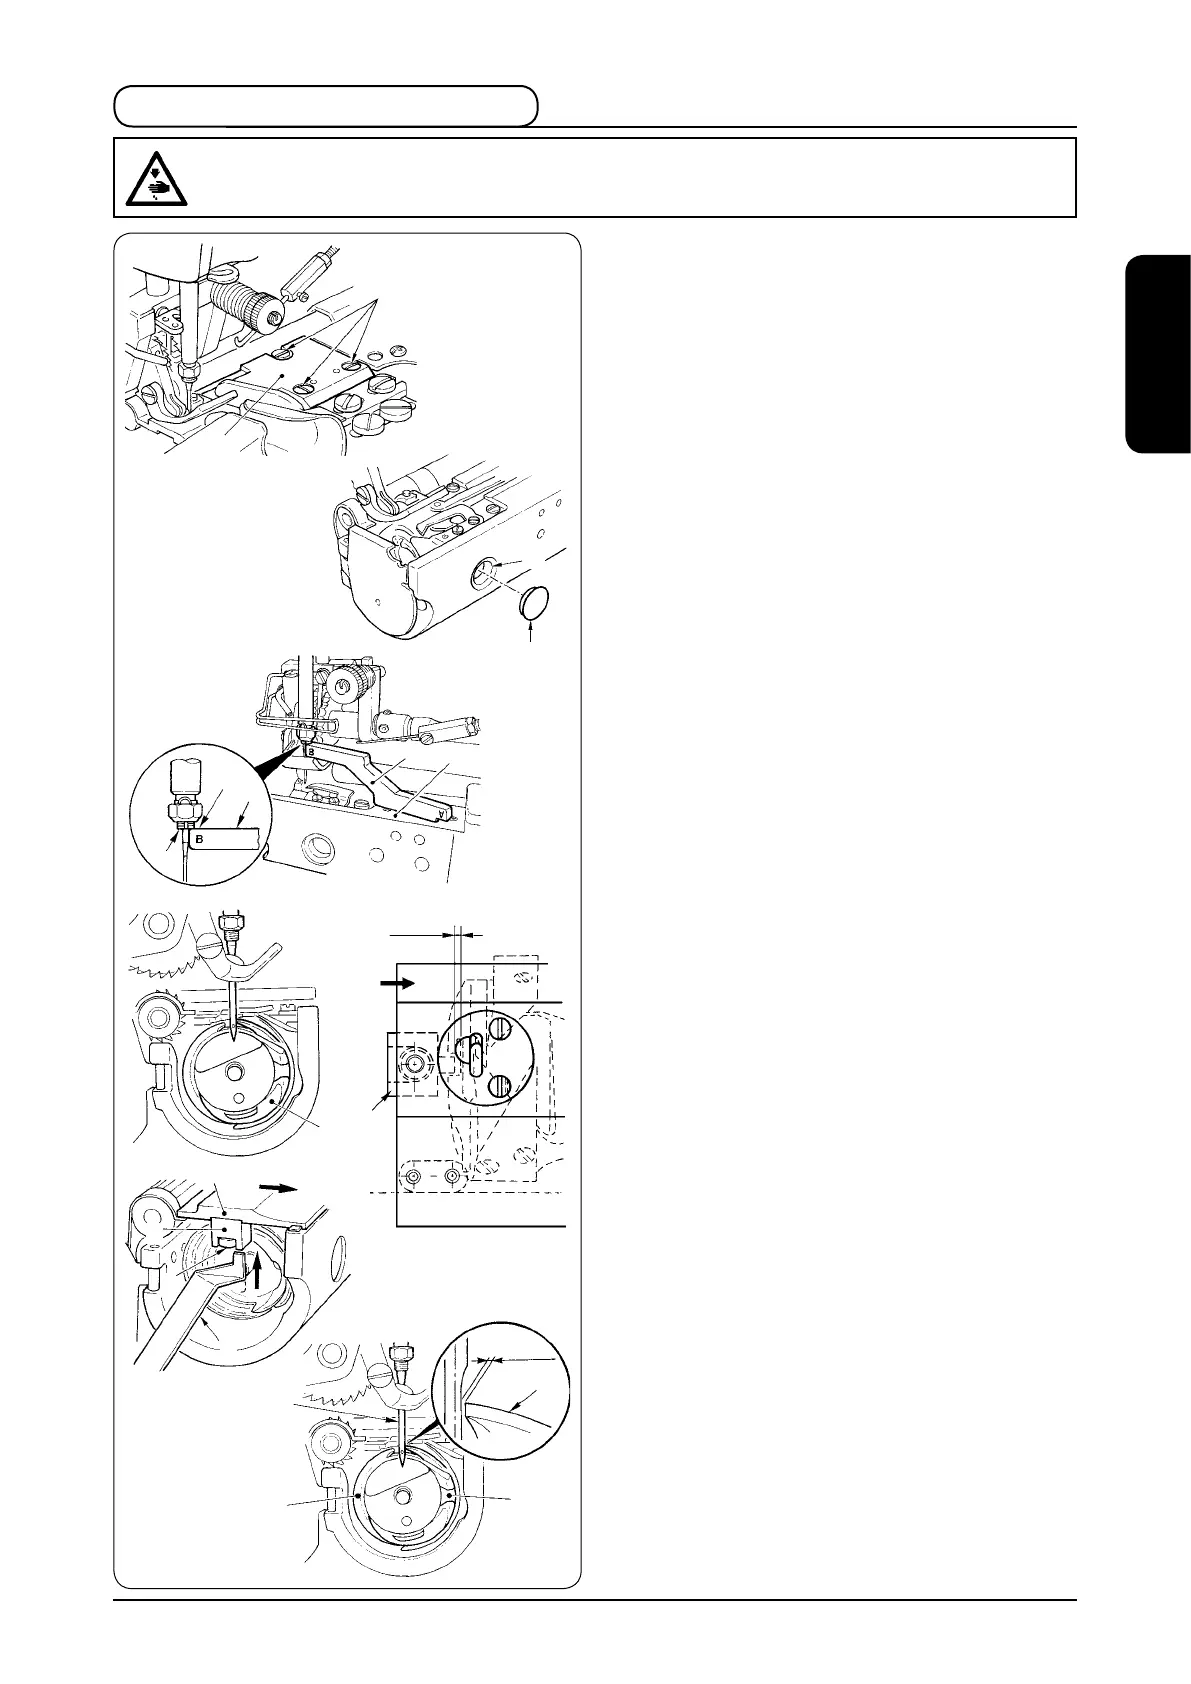
1) Remove setscrews
1
and remove throat plate
2
.
2) Remove cap
3
and put a screwdriver from hole
4
to
loosen three hook setscrews. Turn the handwheel in
the direction where needle bar goes up, set gauge for
the height of needle bar
5
supplied as accessories to
installing plane
6
of the throat plate as shown in the
gure, and adjust the position so that plane
B
(section
B of engraved marker) of gauge for the height of
needle bar
5
enters bottom end
7
of the needle bar.
3) In this state, adjust blade point
8
of hook
a
to the
center of needle
9
. Then adjust so that the clearance
provided between the needle and the hook is 0 to
0.06 mm (standard) and securely tighten three hook
setscrews.
(Tightening torque : 2 to 4 N·m)
*
At this time, adjust inner hook
b
at the position as
shown in the gure.
4) Install cap
3
and throat plate
2
, and securely tighten
setscrews
1
.
(Tightening torque : 1.5 to 3 N·m)
*
Adjust the convex of bobbin case holder
!0
to the
concave of inner hook
b
when installing the throat
plate.
*
Tighten setscrews
1
and install throat plate
2
while
pushing throat plate
2
by hand in the direction of
arrow mark
C
when installing throat plate
2
.
5) Adjust clearance
D
provided between the convex of
bobbin case holder and the concave of the inner hook
with gauge
!2
supplied with the sewing machine as
accessories. (Standard : 0.8 mm)
*
Put gauge
!2
supplied as accessories in clearance
D
and tighten setscrew
!1
while lightly pushing bobbin
case holder
!0
in the direction
E
.
(Tightening torque : 1.5 to 2.5 N·m)
*
Check that the gauge
!2
can go in clearance
D
and
come out from it with light resistance.
WARNING :
To protect against possible personal injury due to abrupt start of the machine, be sure to start the
following work after turning the power off and ascertaining that the motor is at rest.
2. Installing position of the hook
0 to 0.06 mm
 Loading...