5
ENGLISH
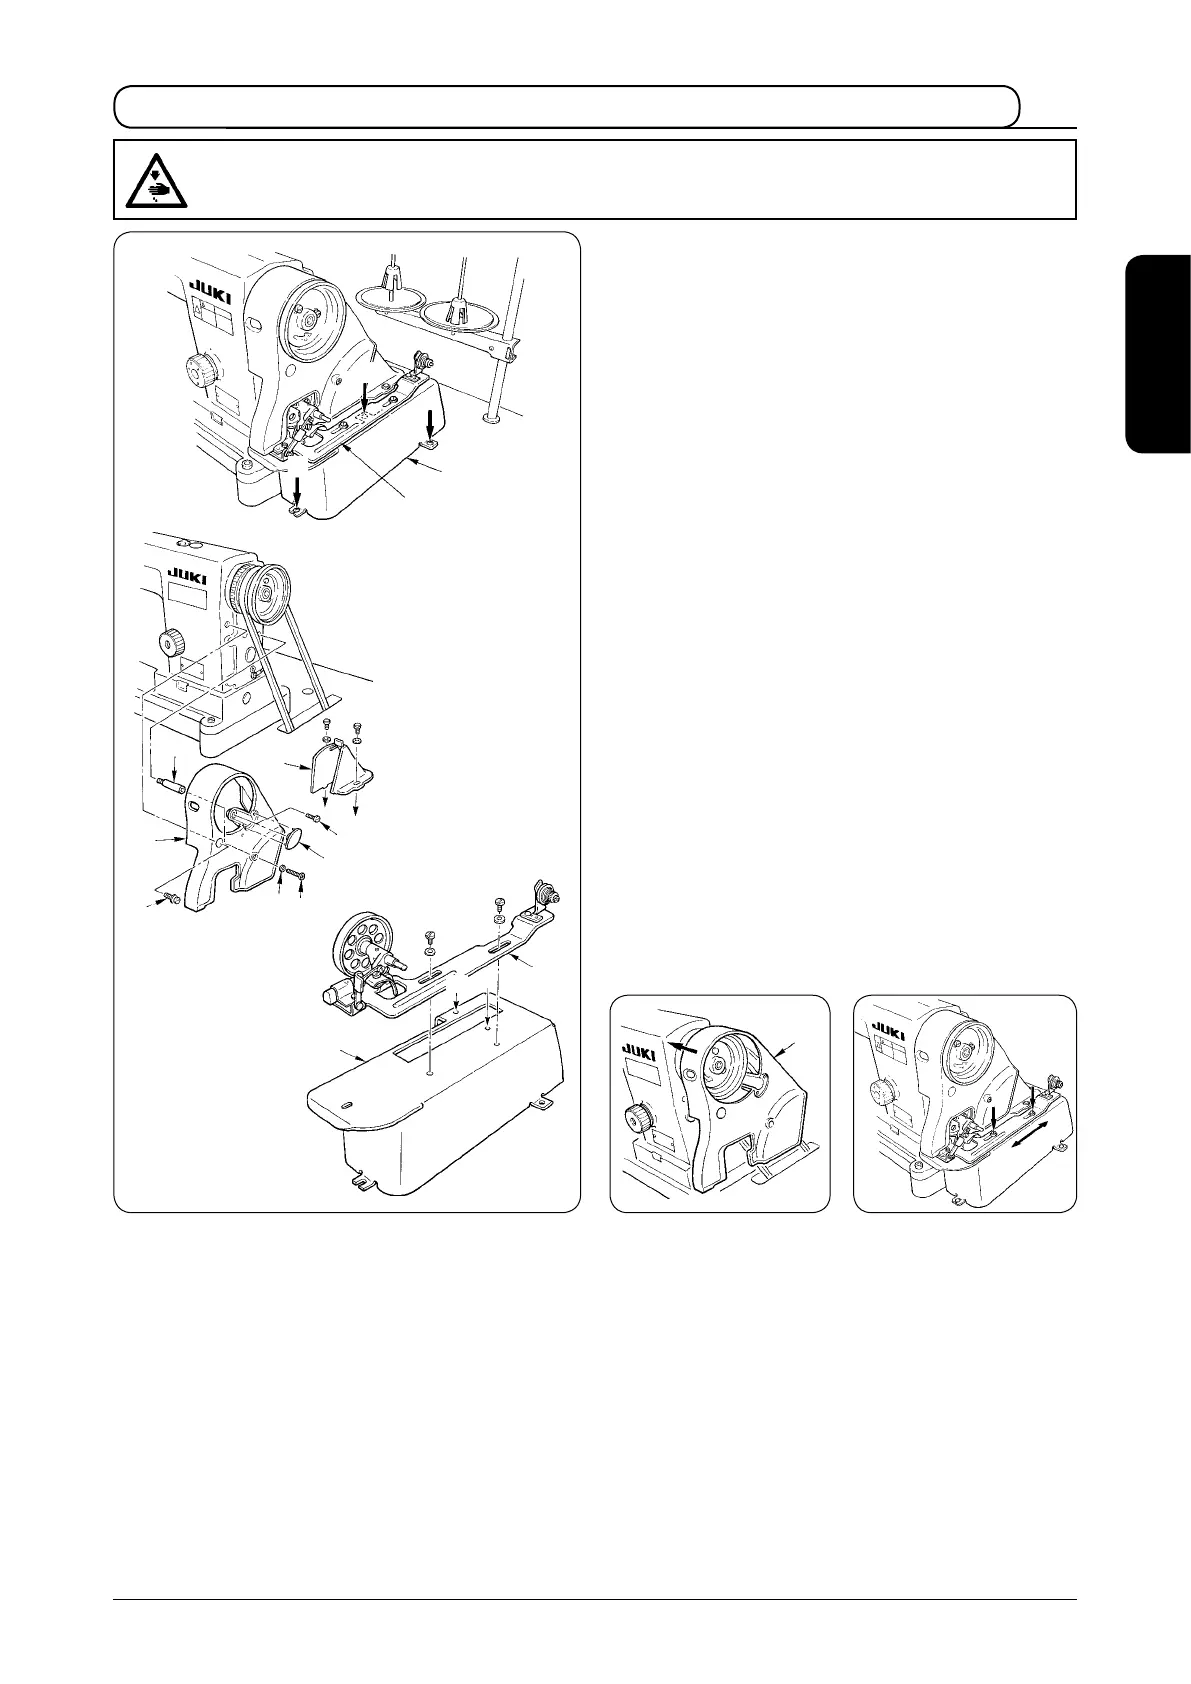
3. Installing the belt cover, the bobbin winder base and the bobbinwinder
<Installation procedure>
1) Fix bobbin winder base
1
onto the table with wood
screws
2
. (Wood screws in 3 places)
(For the xing position, refer to the drawing of table for
reference.)
2) Temporarily x bobbin winder
3
on bobbin winder
base
1
. (Screw + (plus) washer in 2 places)
3)
Install belt cover support
4
in the tapped hole in the arm.
4) Pass the handwheel through the hole in belt cover A
6
,
then set the handwheel on the arm. At this time, you
can smoothly install the belt cover A
6
by tilting it from
the slant rear side as illustrated in the gure below.
5) Place belt cover B
5
on tap holes
C
and
D
.
6) Fix belt cover A
6
on the arm using screws
7
,
8
and
washer
9
. At this time, tighten screw
7
with a tighten-
ing torque of 3 N·m and screw
8
with a tightening
torque of 2.5 N·m. If you tighten further these screws,
the securing state of the belt cover will not change.
7) Fit cap
!0
to the belt cover A.
8) Move belt cover B
5
backward until the rubber section
of belt cover B
5
comes in contact with belt cover A
6
. Then, further move the belt cover B in the same
direction by 0.5 to 1 mm. Now, x the belt cover B in
position using screws and washers.
9) Adjust the position of bobbin winder
!1
to a proper one
by moving back and forth bobbin winder
!1
which has
been temporarily xed. Then x it.
WARNING :
To protect against possible personal injury due to abrupt start of the machine, be sure to start the
following work after turning the power off and ascertaining that the motor is at rest.
6
!1
1
C
4
5
6
7
8
9
!0
7
1
3
2
2
2
D
 Loading...