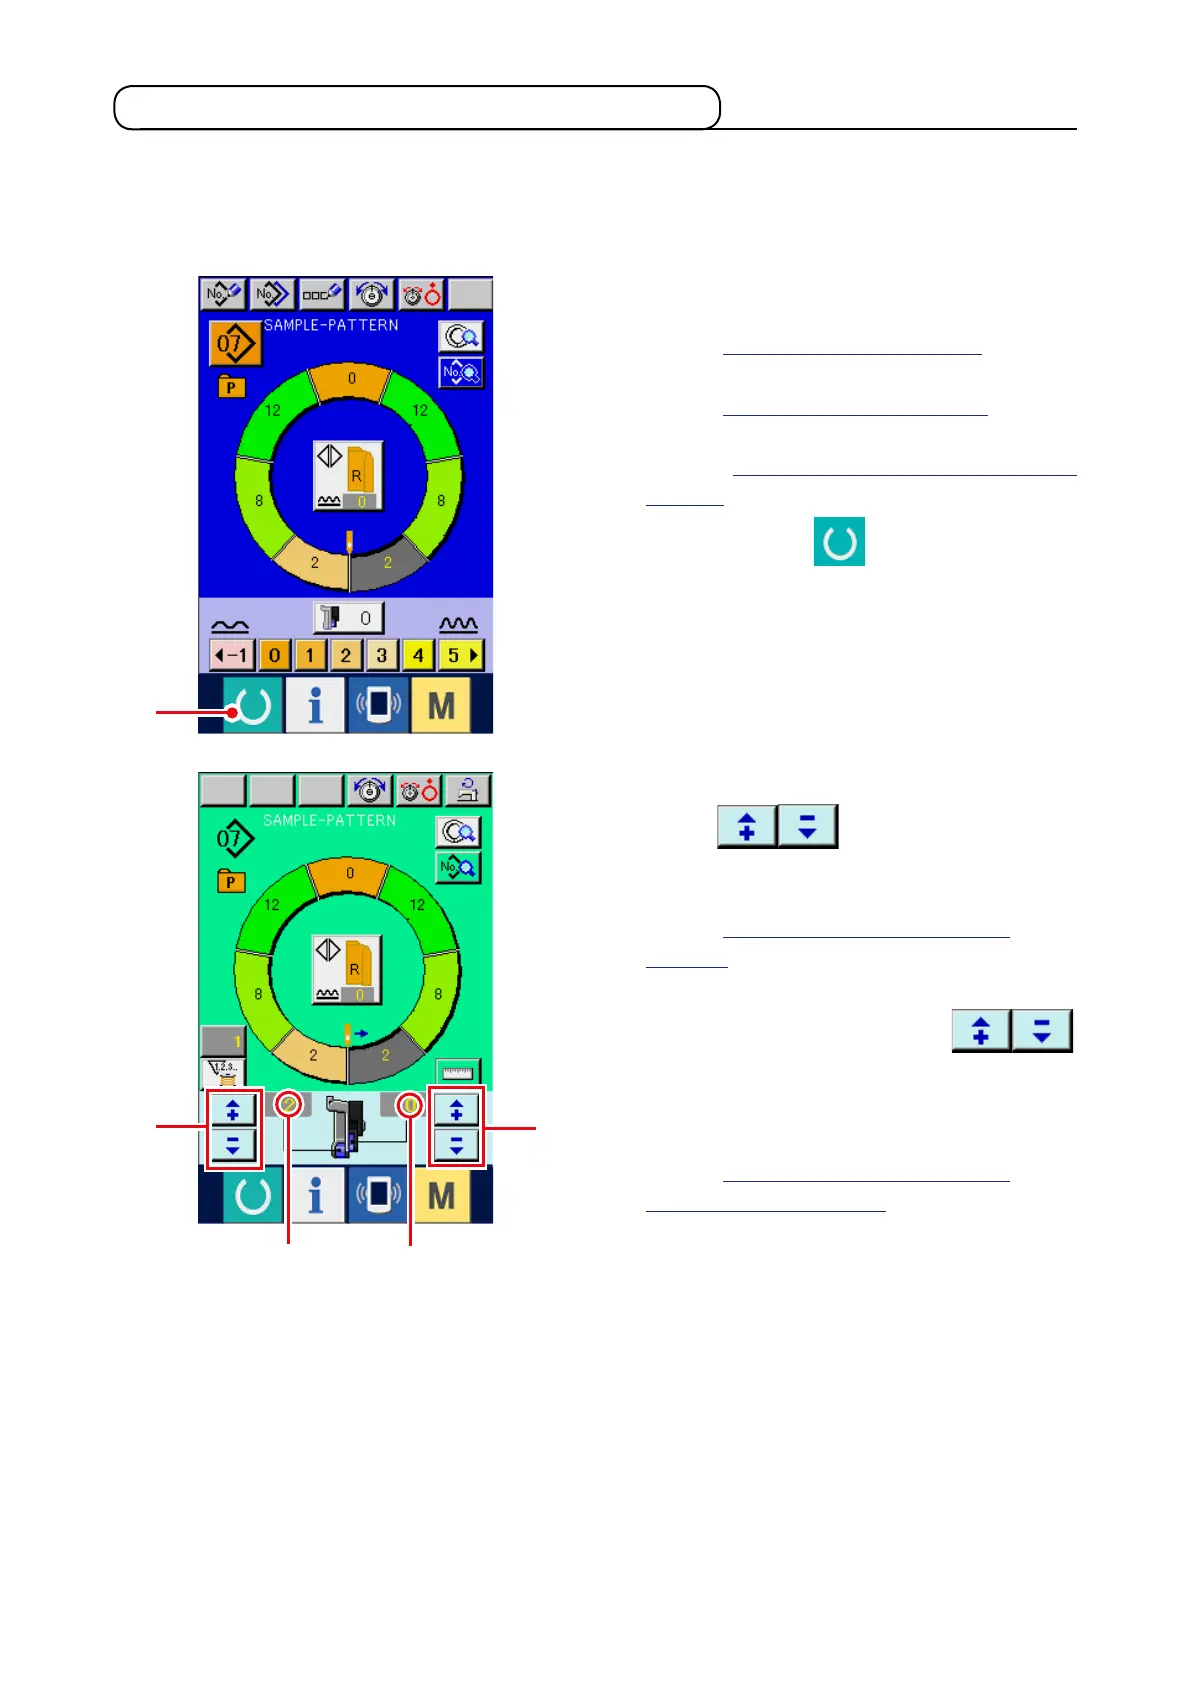
5-7 Creating the pattern <Pattern creation>
The way of correcting the sample pattern and creating the pattern with ease is explained in the basic volume.
1) Prepare the materials.
2) Turn ON the power.
9) When notches do not t properly, press "+"/ "–"
buttons
2
after thread trimming
on the way to change shirring amount set value
A
.
Then perform re-sewing.
Refer to
"5-6 (4) Changing the shirring
amount"
.
10) When the sleeve material on the outlet seam
side delays, press "+"/ "–" buttons
3
after thread trimming on the way to change
set value of shirring amount for auxiliary feed B.
Then perform re-sewing.
Refer to
"5-6 (5) Changing the shirring
amount of auxiliary feed"
.
11) When the program for one sleeve is completed,
sew the other sleeve and correct the program.
A
B
1
3
2
3) Call a sample pattern where the sewing products
and number of steps are the same.
Refer to
"5-5 (3) Calling the pattern"
.
4) Change the pitch.
Refer to
"5-6 (2) Changing the pitch"
.
5) Select left/right alternate sewing.
Refer to
"5-5 (4) Select left/right alternate
sewing"
.
6) Press READY key
1
.
7) Perform sewing.
8) Stop the sewing machine at each notch and
perform checking of shirring amount.
 Loading...