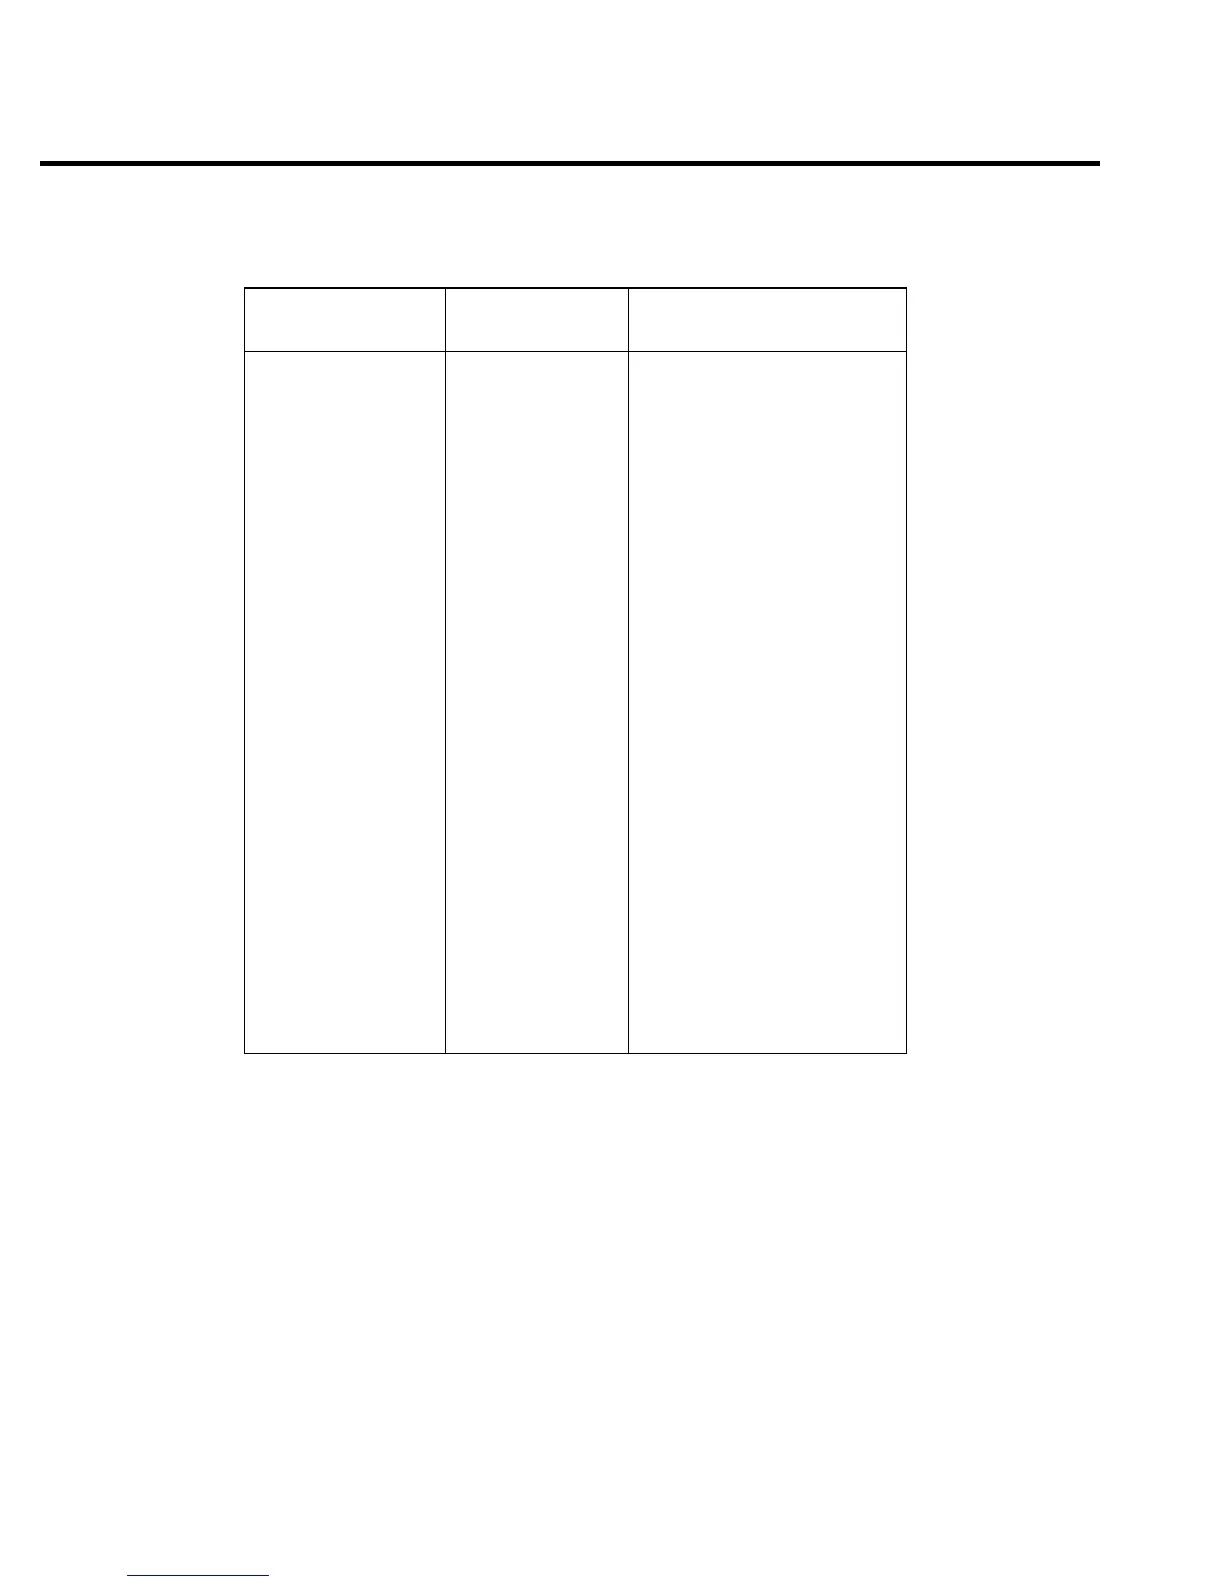
Table 2-4
Front panel current calibration
Source range
1
Source current
Multimeter
current reading
2
10μA +10.000μA
+00.000μA
-10.000μA
+00.000μA
___________ μA
___________ μA
___________ μA
___________ μA
100μA +100.00μA
+000.00μA
-100.00μA
+000.00μA
___________ μA
___________ μA
___________ μA
___________ μA
1mA +1.0000mA
+0.0000mA
-1.0000mA
+0.0000mA
___________ mA
___________ mA
___________ mA
___________ mA
10mA +10.000mA
+00.000mA
-10.000mA
+00.000mA
___________ mA
___________ mA
___________ mA
___________ mA
100mA +100.00mA
+000.00mA
-100.00mA
+000.00mA
___________ mA
___________ mA
___________ mA
___________ mA
1A +1.0000A
+0.0000A
-1.0000A
+0.0000A
___________ A
___________ A
___________ A
___________ A
3A
3
+3.0000A
+0.0000A
-3.0000A
+0.0000A
___________ A
___________ A
___________ A
___________ A
2-14 Calibration
1. Use EDIT and RANGE keys to select source range.
2. Multimeter reading used in corresponding calibration step. See procedure.
3. Current calculated as follows: I = V/R, where V is the DMM reading, and R is the
characterized value of the 1Ω resistor. 10A pulse range calibrated simultaneously.
Step 4: Enter calibration dates and save calibration
NOTE For temporary calibration without saving new calibration constants, proceed to
Step 5: Lock out calibration.
1. From normal display, press MENU.
2. Select CAL, and then press ENTER. The Model 2430 will display the following:
CALIBRATION
UNLOCK EXECUTE VIEW-DATES
©
ß
SAVE LOCK CHANGE-PASSWORD
 Loading...