8.2
Section 8
Disassembly
Remove Oil Sentry
™
Pressure Switch
(on models so equipped)
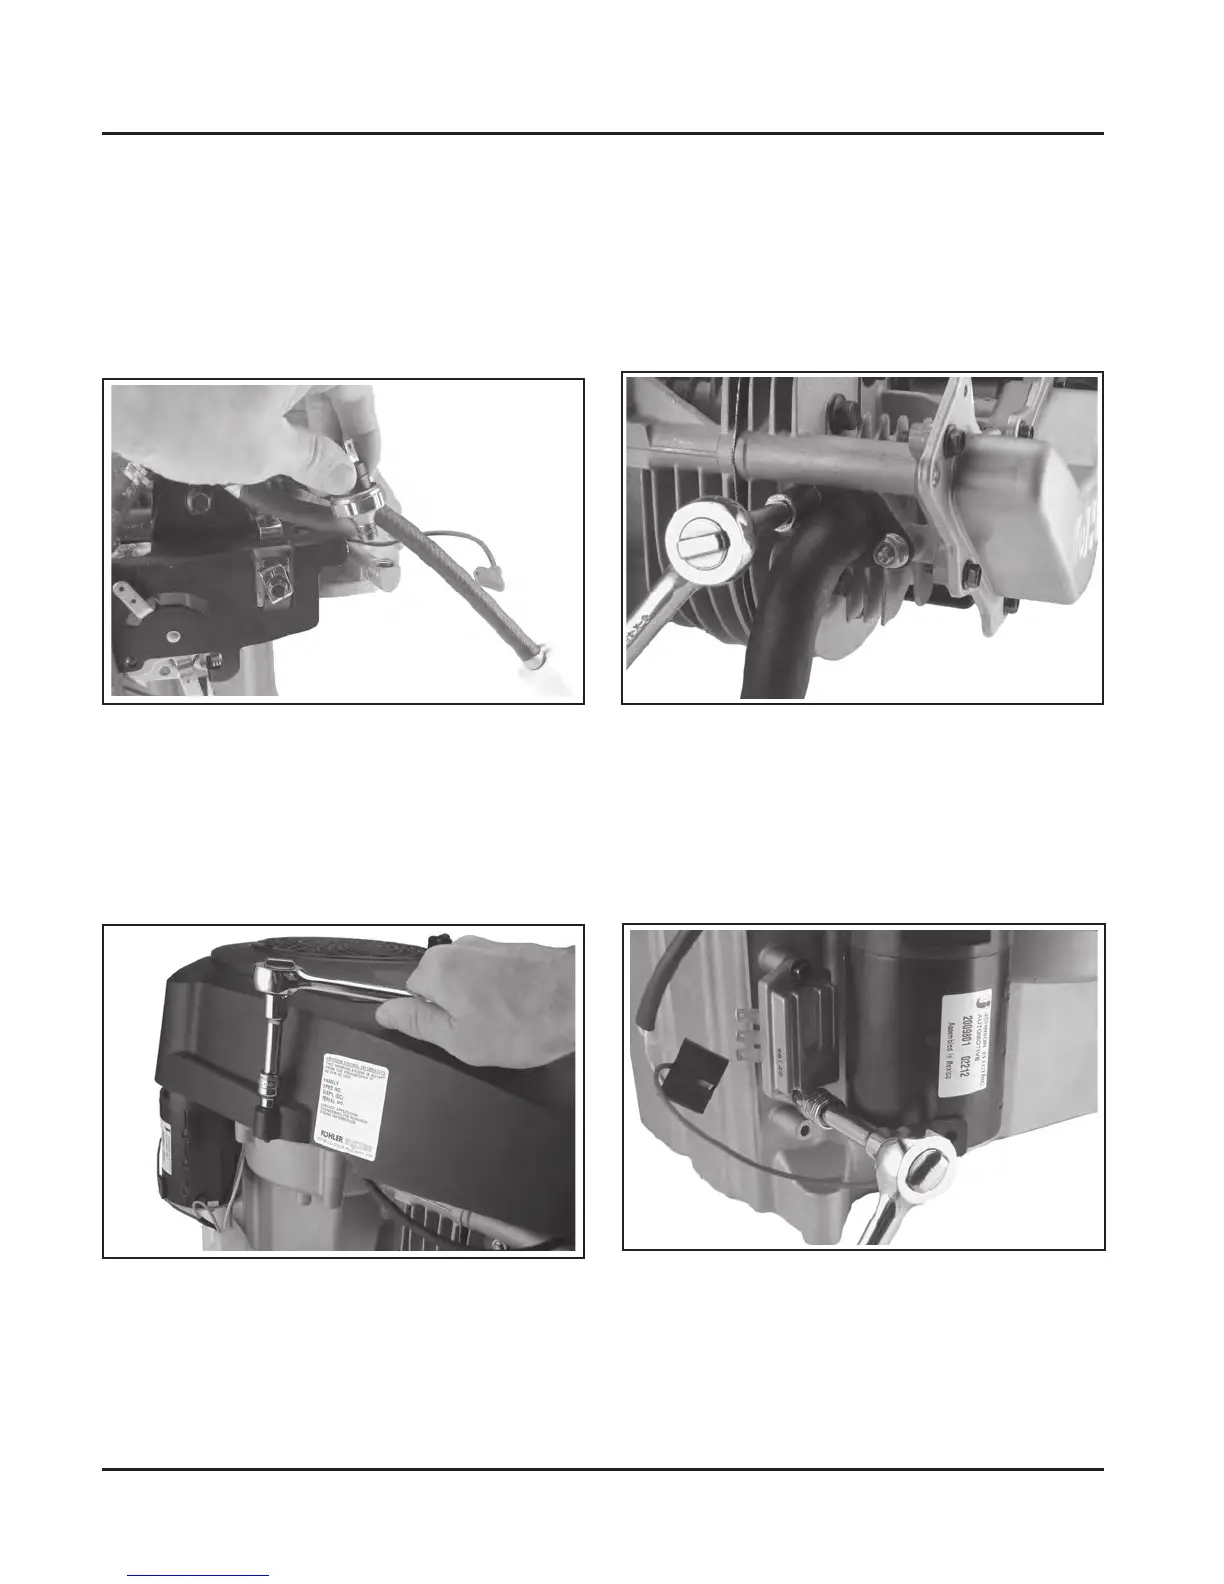
1. Disconnect the lead from the Oil Sentry™
pressure switch.
2. Remove the pressure switch from the center
passage or adapter elbow in the closure plate.
See Figure 8-2.
Remove Muffler
1. Remove the hex. flange nuts from the exhaust
studs. If a muffler bracket is used, remove the
hex. flange screws attaching the muffler or
exhaust system to the bracket.
2. Remove the muffler and gasket from the exhaust
port studs. See Figure 8-4.
Figure 8-4. Removing Exhaust Flange Nuts.
Remove Rectifier-Regulator
1. Unplug the connector from the rectifier-regulator.
2. Remove the two screws securing the rectifier-
regulator to the crankcase. Remove the rectifier-
regulator. See Figure 8-5.
Figure 8-3. Removing Blower Housing Screws.
Disconnect Spark Plug Lead
1. Carefully pull on the boot section and disconnect
the spark plug lead.
Figure 8-2. Removing Oil Sentry™ Switch.
Remove Blower Housing
1. Remove the four shoulder screws securing the
blower housing to the closure plate. Figure 8-3.
2. Lift the blower housing and separate the spark
plug lead from the corresponding slot.
Figure 8-5. Removing Rectifier-Regulator.
Remove Electric Starter
1. Disconnect the starter lead from the terminal stud.
2. Remove the two hex. flange nuts securing the
starter to the closure plate. Remove the starter.
See Figure 8-6.
Not For Resale
www.SmallEngineDiscount.com

 Loading...