EasyManua.ls Logo

Komatsu PC110R-1 User Manual

Komatsu PC110R-1
212 pages
To Next Page IconTo Next Page
To Previous Page IconTo Previous Page
Page #208 background imageLoading...
Page #208 background image
206
ARRANGEMENT FOR THE INSTALLATION OF THE DEMOLITION HAMMER
6.2.3.2 REMOVING THE HAMMER
6.2.4 MAINTENANCE
6 - Rotate the lever of the selection valve (3) completely anticlock-
wise.
7 - Start the machine and raise the demolition hammer position-
ing it vertically.
8 - Stop the machine again and lubricate the arm connection
joints (See 4.7.4.a LUBRICATING THE JOINTS) and the
hammer (see the specific operation and maintenance manu-
al).
9 - Before starting work, check the seals.
DANGER
Always wear thick gloves and safety goggles during this
check.
To check the system for leaks, use a piece of cardboard or
a wooden board.
RWA19870
3
To remove the hammer, proceed as follows:
1 - Position the hammer on level ground, making sure that it will be firm and stable even after disconnection from
the machine.
2 - Stop the engine and move the hydraulic controls in all directions, in order to completely release the residual
pressures present in the hydraulic circuits.
3 - Turn the ignition key to position «I» and press the hammer control button to release the residual pressure
present in the hammer delivery pipe.
4 -Turn the ignition key to position «O» and remove it.
5 - Disconnect the hammer feeding and draining pipes.
Use 41 and 50 mm spanners.
6 - Fit the sealing plugs of the pipes.
DANGER
Make sure that the sealing plugs are tightened correctly and that there are no leaks; if the circuit is inad-
vertently pressurized, small leaks could become thin jets that may hurt the skin or the eyes.
Always wear thick gloves and safety goggles during this check.
To check the system for leaks, use a piece of cardboard or a wooden board.
7 - Disconnect the hammer from the mechanical constraints as described in paragraph 3.12.5 CHANGING THE
BUCKET.
The hydraulic system does not require any maintenance operation and inspection other than those prescribed for
the machine.
For the maintenance operations required for the hammer, see the specific operation manual.

Table of Contents

Question and Answer IconNeed help?

Do you have a question about the Komatsu PC110R-1 and is the answer not in the manual?

Komatsu PC110R-1 Specifications

General IconGeneral
BrandKomatsu
ModelPC110R-1
CategoryExcavators
LanguageEnglish

Summary

Foreword

Information on Safety

Pictograms and Relevant Meanings

Explains symbols on warning plates and their meanings for safe operation.

General Precautions

Outlines essential safety rules, guards, clothing, and modifications.

Precautions Before Starting Engine

Details safety checks for the work site, fire prevention, and cab readiness.

Precautions When Working

Covers safe operation practices, including starting, moving, and working on slopes.

Product Identification

Machine Serial Number

Details the location and importance of the machine's unique serial number.

Machine Identification Plate

Describes the CE mark plate and its compliance with standards.

Instruments and Controls

Instruments

Identifies and explains the function of key dashboard indicators like hour meter and fuel level.

Warning Lights

Explains various warning lights and their meanings for machine status and alerts.

Switches and Push Buttons

Details the function and location of various operational switches and buttons.

Machine Controls

Illustrates and explains the operation of levers, pedals, and other machine controls.

Use of the Machine

Checks Before Starting the Engine

Provides a checklist for essential visual and daily checks before engine startup.

Starting the Engine

Explains the procedures for starting the engine in warm and cold conditions.

How to Move the Machine

Covers essential steps for safely moving the machine, including steering and slopes.

Maintenance Plan

Maintenance Every 50 Hours

Details routine checks and lubrication required every 50 operating hours.

Maintenance Every 250 Hours

Outlines specific checks and adjustments needed every 250 operating hours.

Maintenance Every 500 Hours

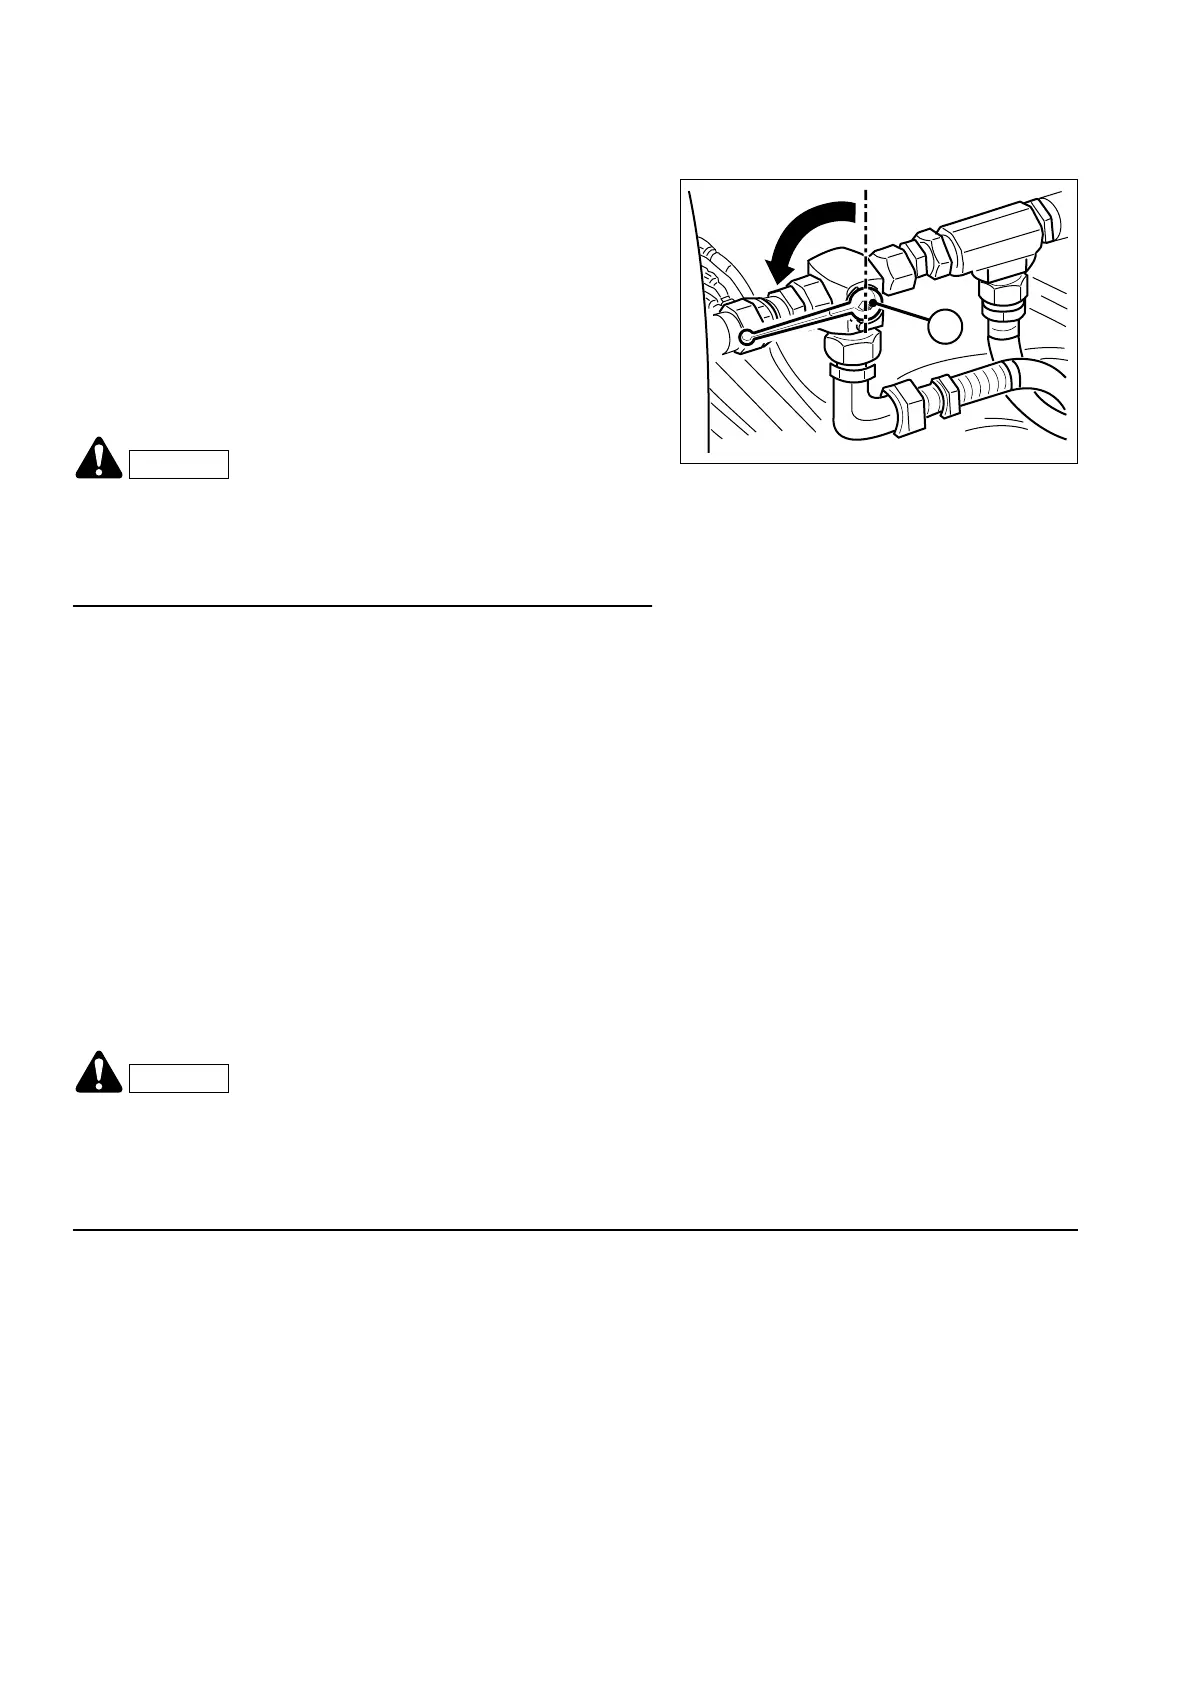
Specifies tasks such as filter changes and fluid checks at 500-hour intervals.

Maintenance Every 2000 Hours

Details major service items like oil changes for reduction gears and coolant replacement.

Technical Data

Standard Overall Dimensions

Provides key dimensions for monoboom and two-piece boom configurations.

Technical Characteristics

Lists specifications for mass, engine, electrical system, and speeds.

Lifting Capacities

Details load capacities based on arm length and working radius.

Related product manuals