2-76
PC130/150LGP-6K ENG
12.OPERATION
12.16 REPLACEMENT AND INVERSION OF
BUCKET
• When knocking the pin in with a hammer, metal particles may
fly and cause serious injury, particularly if they get into your
eyes. When carrying out this operation always wear goggles,
helmet, gloves and other protective equipment.
• When the bucket is removed, place it in a stable condition.
Stop the machine on a firm, flat surface. When performing joint work,
make clear signals to each other and work carefully for safety's sake.
12.16.1 REPLACEMENT
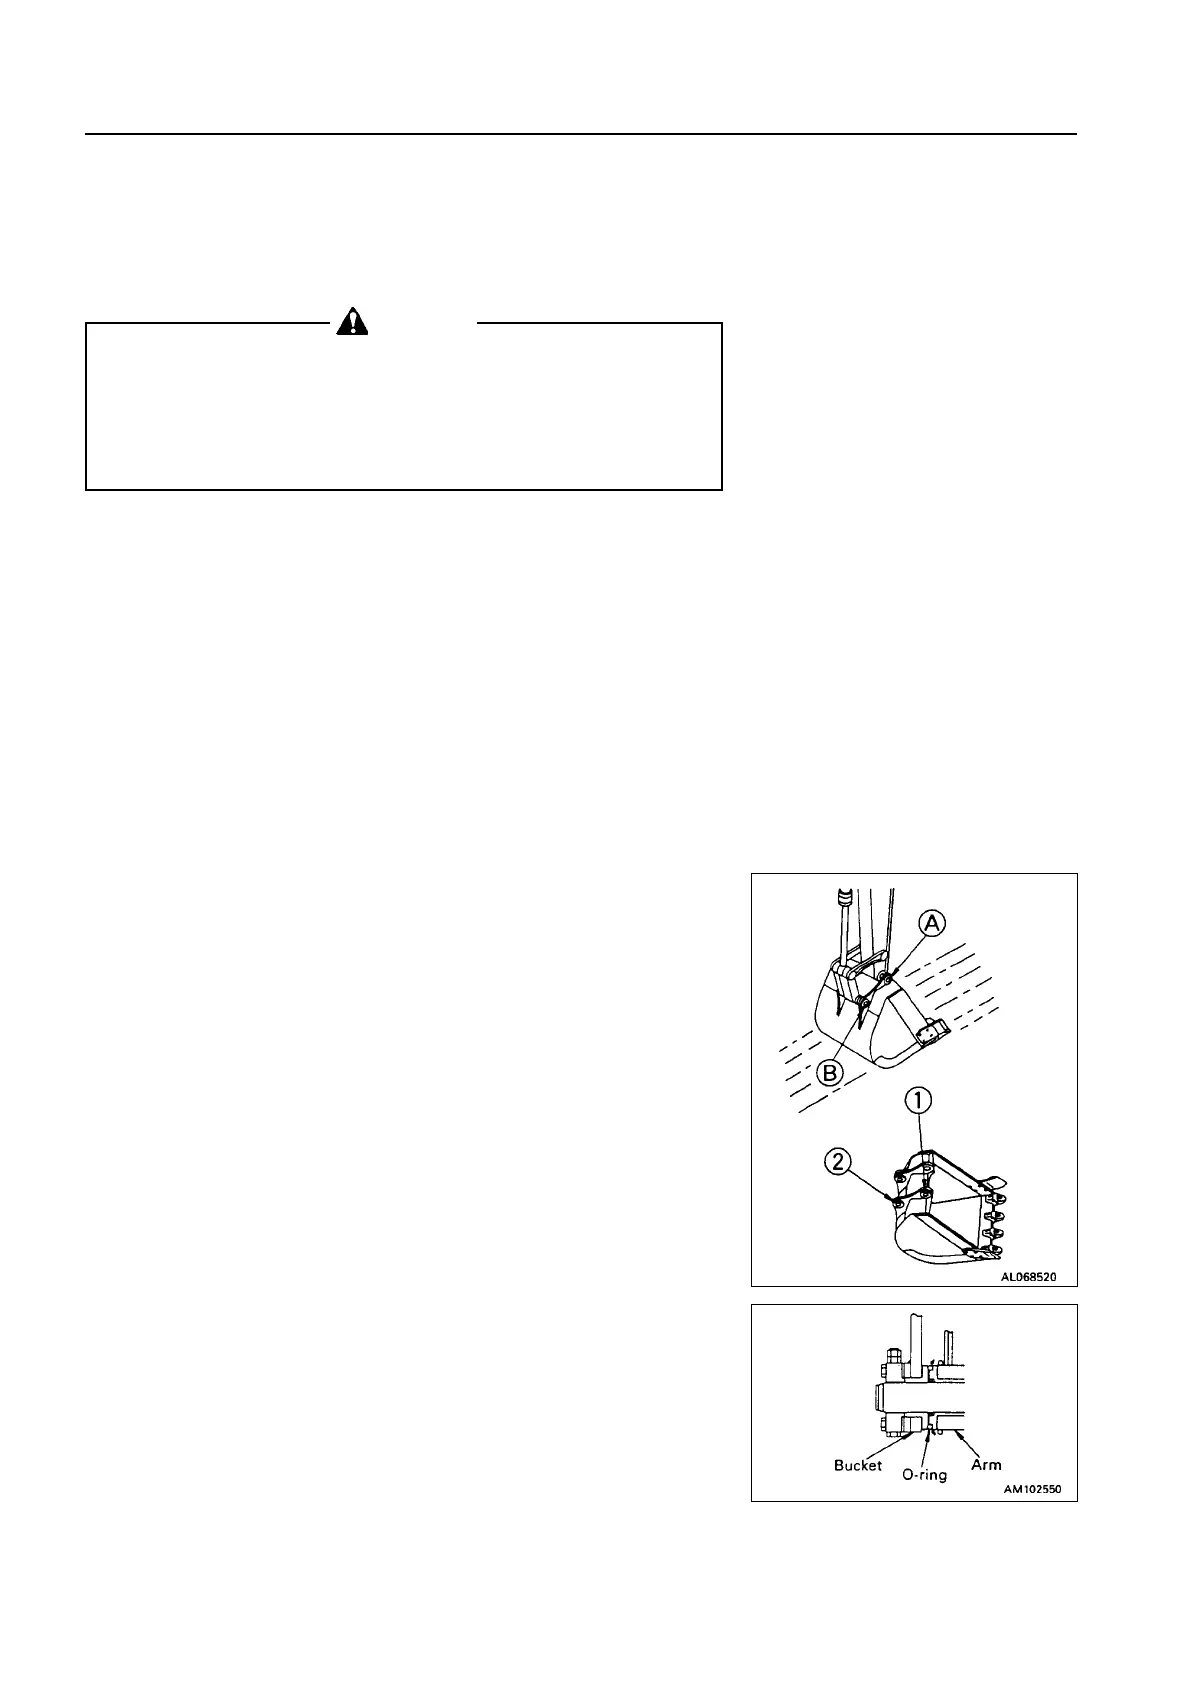
1. Place the bucket in contact with a flat surface.
REMARK
When removing the pins, place the bucket so that it is in light contact
with the ground.
If the bucket is lowered strongly to the ground, the resistance will be
increased an it will be difficult to remove the pins.
2. Remove the stopper bolts and nuts, then remove pins and , and
remove the bucket
NOTICE
After removing the pins, make sure that they do not become
contaminated with sand or mud and that the seals of bushing on
both sides do not become damaged.
3. Align the arm with holes and the link with holes , then coat with
grease and install pins and .
REMARK
When installing the bucket, the O-rings are easily damaged, so fit the
O-rings on the boss of the arm end as shown in the diagram.
When knocking the pin, move the O-ring down to the regular groove.
4. Install the stopper bolts and nuts for each pin, then grease the pin.
WARNING
 Loading...