EasyManuals Logo
Home>Kyocera>All in One Printer>ECOSYS M6026cidn

Kyocera ECOSYS M6026cidn User Manual

Kyocera ECOSYS M6026cidn
375 pages
To Next Page IconTo Next Page
To Previous Page IconTo Previous Page
Page #216 background imageLoading...
Page #216 background image
2PX/2PY
1-5-30
(3) Detaching and refitting the main PWB
Procedure
1. Remove the FAX control PWB, if
installed (see page 1-5-36).
2. Remove the right rear cover, right cover
and right lower cover (see page 1-5-6).
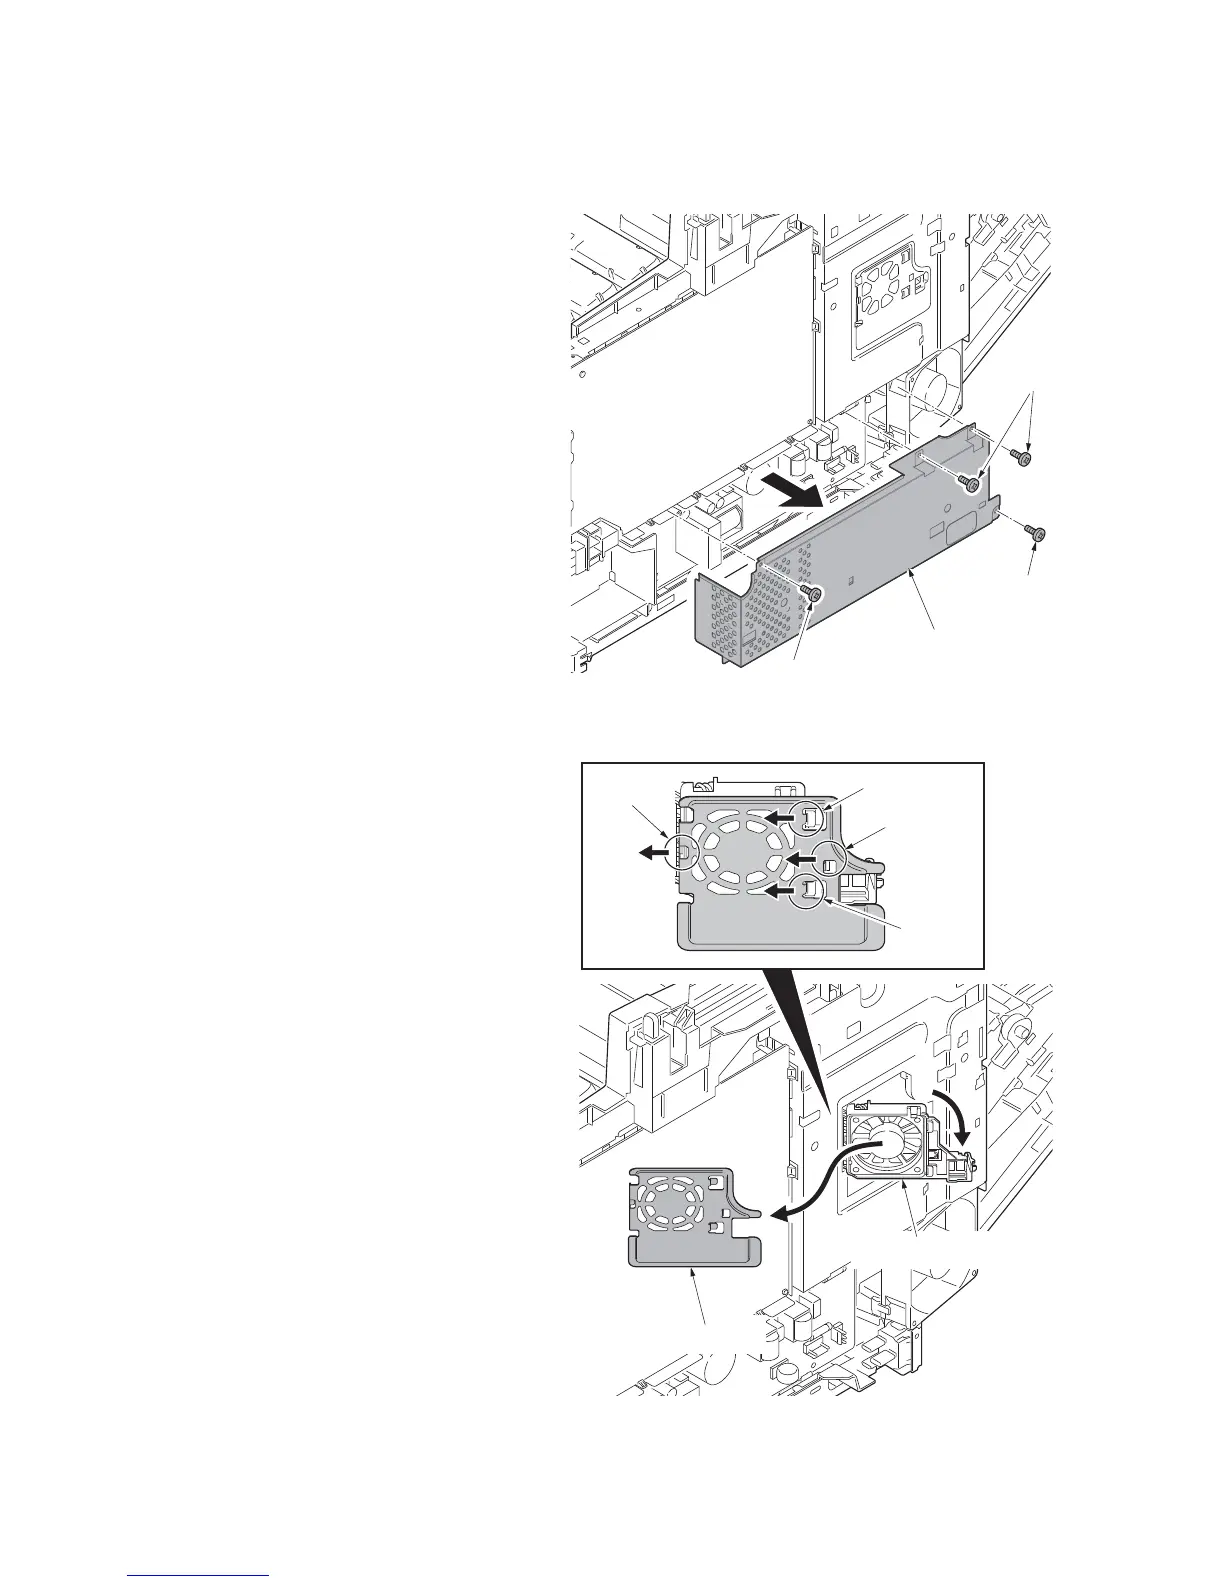
3. Remove three screws and then remove
the power source shield.
Screws A and B are unidentical, there-
fore, do not mix up.
Figure 1-5-43
4. Open the fan bracket.
5. Slide the fan plate. Release four hooks
and then remove the fan plate.
Figure 1-5-44
Power source shield
Screw B
Screws A
Screw A
Fan plate
Fan bracket
Hook
Hook
Hook
Hook

Table of Contents

Other manuals for Kyocera ECOSYS M6026cidn

Questions and Answers:

Question and Answer IconNeed help?

Do you have a question about the Kyocera ECOSYS M6026cidn and is the answer not in the manual?

Kyocera ECOSYS M6026cidn Specifications

General IconGeneral
BrandKyocera
ModelECOSYS M6026cidn
CategoryAll in One Printer
LanguageEnglish

Related product manuals