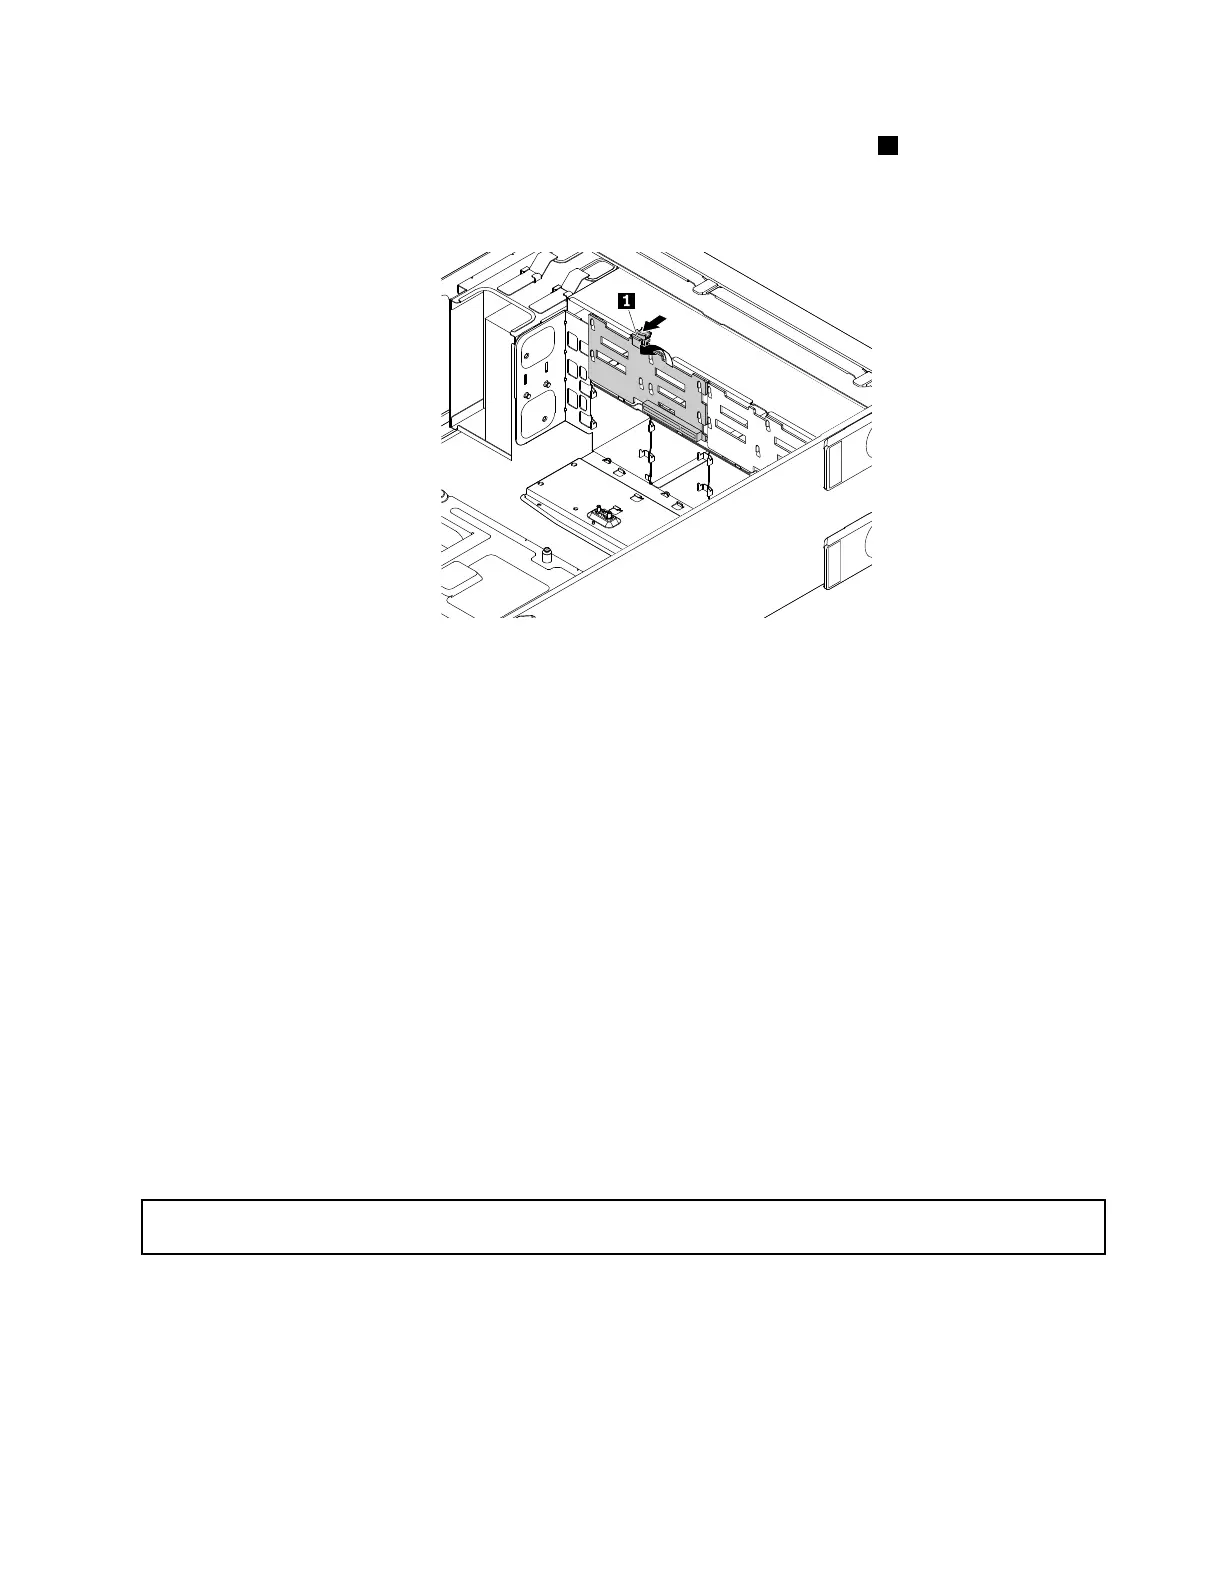
•Fortheservermodelswith2.5-inch-drivebackplane,pressthereleasetab1andgentlyliftthe
2.5-inch-drivebackplanealittlebitupwardsothatitisreleasedfromthehooksonthechassis.Then,
carefullyremovethe2.5-inch-drivebackplaneoutofthechassis.
Figure134.Removingthe2.5-inch-drivebackplane
9.Touchthestatic-protectivepackagethatcontainsthenewbackplanetoanyunpaintedsurfaceonthe
outsideoftheserver.Then,removethenewbackplanefromthepackage.
Note:Carefullyhandlethebackplanebyitsedges.
10.Positionthenewbackplaneonthedrivecagesothattheholesinthenewbackplanearealignedwiththe
correspondinghooksonthechassis.Then,slightlypressthenewbackplaneuntilitsnapsintoposition.
11.Reinstallallthehot-swapstoragedrivesanddummytrays.See“Installingorreplacingahot-swap
internalstoragedrive”onpage127.
12.ReinstalltheAnyRAIDadapter.See“ReplacingtheAnyRAIDadapter”onpage159.
13.Refertoyournotetoreconnectthecablestothebackplane.
14.Ifyouareinstructedtoreturntheoldbackplane,followallpackaginginstructionsanduseanypackaging
materialsthataresuppliedtoyouforshipping.
Whattodonext:
•Toworkwithanotherpieceofhardware,gototheappropriatesection.
•Tocompletethereplacement,goto“Completingthepartsreplacement”onpage180.
Replacingtheeasy-swap-drivemodule
Attention:Donotopenyourserverorattemptanyrepairbeforereadingandunderstanding“Readthisfirst:safety
information”onpageiiiand“Guidelines”onpage69.
Thistopicappliesonlytoservermodelsthathaveeasy-swapinternalstoragedrivesinstalled.
Beforeyoubegin,printalltherelatedinstructionsorensurethatyoucanviewthePDFversiononanother
computerforreference.
Note:Theeasy-swap-drivemoduleissensitivetoESD.Ensurethatyoureadandunderstand“Handling
static-sensitivedevices”onpage70firstandcarefullyperformtheoperation.
Chapter6.Replacinghardware165
 Loading...