3-33
D9 -TRANSMISSION OIL FILTER
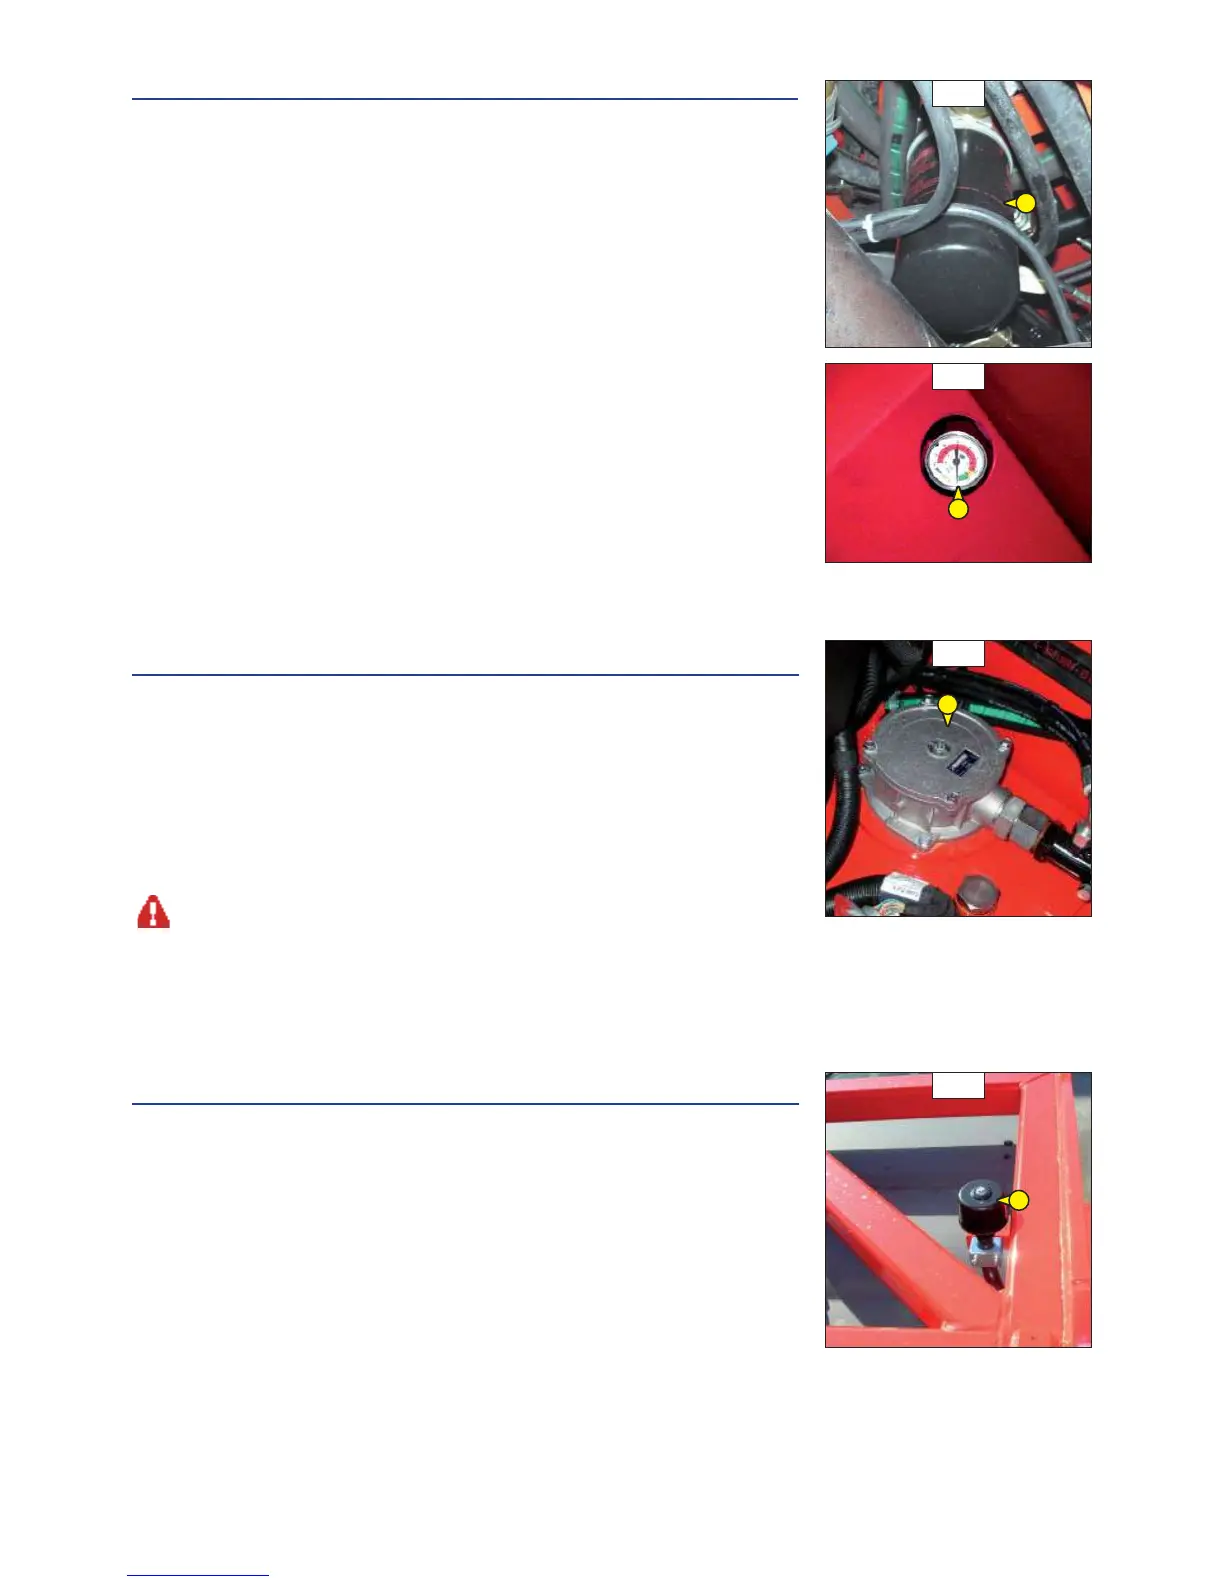
CHANGE
Use a collar wrench to remove the transmission oil filter “1” (fig. D9/1) and throw it away
together with the gasket.
Clean the filter support with a clean cloth which does not leave threads.
Fit the new filter of the same characteristics, see table (“FILTER
ELEMENTS AND BELTS”) using your hands only, taking care that the gasket (lubricated before
fitting) is properly positioned.
Start the truck and check that there are no leaks.
To check the efficency of the filter see the indicator “2” (fig. D9/2).
If the indicator reach the “red” zone before 500 working hours change immediately the filter.
D10 - HYDRAULIC OIL EXHAUST FILTER CARTRIDGE
CHANGE
Slacken the 4 screws that fix the cover of filter “1” (fig. D10), remove the old cartridge.
Fit the new filter of the same characteristics, see table (“FILTER
ELEMENTS AND BELTS”), taking care that the gasket (lubricated before fitting) is properly
positioned.
Start the truck and check that there are no leaks.
Before fitting the cover of filter “1” (Fig. D10), check that the cartridge has been correctly installed.
D11 - BREATHER FILTER
CHANGE
Unscrew the filter “1” (fig. D11) in the back of the cab and replace it with a new one of the same
characteristics, see table (“FILTER ELEMENTS AND BELTS”).
Fit the new filter, tightening it by hand.
D9/1
1
D9/2
2
1
1
D10
D11

 Loading...