DISASSEMBLY PROCEDURE
PHOTOS
86
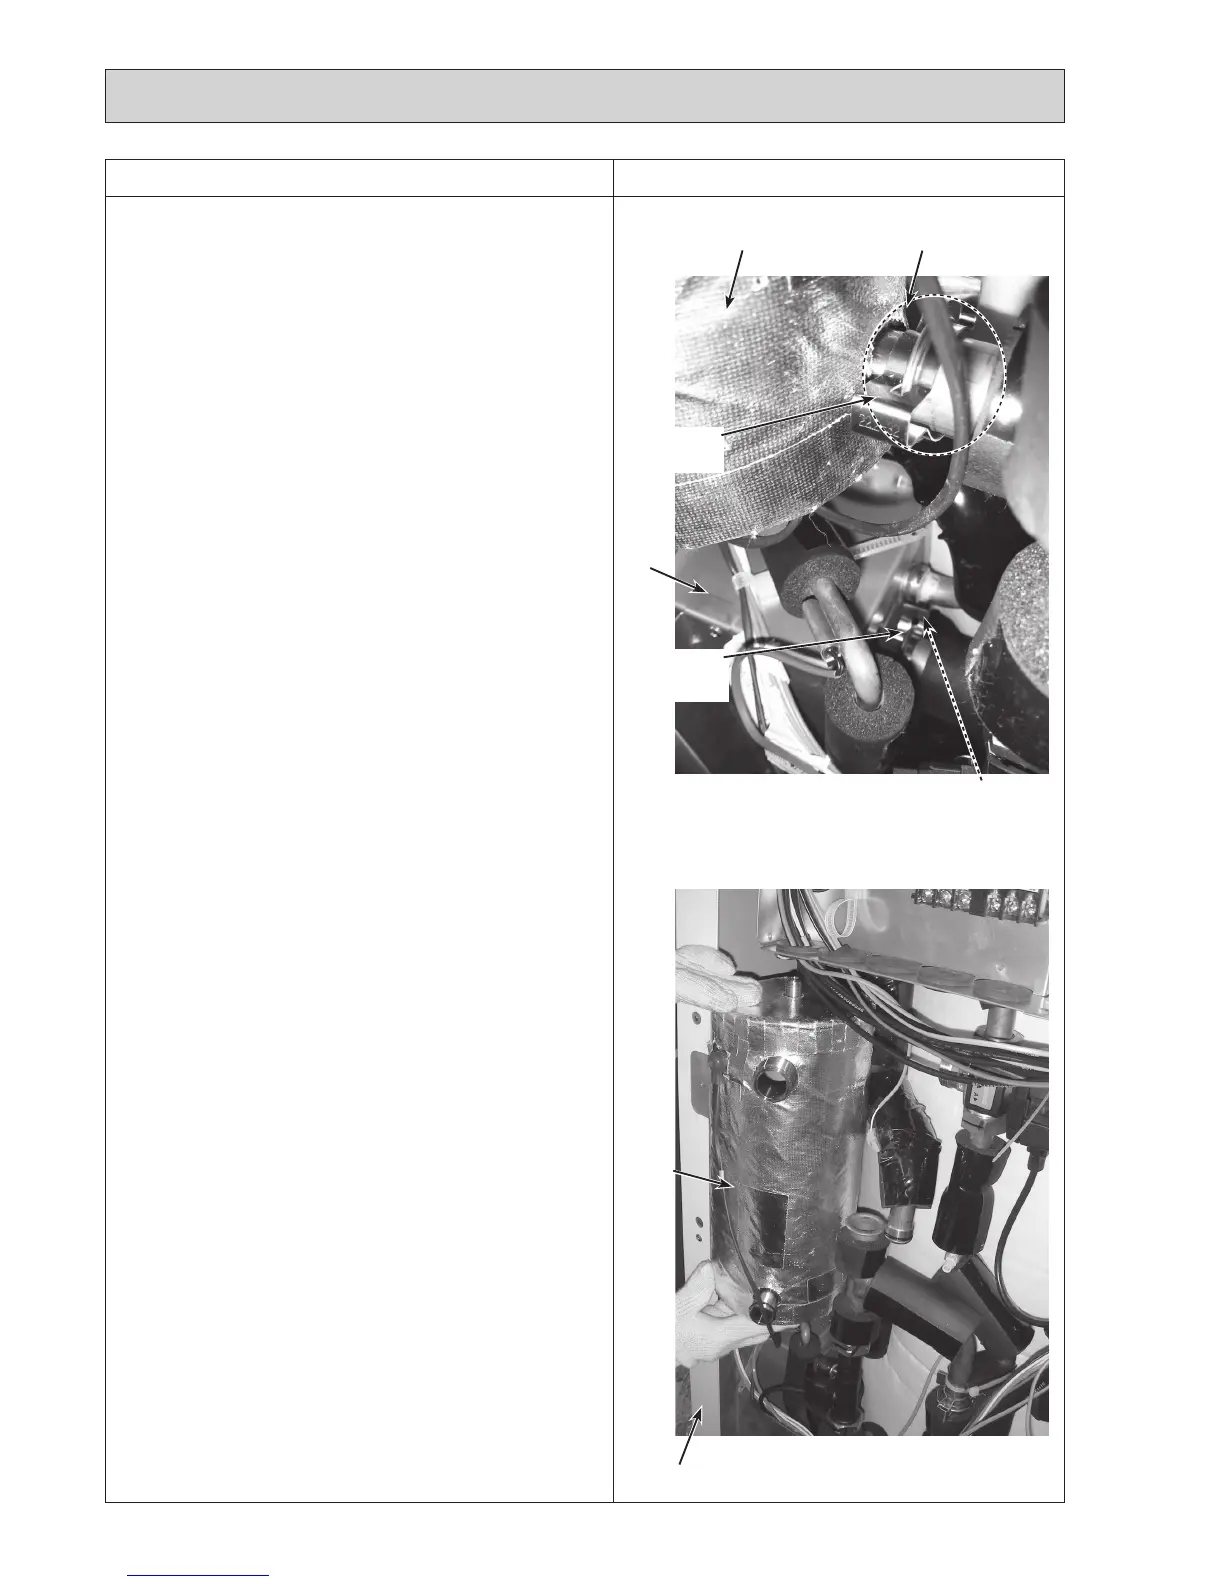
Photo 8-3
Photo 8-4
Quickconnec-
tion of inlet of
booster heater
Quickconnec-
tion of outlet of
P-HEX
Fromthepreviouspage.
(3)RemovetheDIVframebyremovingthe2screwsonit,and
removethecushionbycuttingtheband.Thenremovethe
rubberbycuttingtheband.(Photo8-2)
(4) Close (OFF) the pump valve. (Photo 8-2)
•
Whenthepumpvalvehandleisstiff,useatooltogripthe
handle and turn it carefully.
•
Whenopeningorclosingthepumpvalve,ensuretodoso
fully,nothalfway.
(5) Detach the 2 quick connections (Inlet of booster heater and
outlet of P-HEX) (Photos 8-2 and 8-3)
•
Whenreinstallingthequickconnections,usenewO-rings.
•
RefertoProcedure23forhowtoattachanddetachthe
quick connection.
(6)Removethepipe(W.C.-B.H.)bycarefullypullingittothe
right.(Photo8-2)
(7)Loosenthe2G1"nutsandremovethepipe(B.H.-D.V.)
(Photo 8-3)
•
WhenreinstallingtheG1"nuts,usenewG1"gaskets.
(8) Detach the quick connection (upper F.S.) to make the con-
nection part of pipe (to F.S.) free. (Photo 8-2)
•
Whenreinstallingthequickconnections,useanewO-ring.
•
RefertoProcedure23forhowtoattachanddetachthe
quick connection.
(9)Holdthetopoftheboosterheaterusingapipewrenchand
turntheflarenutusingaspanner.(Photo8-2)
(10)Removethe2screwsthatholdtheheaterstayontothe
frontframe(L).Lifttheboosterheaterslightlyandremove
theboosterheaterwiththeheaterstayfromthefront
frame (L). (Photos 8-2 and 8-4)
(11)Removethe3screwsthatholdtheheaterstayontothe
booster heater, and remove the heater stay from the
booster heater. (Photo 8-2)
O-ringBooster heater
O-ring
P-HEX
Booster
heater
Front frame (L)

 Loading...
