DISASSEMBLY PROCEDURE
PHOTOS
90
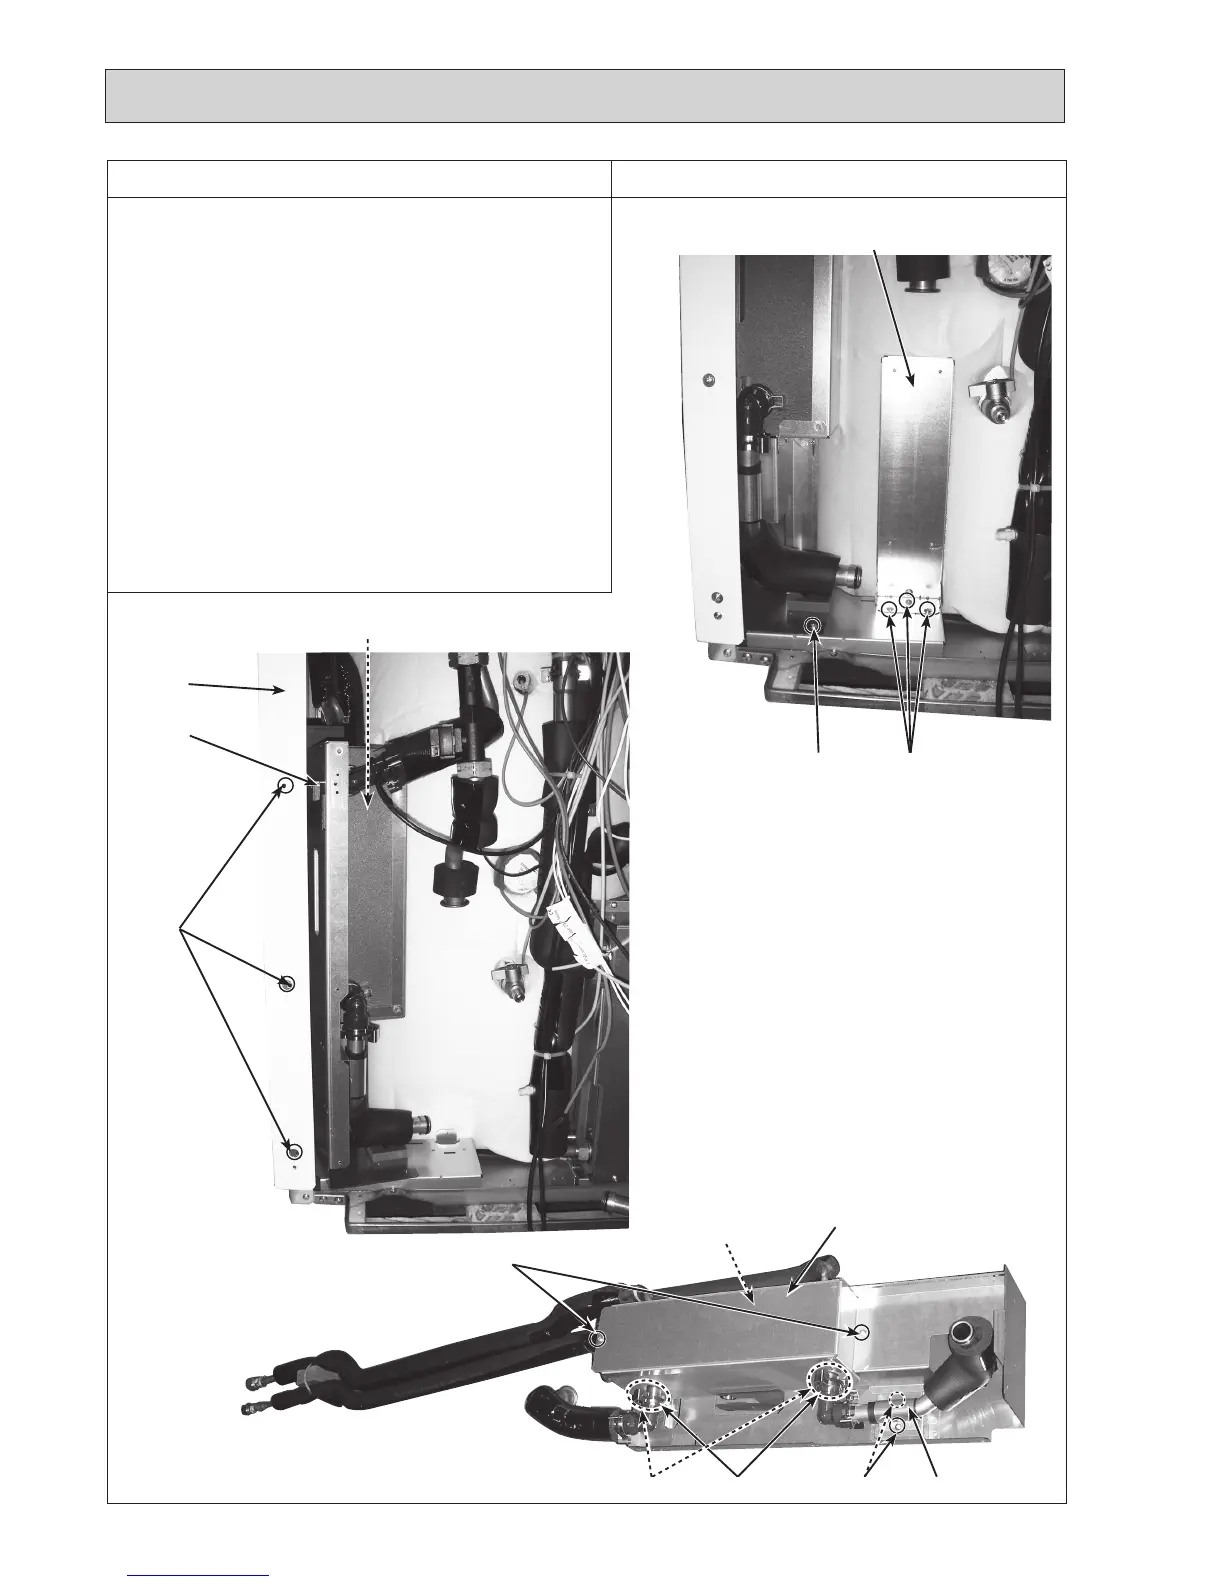
Photo 10-8
10. How to remove the plate heat exchanger (P-HEX)
<E*ST20D model>
(15)Removethepumpstaybyremovingthe3screwsonit.
(Photo 10-8)
(16)Removethe3screwsonthefrontframe(L),and1
screwonthebottom.
(Photos 10-8 and 10-9)
(17)LoosenthehooksontheplatetopullouttheP-HEXwith
platesfromthecylinderunitbyliftingthemtogether.
(Photos 10-9 and 10-10)
(18)Removethepipebandbyremoving2screwsonit,and
removethewatercoilcoverbyremovingthe2screwson
it. (Photo 10-10)
•Reusethepipeband,thewatercoilcoverandthe
removed4fixingscrews.
(19) Detach the 2 quick connections, then take out the
P-HEX.
(Photo 10-10)
•
WhenreinstallingthequickconnectionsusenewO-rings.
•
RefertoProcedure23forhowtoattachanddetachthe
quick connection.
Photo 10-9
Photo 10-10
Screws
(on the bottom)
Screws
P-HEX (inside)
Screws
Pump stay
Front
frame (L)
Hook
P-HEX (inside)
Water coil cover
Screws
QuickconnectionsO-rings
Screws Pipe band
Fromthepreviouspage.

 Loading...
