6878215A01
Motorcycle Radio Installation Installing the Weather-Resistant Enclosure 5-21
5.10 Installing the Weather-Resistant Enclosure
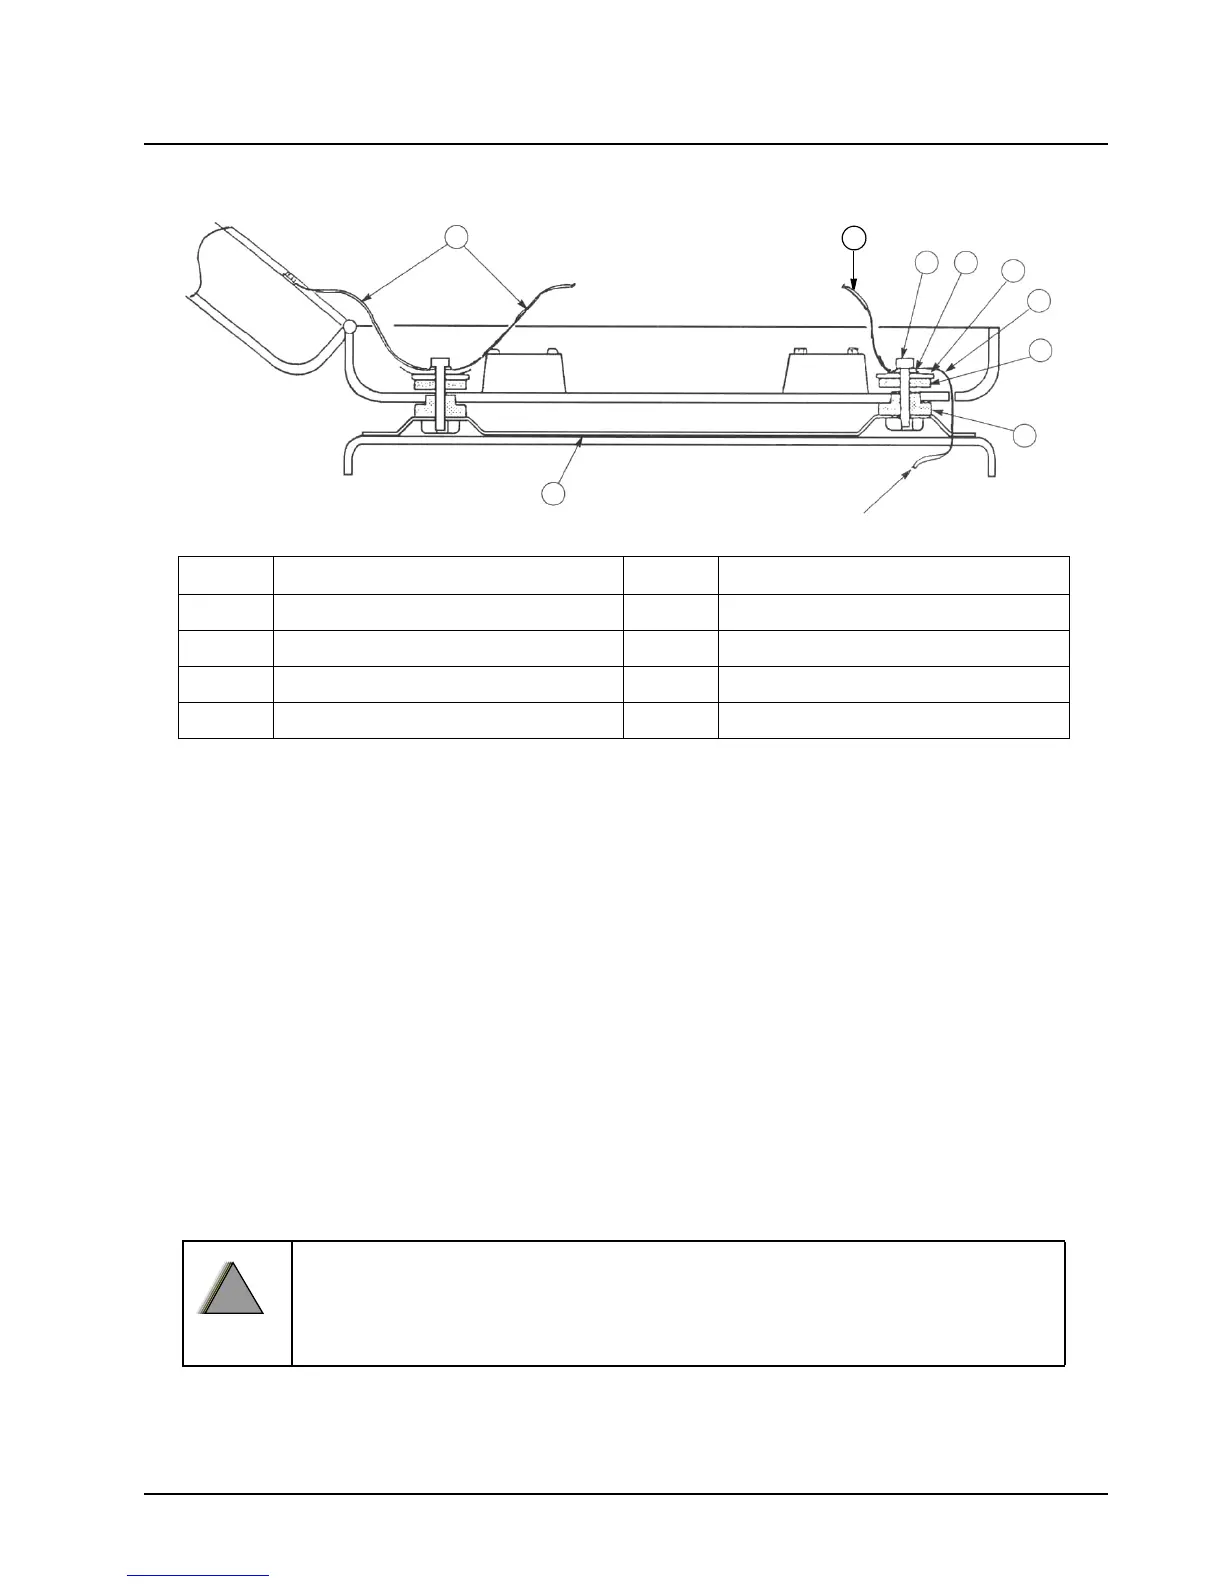
Figure 5-15. Weather-Resistant Enclosure Installation
1. Remove the radio-mounting plate by removing four screws, lock washers, and flat washers.
2. The weather-resistant enclosure is mounted to the universal mounting plate using shock
mounts. Assemble the shock-mount components exactly as shown in Figure 5-15. Be sure to
install ground straps between the shock-mount and the transceiver trunnion mount, and
install one 7-1/2-inch ground strap between the right rear mount and the enclosure lid’s
antenna ground plane 0 (shown in Figure 5-15 and in Figure 5-17).
3. The order of assembly is important to ensure proper shock mount operation. All components
are supplied with the mounting kit. The five 7- 1/2-inch straps are used on the rear and front
shock mounts – four from shock mount to trunnion, and one from the shock mount to the lid’s
antenna ground plane.
NOTE: Grounding through the power-supply cable is NOT sufficient. Whether the radio transceiver
is mounted to a carrier or the chassis itself, the transceiver MUST be properly grounded to
the motorcycle chassis. The ground strap supplied with the installation kit may have to be
used to ensure a good RF ground path from the radio transceiver to the motorcycle chassis.
4. Install the 3-foot ground strap on one of the front shock mounts. Route it through the cable-
routing hole and connect the other end to the motorcycle frame (see Figure 5-15).
DO NOT connect the ground strap directly to the negative battery post.
7
1
7
23
4
8
5
6
TO MOTORCYCLE
CHASSIS GROUND
Item No. Description Item No. Description
1 Universal Mounting Plate 5 Flat Rubber Washer
2 Machine Screw 6 Shouldered Rubber Washer
3 Lockwasher 7 7-1/2-inch Ground Strap
4 Flat Washer 8 Ground Strap
 Loading...


