6878215A01
Motorcycle Radio Installation Transceiver and Cabling Installation 5-23
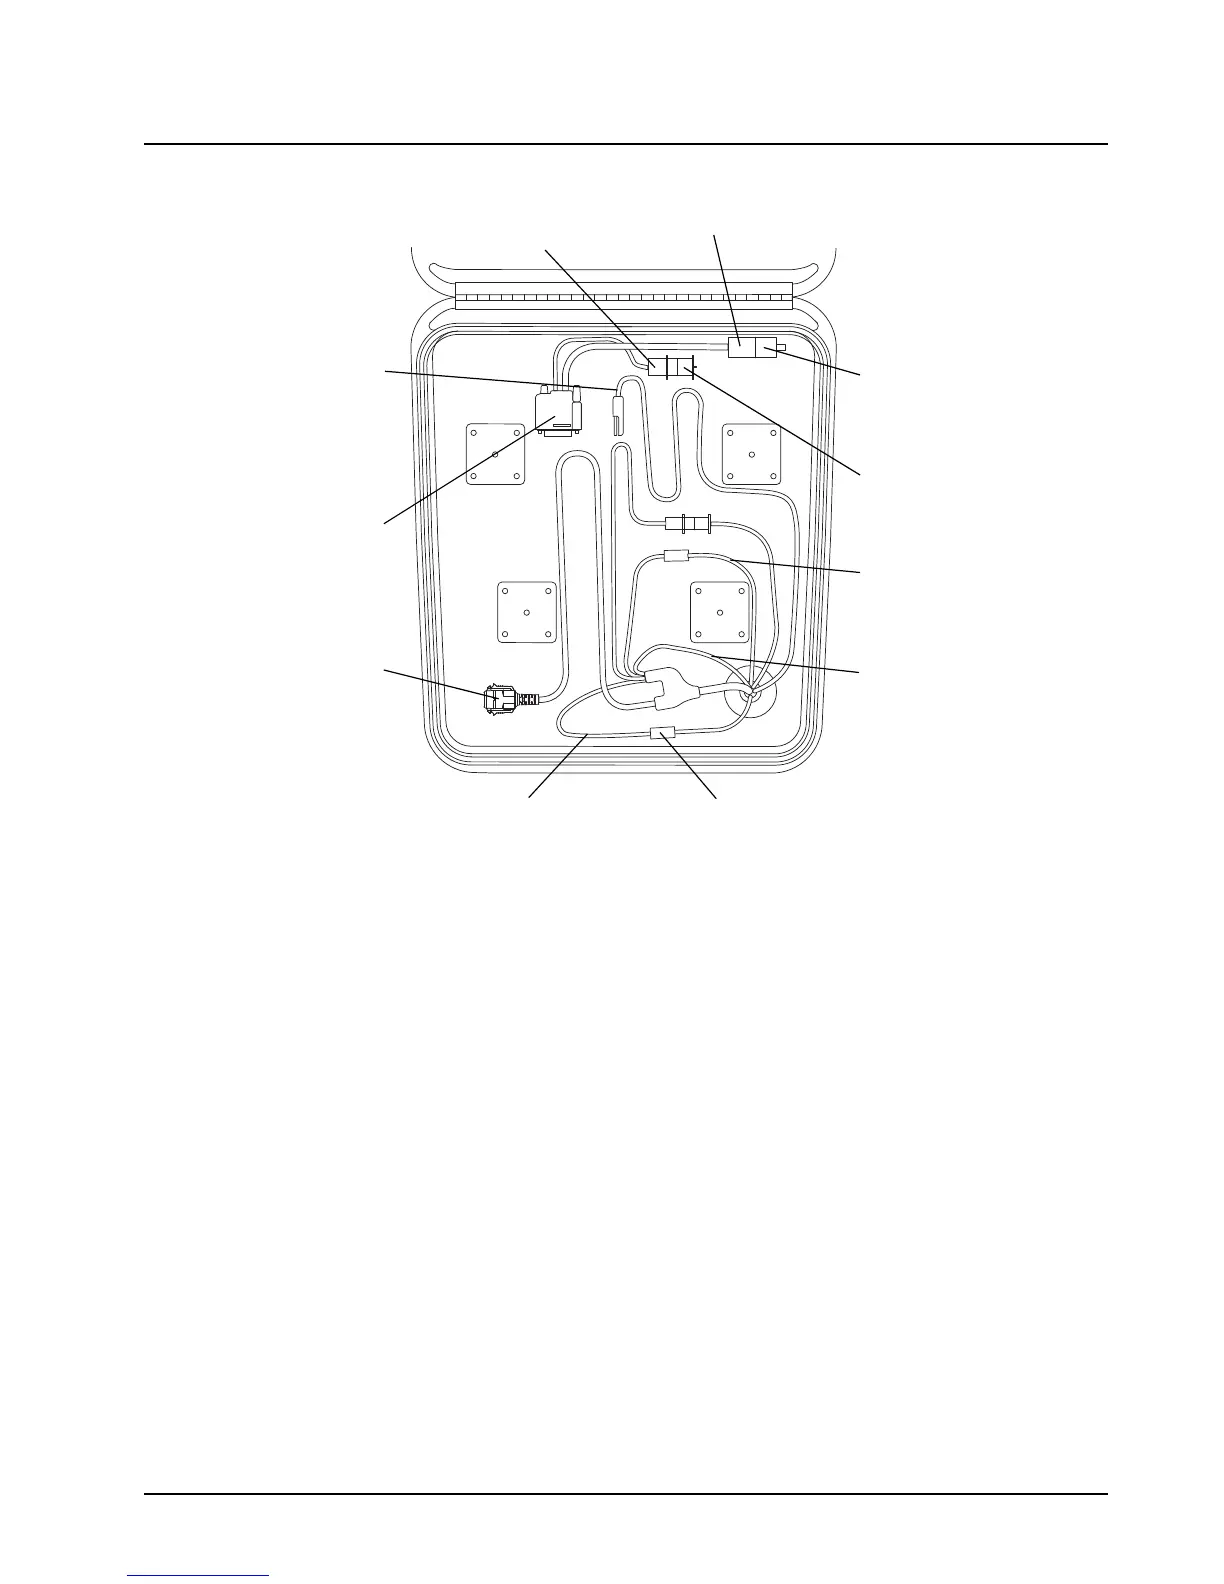
Figure 5-16. Installing Cables
5.11.2 Installing the Transceiver
Install the transceiver in the weather-resistant enclosure as follows (see Figure 5-17).
NOTE: For new or existing installations, use only the APX mobile trunnion (kit number: HLN7002_).
1. Install the mounting trunnion and loose ends of the four ground straps to the radio-mounting
plate, using four screws, flat washers, and external-tooth lock washers (see Figure 5-17). The
ground straps must be sandwiched between the flat washers and lock washers. The lock
washer must be against the trunnion. The flat washer must be under the screw head.
2. Attach the transceiver to the mounting trunnion and secure with the two screws provided.
3. Connect the control cable to the front of the transceiver. Ensure the control-cable connector
screws are tightened.
4. Attach the accessory connector to the transceiver. Plug in the power connector.
5. Install the grommet around the cables and push the grommet into the cable-routing hole of
the weather-resistant enclosure.
ACCESSORY
CABLE
TRANSCEIVER
POWER CABLE
ACCESSORY CABLE
EMERGENCY AND
EXTERNAL ALARM
CONNETOR
ACCESSORY
CABLE HEADSET
CONNECTOR
HEADSET
SPORTING PLUG
EMERGENCY
CABLE SHORTING
PLUG
IGNITION SENSE
(ACC)
CONTROL HEAD
GROUND (BLACK)
CONTROL HEAD
POWER FUSE
CONTROL CABLE
(CAN)
CONTROL HEAD
POWER (RED)
 Loading...


