Configure Routing
183
ProSAFE 10-Gigabit Smart Managed Switch XS728T and XS748T User Manual
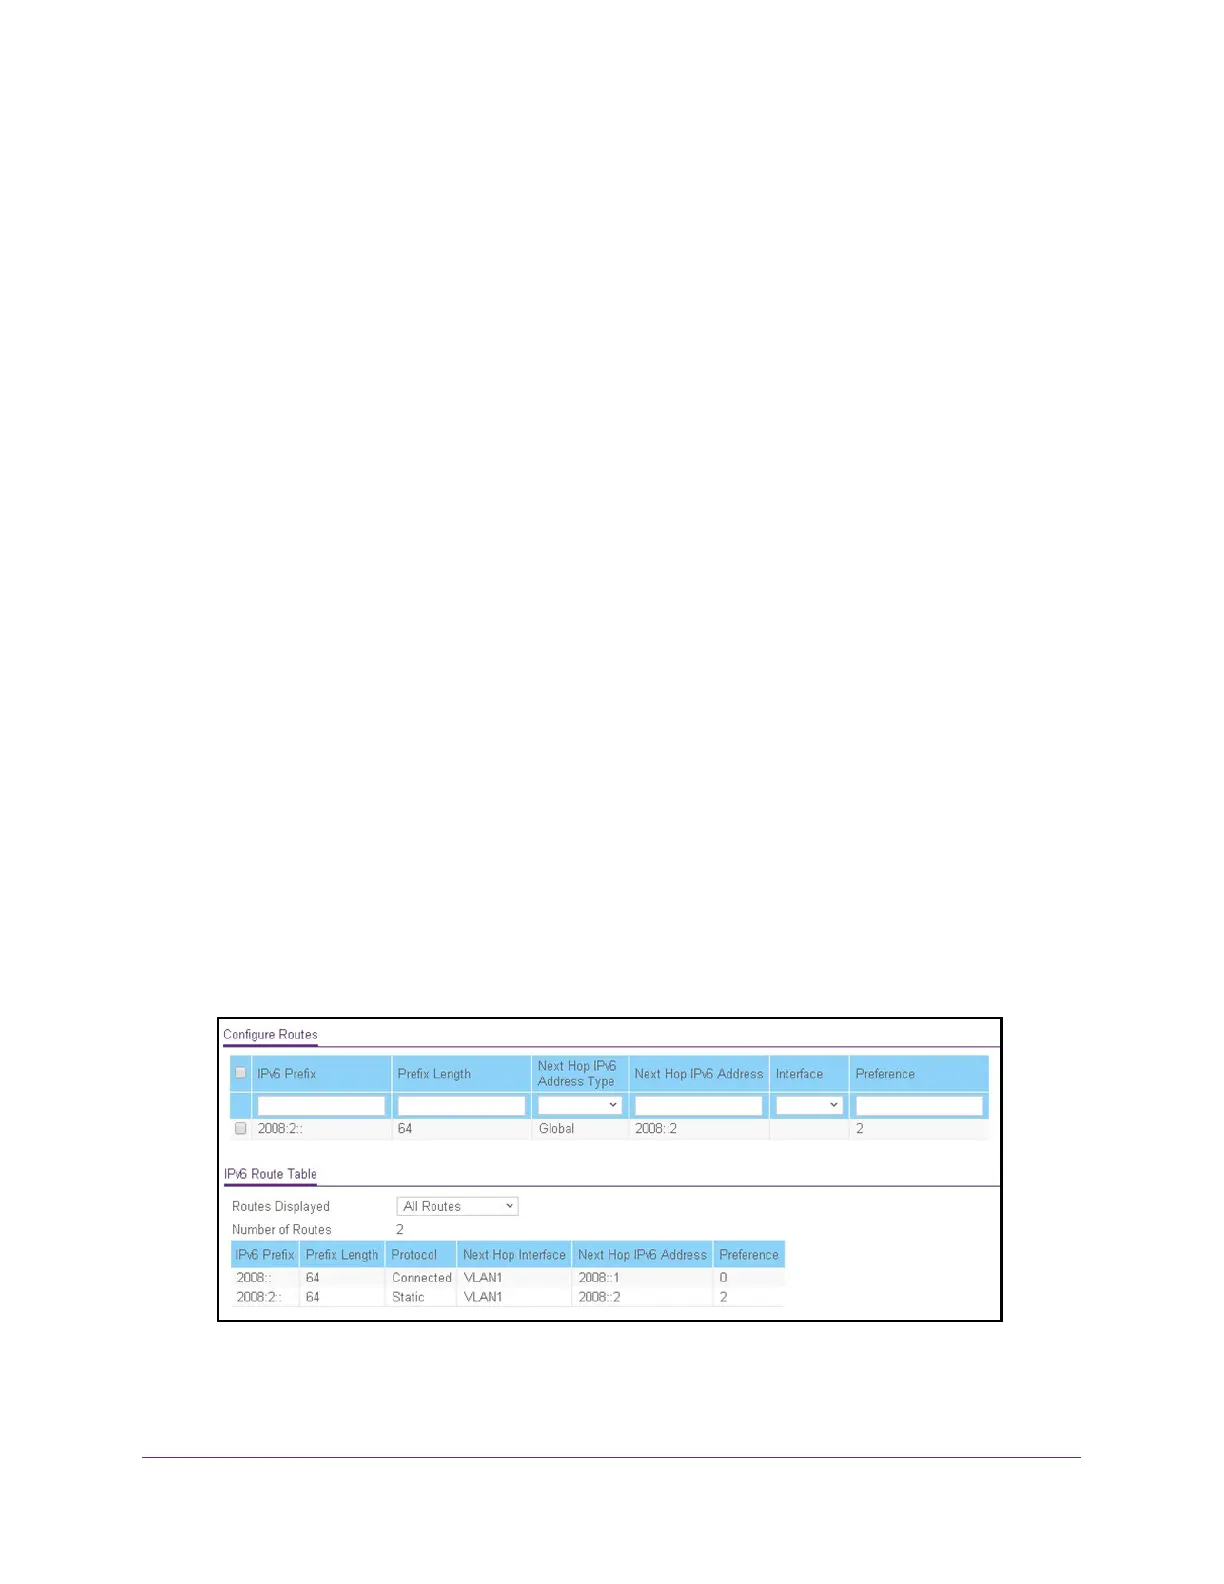
5. Select Routing> IPv6 > Basic > Route Table.
The Configure Routes page displays. The page also shows the IPv6 Route Table.
6. In the table in the Configure Routes section, select the check boxes for the static IPv6
routes.
7. Click the Delete button.
The routes are removed from the switch.
View the IPv6 Route Table
The IPv6 Route Table contains IPv6 routes that were statically added, IPv6 routes that were
discovered through the Neighbor Discovery (ND) protocol, and IPv6 routes that were derived
from manually added IPV6 addresses.
To view the IPv6 Route Table:
1. Connect your computer to the same network as the switch.
You can use a WiFi or wired connection to connect your computer to the network, or
connect directly to a switch that is off-network using an Ethernet cable.
2. Launch a web browser.
3. In the address field of your web browser, enter the IP address of the switch.
If you do not know the IP address of the switch, see Change the Default IP Address of the
Switch on page 10.
The login window opens.
4. Enter the switch’s password in the Password field.
The default password is password.
The System Information page displays.
5. Select Routing> IPv6 > Basic > Route Table.
6. To specify which type of routes to display in the IPv6 Route Table, from the Routes
Displayed menu, select one of the following options:
• All Routes. Show all active IPv6 routes.
 Loading...