SCRUB BRUSH SYSTEM
FORM NO. 56043088 / Advenger
™
/ BR 600S, 650S, 700S, 800S - 29
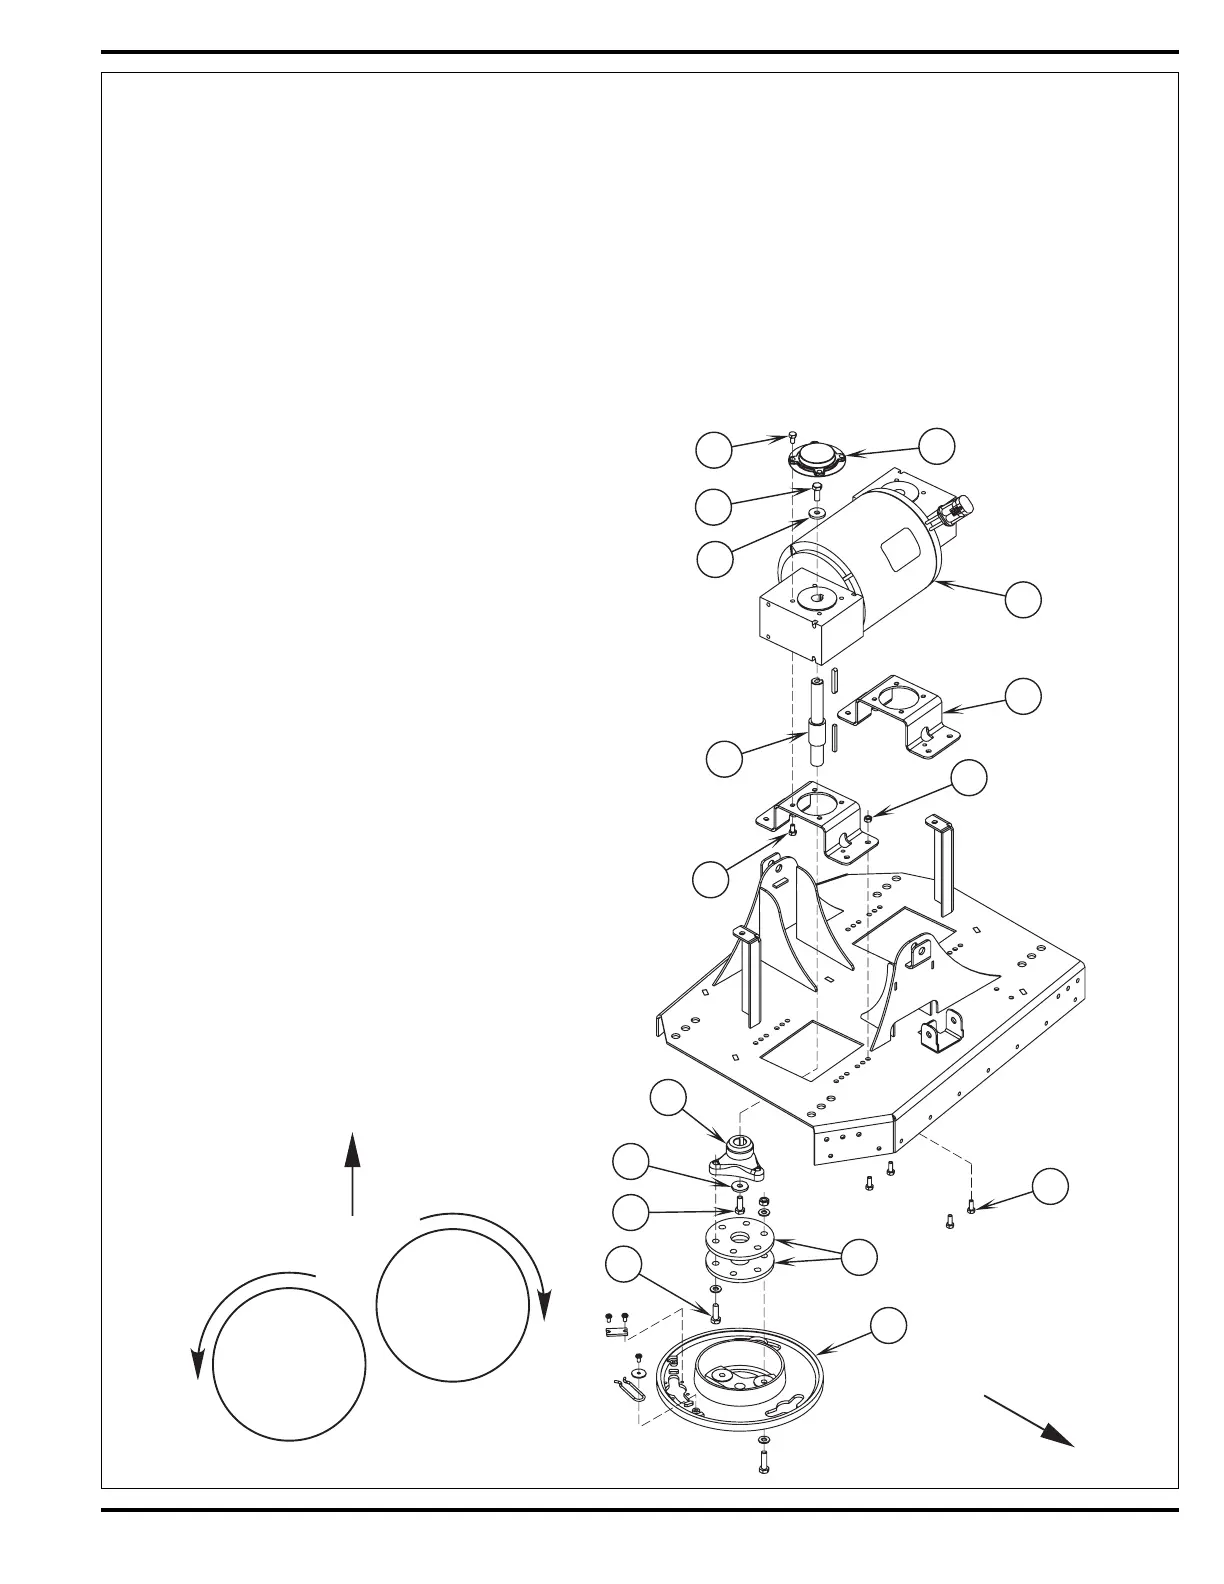
FIGURE 3
SCRUB BRUSH MOTOR ASSEMBLY REMOVAL (DISC)
Service Note: The items listed; shaft dust covers, keys, output shafts, shaft mounting hardware and gear-box mounting brackets, must be salvaged
(saved) and reused when replacing the complete motor and gear-box assembly. As shown in Figure 3.
1 Follow steps 1-7 of the Scrub Brush Deck Removal (Disc & Cylindrical) section.
2 See Figure 3. Remove the scrub brushes from the Brush Holders (F).
3 Remove the (3) Screws (G) from each thermoid disc (fl exible coupler) (H) and remove the Brush Holders (F) from both (I) Hubs. Note: Use a
13mm socket wrench to remove Screws (G).
4 Remove all (8) hardware items (J & K) that secure the gear case Mount Brackets (L) to the scrub deck plate. Then remove the complete Motor
Assembly (M) from the scrub deck by pulling it straight up.
5 Remove the (8) hex Screws (P) that secure the Mounting Brackets (L) to the gearboxes and separate.
6 Remove the (8) (Q) Screws (use a 5mm hex wrench) that hold in place the Dust Covers (R). Next remove the shaft retainer hardware items
(S & T). Then tap out the Output Shaft (U) using a brass shaft to
help prevent any possible damage.
7 Re-assemble in reverse order and test for proper operation. Note:
The proper motor installation position is where the two motor wires
face the front and left side on the scrub deck platform.
SCRUB BRUSH GEARBOX REMOVAL AND
OUTPUT SHAFT REPLACEMENT (DISC)
1 Follow steps 1-7 of the Scrub Brush Deck Removal (Disc &
Cylindrical) section and steps 2-6 of the Scrub Brush Motor Removal
(Disc) section.
2 See Figure 3. Remove the hardware items (N & O) that secure
the Hub (I) to the Output Shaft (U) then pull the hub from the shaft
and save the key. Note: Skip this step if shaft does not need to
be replaced.
3 Remove the (4) socket head cap screws (use a 5mm hex wrench)
securing the gearbox that needs replacement.
4 Re-assemble in reverse order and test for proper operation. Service
Tip: Apply a small amount of grease or “Never Seize” to the gearbox
output shafts when reinstalling the drive Hub(s) (I).
Note: The gearbox output shafts rotate the brush holders in the opposite
direction of other Nilfi sk-Advance automatic scrubbers (see below).
FRONT
Right
Left
FRONT
M
L
K
J
I
H
N
O
G
F
P
R
Q
S
T
U
 Loading...