SQUEEGEE SYSTEM
FORM NO. 56043088 / Advenger
™
/ BR 600S, 650S, 700S, 800S - 43
SQUEEGEE LIFT ACTUATOR MOTOR REMOVAL
1 Lower the squeegee tool to the fl oor and then disconnect the battery pack by pushing in the emergency disconnect lever (13). This procedure
is done to prevent the squeegee mount from automatically raising when the key is turned off.
2 Drain the recovery tank using the recovery tank drain hose.
3 Disconnect the squeegee hose from the squeegee tool and remove the tool from its mount.
4 Open the hinged recovery tank cover and grip the top inside edge of the tank then pull straight up to separate it from the solution tank/seat
platform. Then guide the tank off the rear of the machine to the fl oor. Important Service Note: Support the bottom of the tank on its left corner
to prevent crushing of the squeegee hose. Don’t pull the tank immediately away from the machine the vacuum motor wiring harness located
on the lower left front corner must be disconnected to complete the separation.
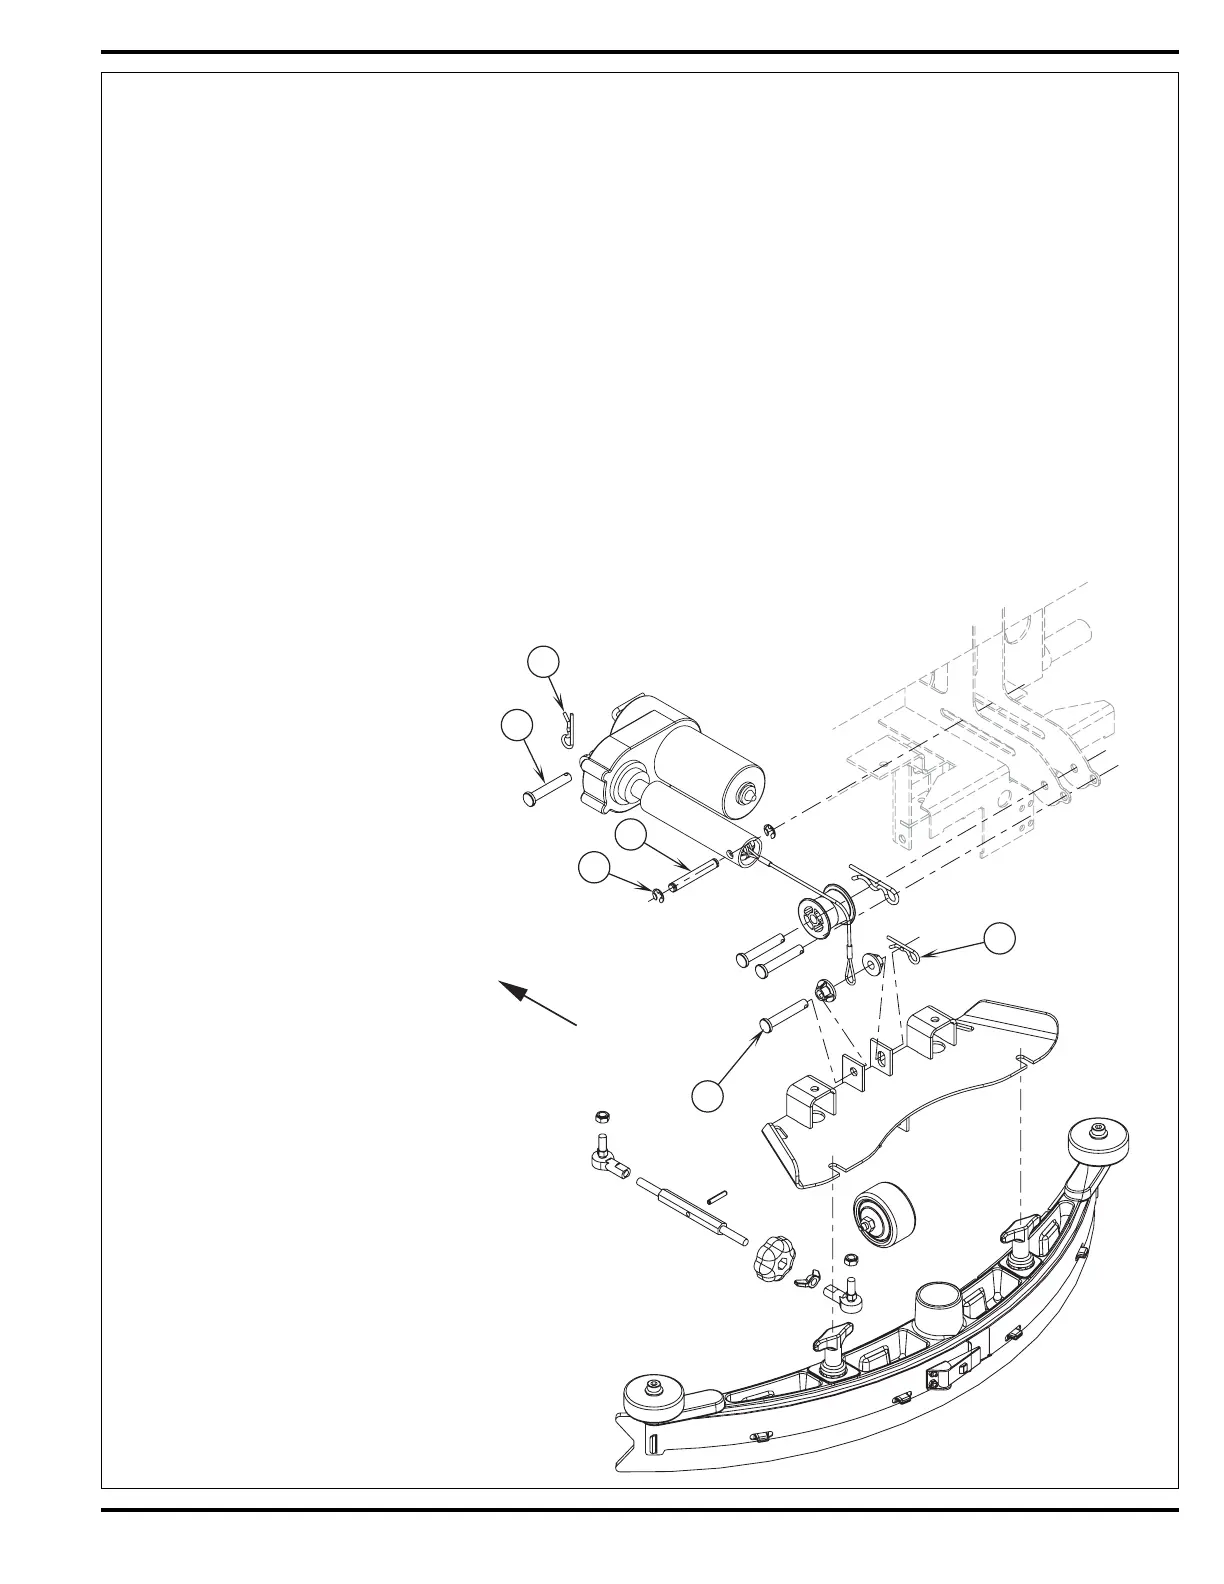
5 See Figure 2. From the back of the machine remove the Retainer Ring (A) securing the lift cable Pin (B) and separate the pin and cable from
the motor drive tube housing and chassis mounts. Note: Don’t lose the two plastic cable spacers positioned in motor drive tube.
6 Locate the wire tie that attaches the motor wiring to the chassis and then disconnect the motor harness.
7 From underneath the machine remove the Hairpin (C) securing the lift motor Pin (D) and disassemble the motor from the chassis mount. Then
pull the motor forward to remove it completely from the machine.
Note: New replacement lift actuator motors do not come with the lift nut pre-adjusted.
Important: After removing the actuator motor and before replacing a new motor or drive nut the IN & OUT limit switches must be set (or checked)
to their correct specifi cations (see the Electrical System for the Actuator Drive Nut Adjustment instructions).
8 After setting the correct actuator lift nut dimensions follow steps 1-7 in reverse order to re-install.
SQUEEGEE LIFT CABLE REPLACEMENT
1 Follow steps (1-5) in “Squeegee Lift
Actuator Motor Removal” above.
Note: The motor does not need to be
dismounted from the frame.
2 Remove the lower squeegee cable hair
pin (E) and mounting pin (F) to allow
complete removal of lift cable.
3 Reassemble in reverse order and test
for proper raise and lower functions.
FIGURE 2
D
FRONT
A
B
C
E
F
 Loading...