RECOVERY SYSTEM
FORM NO. 56043088 / Advenger
™
/ BR 600S, 650S, 700S, 800S - 41
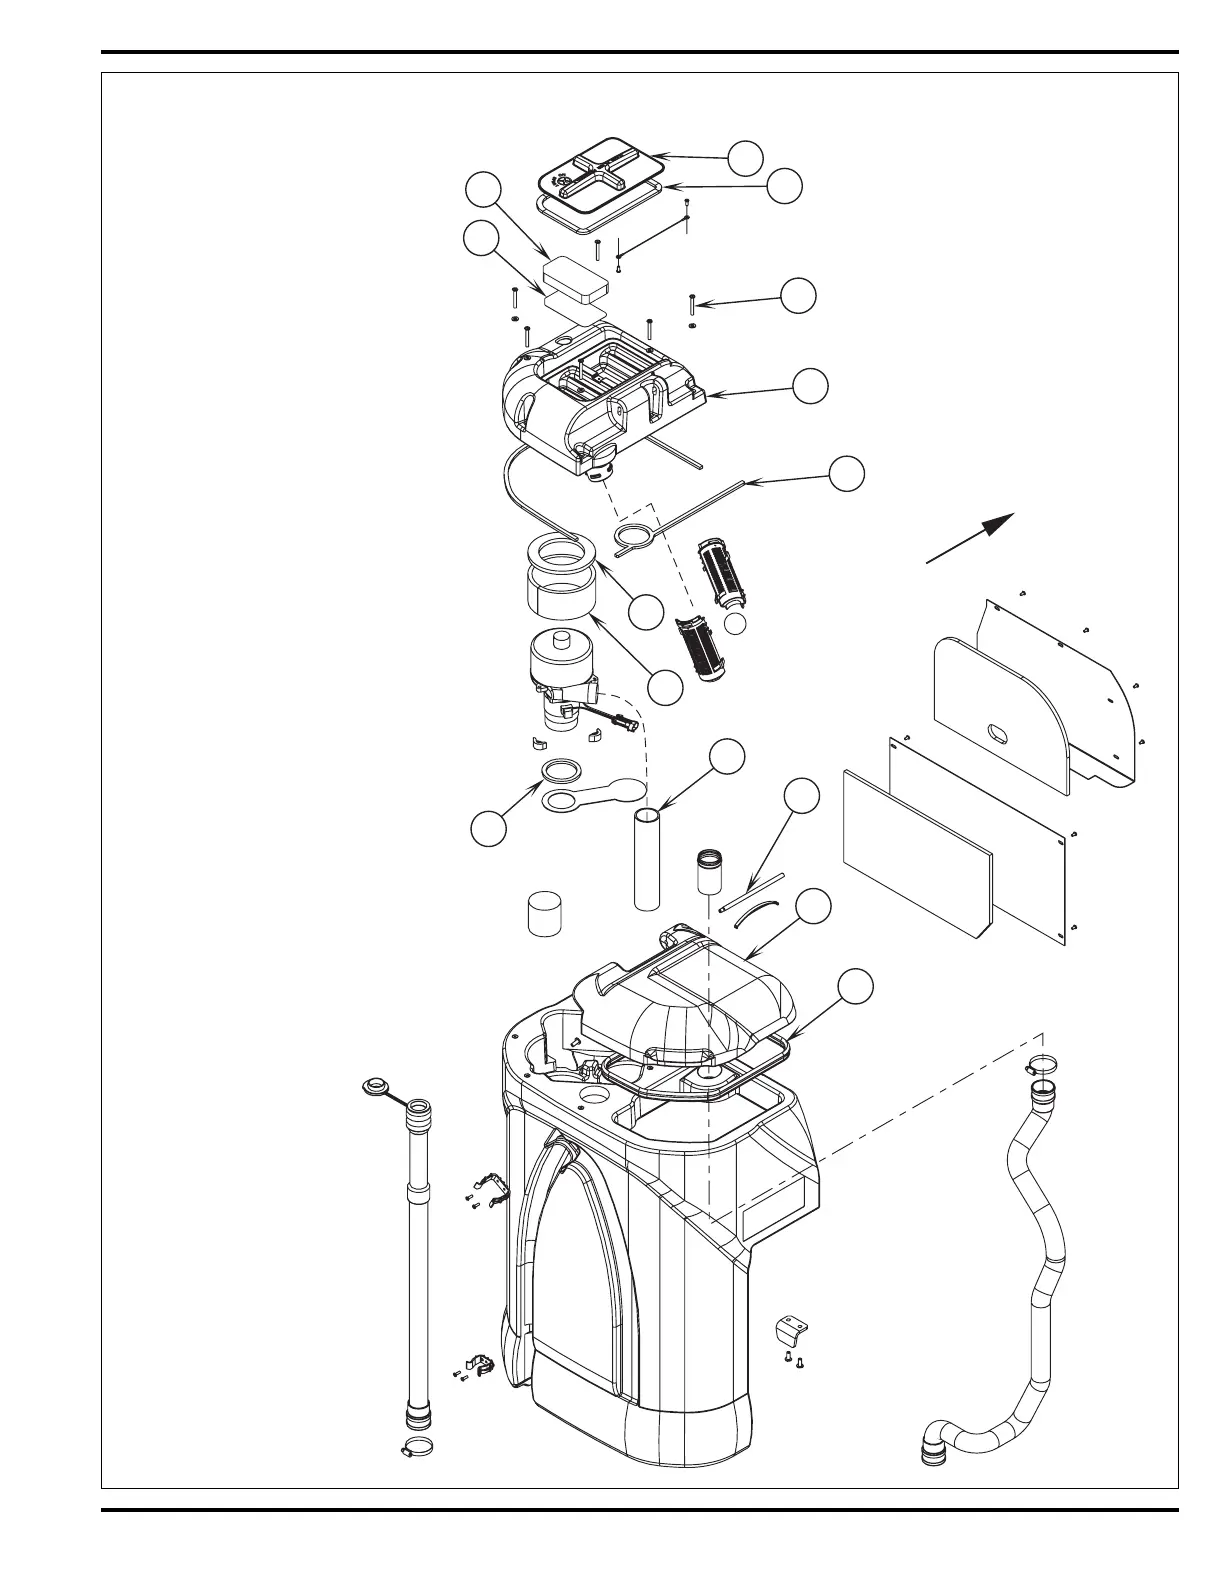
RECOVERY TANK REMOVAL
FIGURE 3
1 Drain the recovery tank using the recovery
tank drain hose.
2 Disconnect the squeegee hose from the
squeegee tool and remove the tool from
its mount.
3 See Figure 3. Open the hinged recovery
tank Cover (D) and grip the top inside edge
of the tank then pull straight up to separate it
from the solution tank/seat platform. Then
guide the tank off the rear of the machine to
the fl oor. Important Service Note: Support
the bottom of the tank on its left corner to
prevent crushing of the squeegee hose.
Don’t pull the tank immediately away from
the machine the vacuum motor wiring
harness located on the lower left front
corner must be disconnected to complete
the separation.
VACUUM MOTOR(S) REMOVAL
1 See Figure 3. Remove the vacuum duct
Cover (C) that is secured to the recovery
tank by a qty of (6) Screws (B).
2 Separate the wiring harness from each
motor and lift motor(s) out from their
mounting cavity.
3 Inspect all the vacuum/recovery system
Gaskets, (items E, F, G & H) also clean
the vacuum motor(s) Foam Filters (I, J &
K)
, Screens (L) and Exhaust Hoses (M).
4 Inspect the carbon motor brushes, if less
than 3/8” (10mm) in length replace.
* Service Note: The hinged Tank Cover (D) can
easily be separated from the vacuum Duct Cover
(C) by removing the slotted Pin (N) (by using a fl at
bladed screwdriver).
FRONT
E
B
C
I
L
F
K
J
H
M
D*
G
A
N
 Loading...