30 - FORM NO. 56043088 / Advenger
™
/ BR 600S, 650S, 700S, 800S
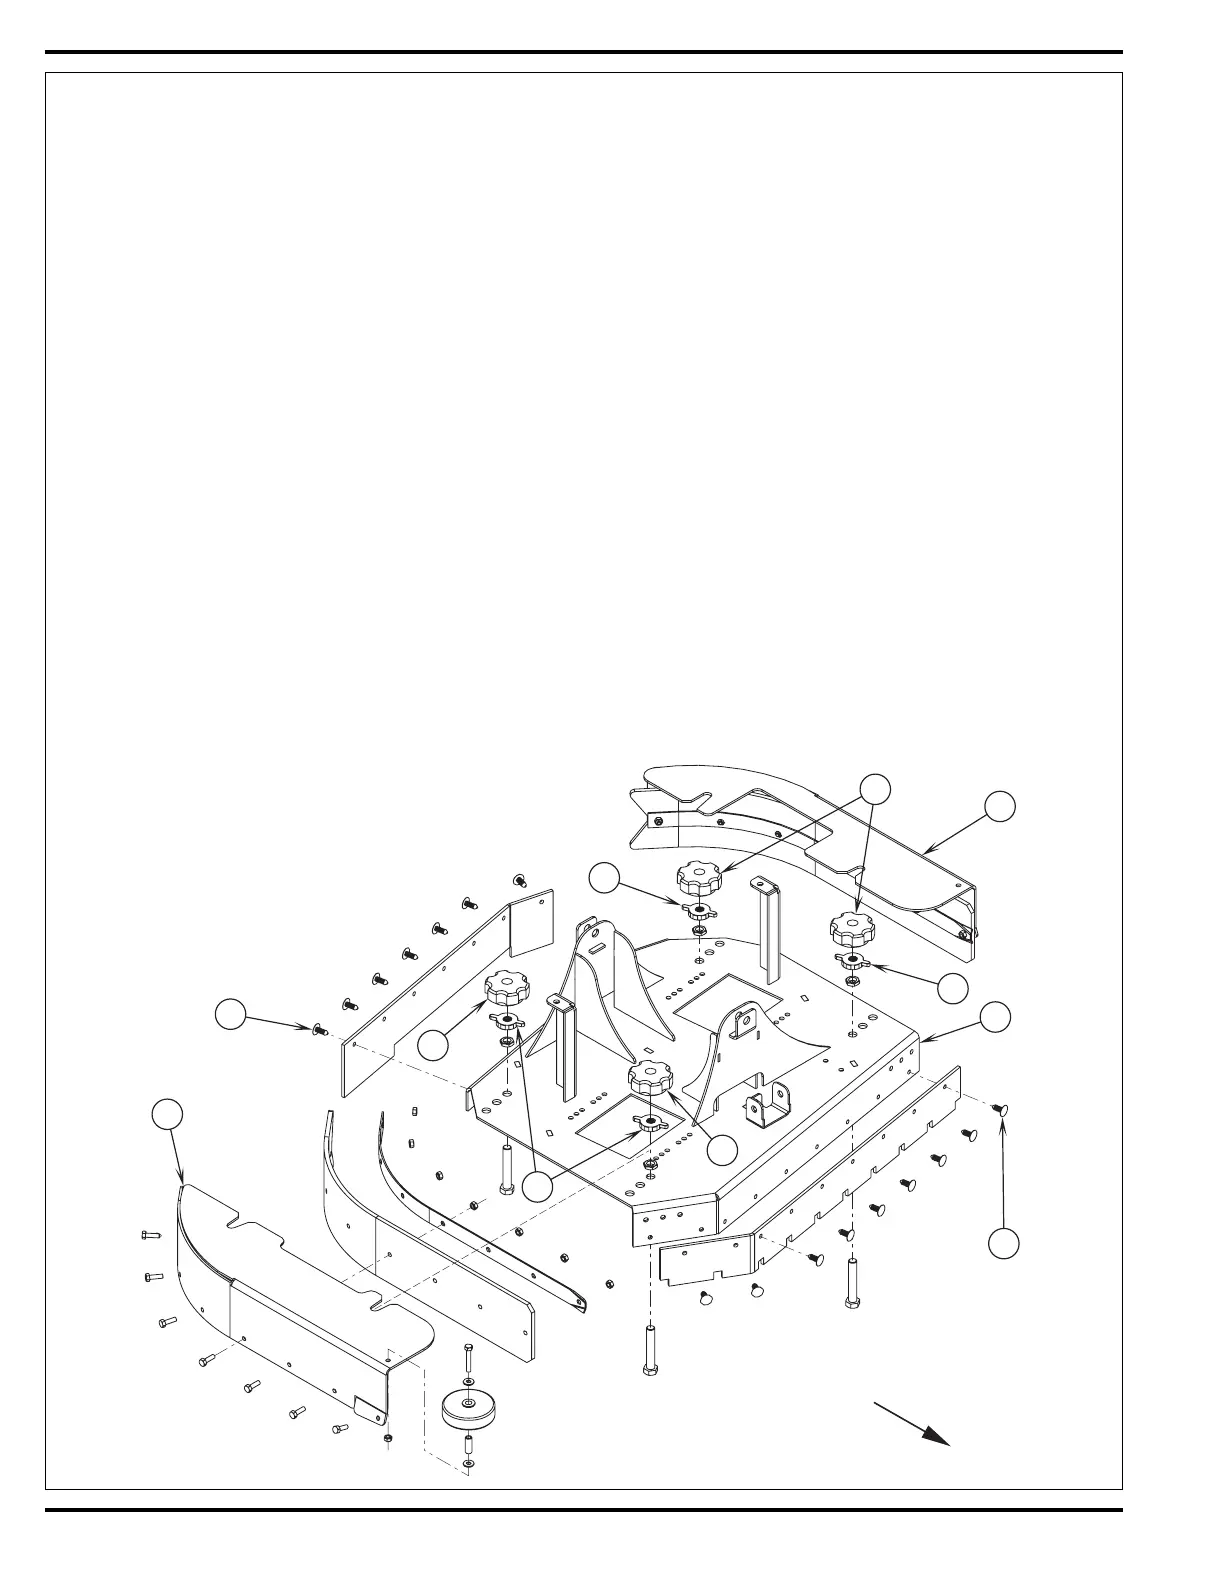
SCRUB BRUSH SYSTEM
FIGURE 4
SCRUB BRUSH SIDE SKIRT REPLACEMENT (DISC)
1 See Figure 4. Loosen the (4) side skirt Retainer Knobs (V) (2 per side) and pull the Skirt Assemblies (W) off from the scrub deck.
2 Remove all the hardware that holds the blade and retainer to the skirt housing.
3 Each of the (2) blades has 2 working edges. Reinstall the blades to the skirt housing so a clean, undamaged edge points inside towards the
scrub brushes. Replace the blades as a set if they are nicked, torn or worn beyond their ability to be adjusted.
4 Reinstall the skirt housing assemblies onto the machine and adjust the blade for proper contact to the fl oor when the brush deck is placed in
the scrub position.
SIDE SKIRT HEIGHT ADJUSTMENT (DISC)
1 See Figure 4. The side skirt housing knob retainer screw studs have leveling Adjuster Collars (X), that are to be raised or lowered to compensate
for blade wear.
2 To adjust, remove the Skirt Assemblies (W) from the Scrub Deck (Y) to access the Adjuster Collars (X). Adjustment Tip: The skirts Retainer
Knobs (V) can be loosened with skirts left on and the Adjuster Collars (X) rotated by reaching under the skirt housing.
3 Turn the Adjuster Collars (X) (Up or Down) to where the blades just fold over enough when scrubbing that all the waste water is contained inside
the skirting. Note: Make small adjustments to obtain good blade wiping. Do not lower the blades too much to where they fold over excessively
and cause unneeded blade wear.
SCRUB BRUSH DECK FRONT/REAR SKIRT REPLACEMENT (DISC)
1 Replace with new blades when they are nicked, torn or worn beyond their ability to contain brush wastewater within the skirting.
2 See Figure 4. A quantity of 16 or 18 Panel Fasteners (Z) must be removed to allow the skirt material to be replaced. Method A: The easiest
method to access the fasteners is to remove the scrub deck. Method B: Place the scrub deck in the Up position, then remove both the left and
right side skirt assemblies from the machine.
3 Cut the panel fastener heads off using a chisel or pry the heads out from the deck mounting holes using a large screwdriver or thin piece of
metal. Note: The panel fasteners are not designed to be reused.
4 Install the new skirts with new panel fasteners tap them into the mounting holes with a soft-faced hammer.
FRONT
W
Z
W
Z
Y
X
V
X
X
V
V
 Loading...